Introduction
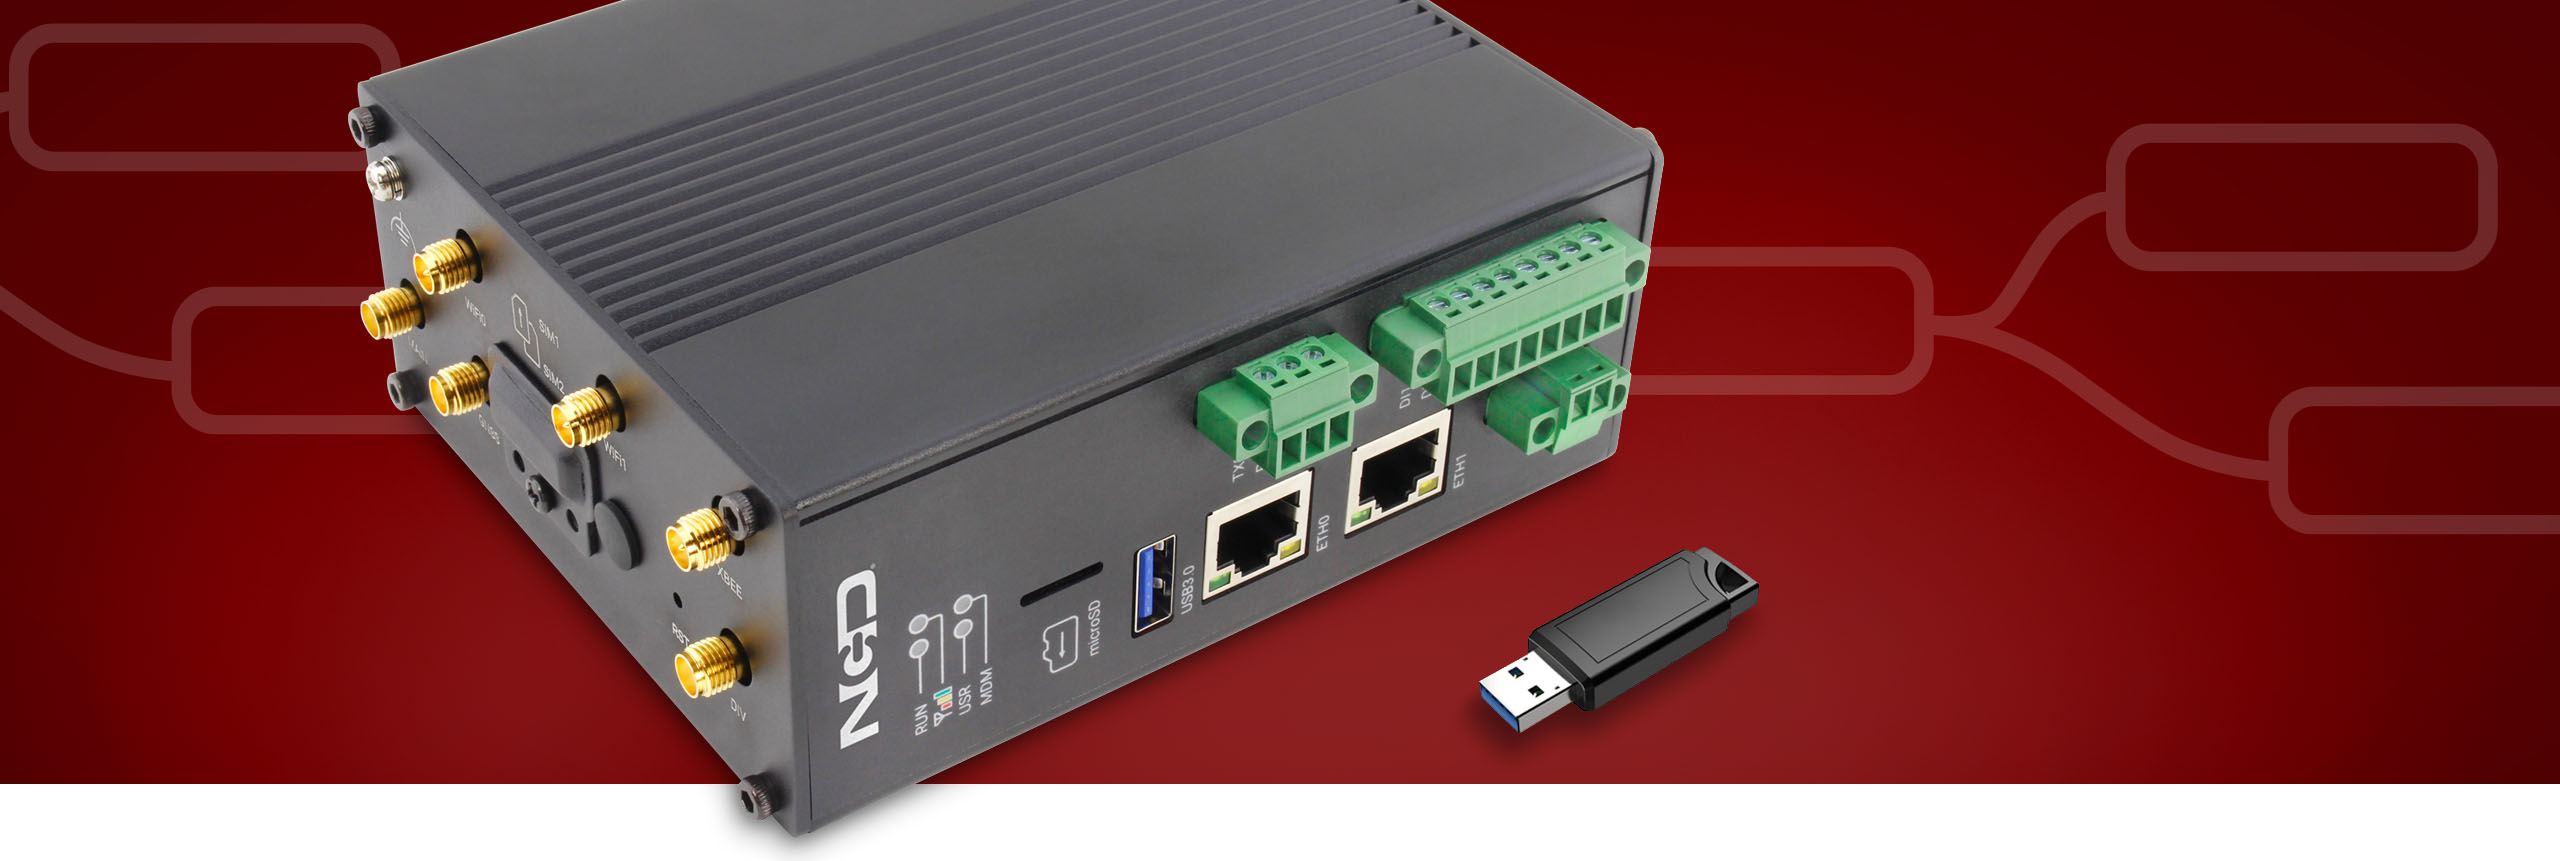
In this article, we will provide a step-by-step guide on how to set up MQTT nodes to send NCD sensor data to an MQTT broker using Node-RED. Node-RED is pre-installed and ready to use on the Enterprise IIoT Gateway and Enterprise IIoT Gateway Lite.
You will learn about the key properties that need to be configured in the MQTT nodes to establish communication with MQTT brokers. This foundational knowledge will enhance your understanding of the MQTT protocol and will serve as a basis for connecting and transmitting NCD sensor data over MQTT to various local and cloud brokers or services, such as AWS IoT Core, Mosquitto Broker, and Microsoft Azure IoT Hub, among others.
AWS IoT Core
AWS IoT offers the cloud services that link your Industrial IoT NCD Sensors to other devices and AWS cloud solutions. AWS IoT supplies device software that can assist you in integrating your Industrial IoT NCD Sensors into AWS IoT-based solutions. If your Industrial IoT NCD Sensors can connect to AWS IoT, AWS IoT can link them to the cloud services that AWS offers.
AWS IoT enables you to choose the most suitable and current technologies for your solution. To assist you in managing and supporting your IIoT NCD Sensors in the field, AWS IoT Core supports the following protocols:
- MQTT (Message Queuing and Telemetry Transport)
- MQTT over WSS (WebSockets Secure)
- HTTPS (Hypertext Transfer Protocol – Secure)
- LoRaWAN (Long Range Wide Area Network)
The AWS IoT Core message broker accommodates devices and clients that utilize MQTT and MQTT over WSS protocols to publish and subscribe to messages. It also supports devices and clients that employ the HTTPS protocol to publish messages.
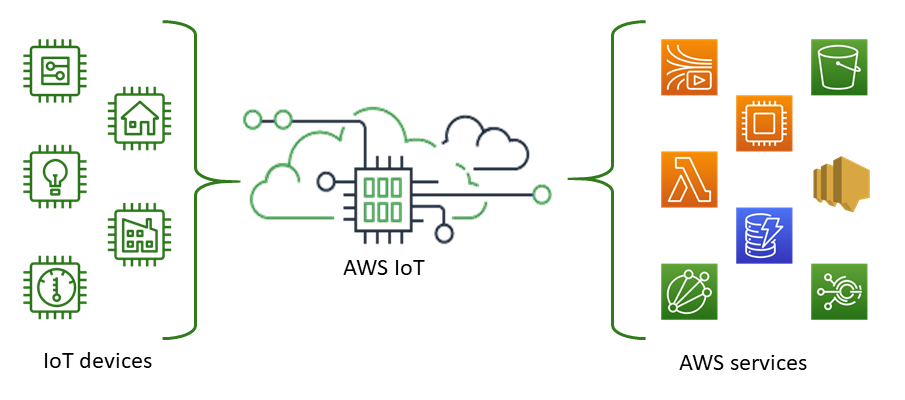
AWS IoT provides some interfaces for AWS IoT tutorials, but in this article we will utilize the AWS IoT console, which offers a graphical user interface (GUI) that allows you to configure and manage the thing objects, certificates, rules, jobs, policies, and other components of your IoT solutions.
MQTT
MQTT (Message Queuing Telemetry Transport) is a lightweight messaging protocol for the Internet of Things (IoT), designed to connect remote devices using minimal code and bandwidth. It’s widely used in various industries like automotive, manufacturing, and telecommunications.
This protocol allows sensors to send telemetry data as messages through an MQTT broker. Messages are organized by topics (e.g., /NCD/Sensor_1/temperature), and clients can subscribe to these topics using specific filters, including wildcards.
The protocol includes two main entities: the broker and the clients. The broker is a server that receives messages from clients and sends them to the correct destinations. Clients can be any device, from IIoT Sensors to servers, that connects to the broker.

Information is organized into topics. When a publisher has new data, it sends this data to the broker, which then shares it with any subscribed clients. Publishers don’t need to know about the subscribers, and subscribers don’t need details about the publishers, making the system efficient and flexible.
Essential concepts in MQTT include the following:
- Topics: Topics are hierarchical strings that messages are linked to. Clients can publish messages to specific topics and subscribe to topics to receive messages. For instance, a weather station might publish temperature data to a topic like “ncd/current_sensor/channel_1”, “ncd/current_sensor/channel_2″.
- Quality of Service (QoS): MQTT provides various levels of message delivery assurance through its QoS levels. QoS 0 (at most once), QoS 1 (at least once), and QoS 2 (exactly once).
- Retained Messages: A retained message is a message that the broker stores and delivers to new subscribers immediately upon subscription. This is beneficial for providing the latest information to new clients that connect.
- Last Will and Testament (LWT): Clients can specify a “last will” message that the broker will send to a designated topic if the client unexpectedly disconnects. This can notify others when a device goes offline suddenly.
- Session Persistence: MQTT supports both clean sessions and persistent sessions. In a persistent session, the broker remembers the state of subscriptions and queued messages for a client even if it disconnects and reconnects later.
Overview
In this article, we will demonstrate how to send data from NCD sensors to AWS IoT Core using MQTT, facilitated by Node-RED running on the Enterprise IIoT Gateway. We will utilize the AWS IoT message broker, a fully managed MQTT broker service provided by AWS, which simplifies the process of connecting IoT devices to the cloud. Before starting, ensure you choose the appropriate. This guide will walk you through the necessary steps to set up your Node-RED environment, configure the MQTT connections, and successfully transmit sensor data to AWS IoT Core.
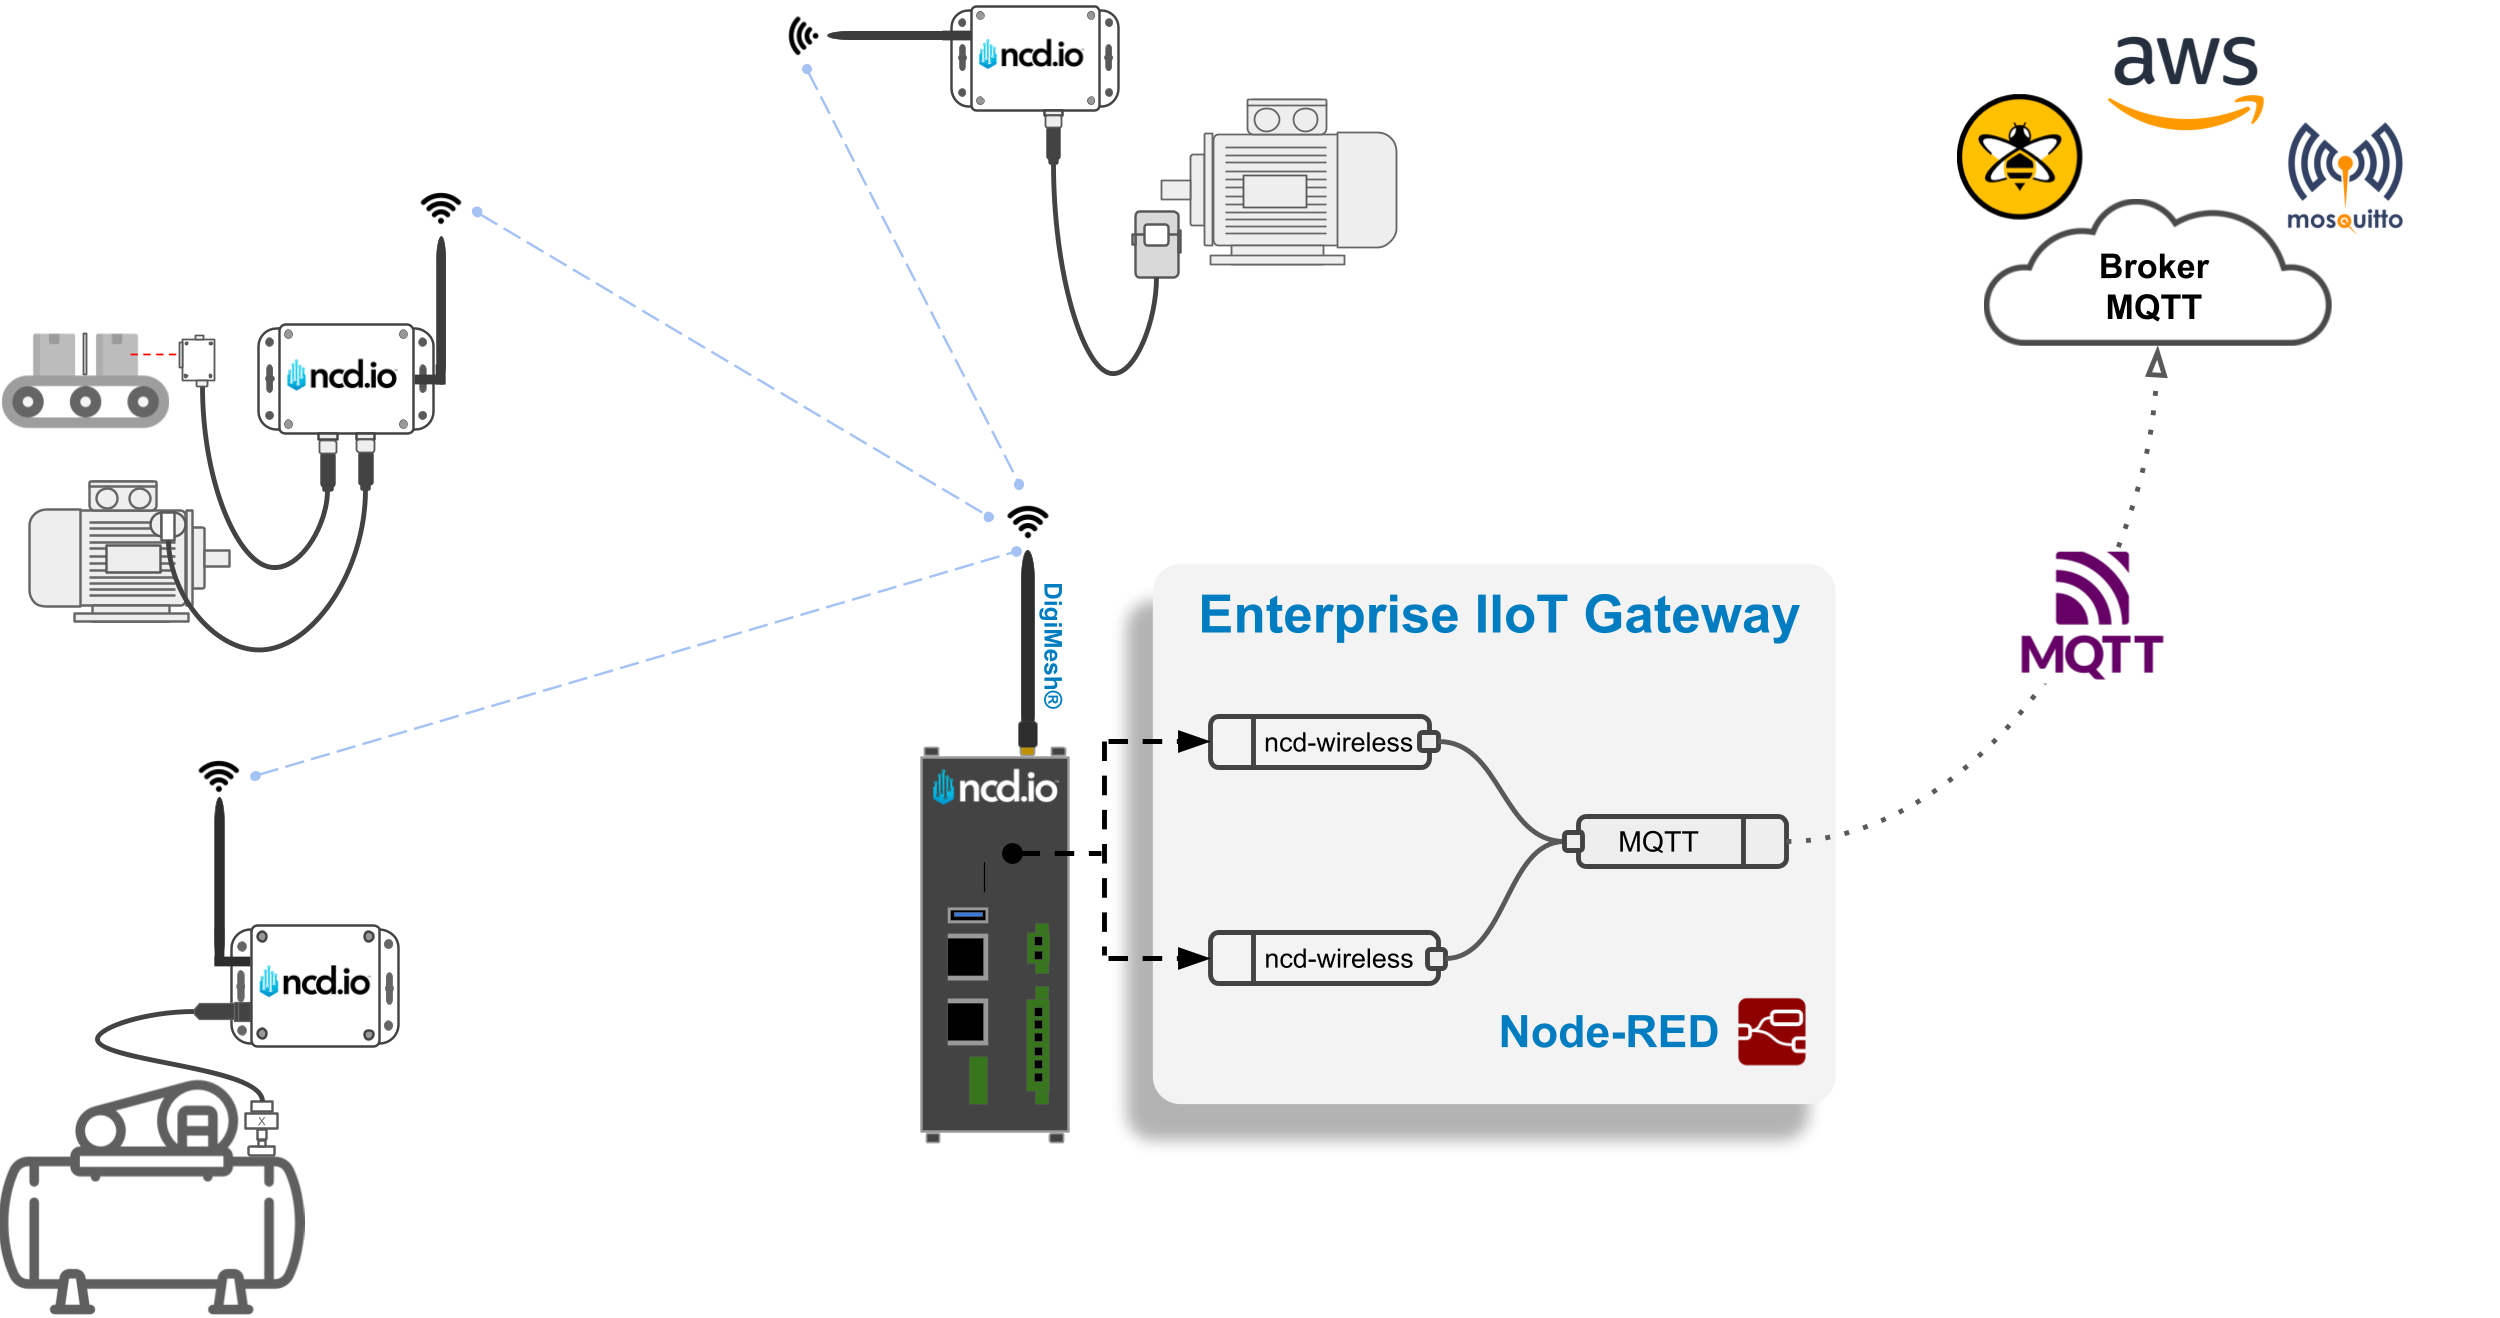
Requirements
- NCD Enterprise Sensors.
- Enterprise IIoT Gateway / Enterprise IIoT Gateway Lite.
- Node-RED Installed.
- NCD Library Installed.
(The Enterprise IIoT Gateway and Gateway Lite comes with Node-RED and the NCD Library preinstalled and run as a service).
- SSH Access to Enterprise IIoT Gateway (Optional, for testing)
- AWS IoT Core account.
To configure and acquire data from NCD sensors, an Enterprise IIoT Gateway or Enterprise IIoT Gateway Lite is required. You can find links to these products in the following buttons.
NCD Enterprise IIoT Gateway
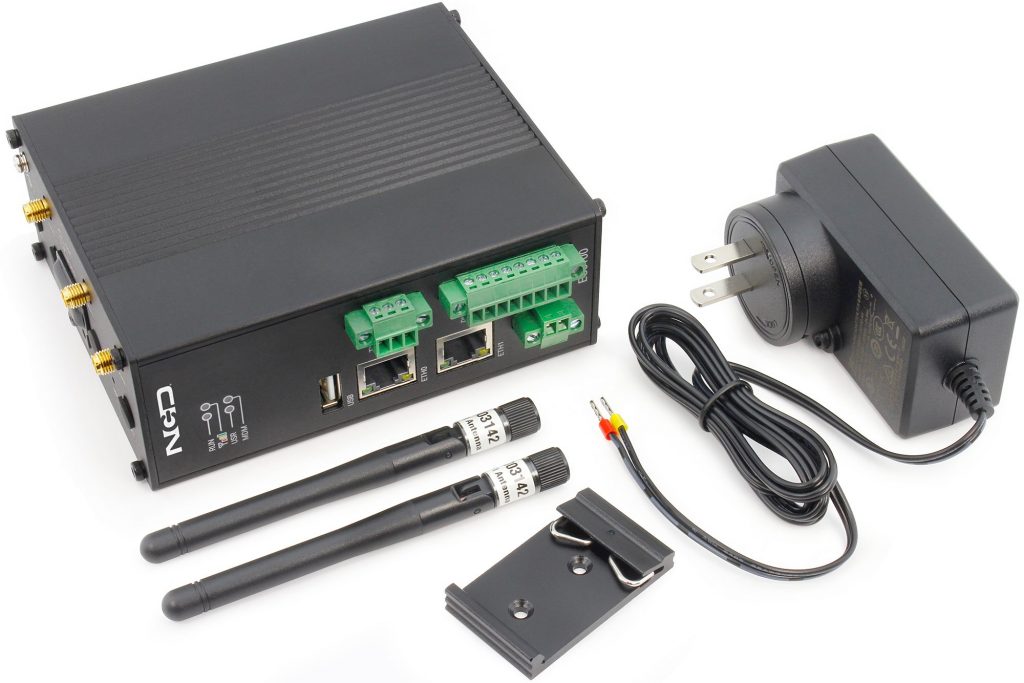
If you are still unsure whether your application requires a Gateway or a Modem, you can find a comprehensive guide on the differences between these two devices below:
Gateway Setup and SSH
To set up and connect the NCD sensor with the Enterprise IIoT Gateway and access the Node-RED interface, please refer to the following article:
In order to access via SSH, please refer to the following article:
Node-RED
Node-RED, is a visual programming tool, It provides a browser-based editor that allows creating applications by wiring predefined black box functions (nodes) . Despite its technical nature, Node-RED offers a user-friendly interface. Node-RED is an open-source project under the OpenJS Foundation. This means it’s free to use, without any monthly subscription fees. You can install and run Node-RED locally on your PC, or, in the case of our Enterprise IIoT Gateway, it comes pre-installed and runs as a service.
NCD Library
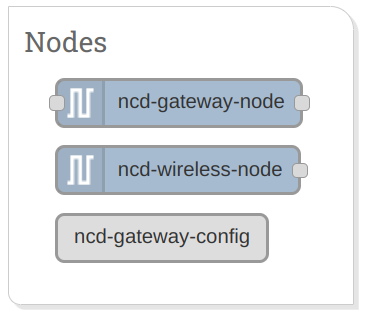
This library facilitates both communication with and configuration of the NCD Wireless Sensor Line. It includes “Wireless Gateway,” “Wireless Device,” and “ncd-gateway-config” nodes. The “Wireless Device” node is specifically designed to configure sensor parameters in an intuitive and graphical way.
NCD First Flow
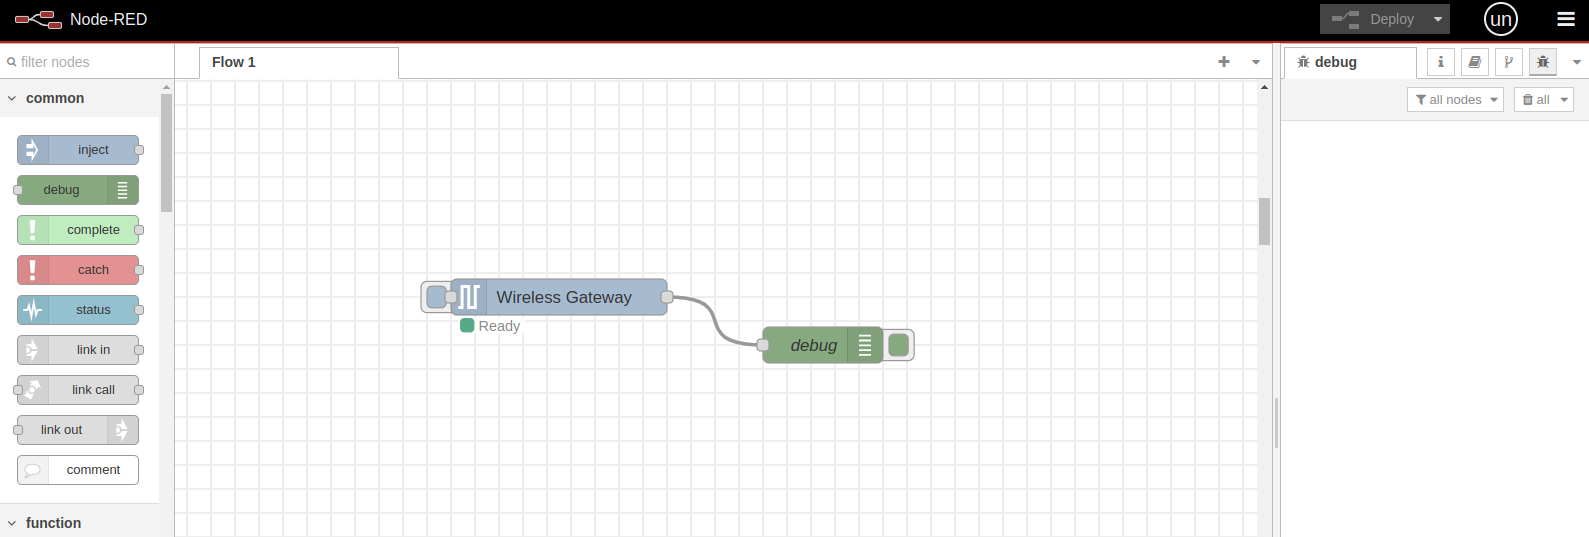
When you accessing Node-RED in the Enterprise IIoT Gateway, the first thing you will see is a basic flow containing two nodes: the “Wireless Gateway” node and the “Debug” node.
This is a preconfigured flow, meaning it is ready to receive data from the NCD sensors. When a new NCD sensor connects to the wireless network and sends data, the “Wireless Gateway” node automatically receives and processes the message. It then sends the message through its output terminal, and the message flows through the connection cable to the “Debug” node. This node receives the message and displays it in JSON format inside the “Debug” window on the right side of the Node-RED editor.
MQTT Nodes
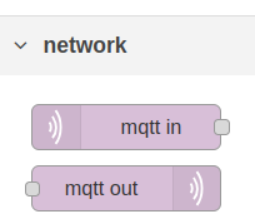
When you open the Node-RED editor, you’ll see the MQTT nodes already installed as they are part of Node-RED core nodes. You can see two different MQTT nodes; the MQTT-in node and the MQTT-out node.
- The MQTT-in node: allows you to connect to an MQTT broker and subscribe to a specific topic of interest, enabling you to receive data into Node-RED. Is used to subscribe to a topic pattern on a given MQTT broker. This means messages published to a topic that matches the pattern will be delivered to the flow by this node.
- The MQTT-out node: on the other hand, enables you to connect to an MQTT broker and publish sensor data to a specific topic. You can create a flow to gather NCD sensor data and then transmit it over MQTT. Is used to publish messages to a topic from the flow.
MQTT-out Properties and Configuration nodes
The primary function of the MQTT-out node is to publish messages to specific topics on an MQTT broker. This allows for real-time data transmission from sensors to centralized systems, dashboards, or other cloud services like AWS IoT Core. In an Industrial IIoT context, the MQTT Out node can be used to send data from sensors monitoring variables such as temperature, pressure, or humidity, enabling remote monitoring and control of industrial processes.
Below are the details for each property of the MQTT-out node. It’s important to note that some properties are optional and may depend on the MQTT version or the configuration set in the MQTT broker or cloud service. This flexibility allows for various configurations and the addition of multiple layers of security in an industrial environment. I recommend consulting with your IT department to manage security layers while using this protocol.
Server: This specifies the MQTT broker to which the MQTT Out node will connect. You can select a previously configured MQTT broker or set up a new connection. This is essential for sending messages to the appropriate destination.
Topic: This is the MQTT topic under which the message will be published. It acts as the channel through which clients can subscribe to receive messages. The topic can include wildcards for more complex subscriptions.
QoS: This setting defines the level of delivery assurance for the messages sent by the MQTT Out node. The options are:
0: At most once (fire and forget).
1: At least once (guaranteed delivery but may result in duplicates).
2: Exactly once (guaranteed delivery without duplicates).
Retain: This option determines whether the message sent by the MQTT Out node should be retained by the broker. If enabled, the broker will keep the last message sent on the specified topic and deliver it to any new subscribers that connect later.
Name: This is an optional label for the MQTT Out node, allowing you to give it a descriptive name for easier identification within your flow. It helps in organizing and managing nodes, especially in complex flows.
(MQTT v5 Options)
Response Topic: This is the topic to which the sender expects a response. It allows the sender to specify a dedicated topic for replies, facilitating asynchronous communication where responses can be sent back to the requester.
Correlation Data: This is an optional binary data field that can be used to correlate a request with its response. It can be any data type and is useful for identifying which response corresponds to which request, especially in systems with multiple outstanding requests.
Content Type: This field indicates the media type of the message payload (e.g., application/json, text/plain). It helps the receiving client understand how to interpret the payload, making it easier to process the message correctly.
User Properties: This allows you to include custom key-value pairs with the message. User properties can be used to add metadata or additional context about the message, enabling more flexible and detailed message handling.
Message Expiry Interval: This property specifies the time interval (in seconds) after which the message will expire if it hasn’t been delivered. It helps prevent old messages from lingering in the system and ensures that only timely and relevant messages are processed.
MQTT Broker - Configuration node
This node represents an MQTT broker connection. It configures the connection details to an MQTT broker, such as the broker’s address, port, and credentials. Once configured, other MQTT nodes in the flow can reference this broker configuration. When you drag an mqtt-in or mqtt-out node onto the workspace, you need to configure the MQTT broker node (this is a configuration node).
Below are all the available properties for the ‘mqtt-broker’ configuration node, along with their descriptions.

Connection Tab
Name: You can assign an ID to this node, in order to identify it into your workspace.
Server: This is the address of the MQTT broker you want to connect to. It can be an IP address or a domain name. If you’re using a local broker, you might use localhost or 127.0.0.1.
Port: The port number used to connect to the MQTT broker. The default MQTT port is 1883 for unencrypted connections, and 8883 is commonly used for TLS/SSL connections.
Connect automatically: This option determines whether Node-RED should automatically attempt to connect to the MQTT broker when the flow starts. If enabled, Node-RED will establish a connection as soon as it is deployed.
Use TLS: This setting specifies whether to use Transport Layer Security (TLS) for secure communication with the MQTT broker. If enabled, you can configure additional TLS settings to establish a secure connection.
Protocol: This property allows you to specify the version of the MQTT protocol to use. Common versions include MQTT 3.1.1 and MQTT 5.0. Selecting the appropriate version ensures compatibility with the broker.
Client ID: This is a unique identifier for the MQTT client connecting to the broker. If not specified, the broker generates a random client ID. It’s important that each client connected to the broker has a unique ID to avoid conflicts.
Keep Alive: This value defines the maximum time interval (in seconds) between messages sent or received. If the client does not send any messages during this time, it will send a heartbeat message to the broker. This helps maintain the connection and allows the broker to detect inactive clients.
Session: When this option is enabled, the broker will not store any subscription or message information for the client once it disconnects. If disabled, the broker retains this information, allowing the client to resume its previous state upon reconnection.
TLS - Configuration
Use Key and Certificates from Local Files: This option enables the use of local files for the TLS configuration. When selected, the node will utilize the specified certificate and private key files for establishing a secure connection to the MQTT broker.
Certificate: This field specifies the path to the local file containing the client certificate. The certificate is used to authenticate the client to the MQTT broker, ensuring that only authorized clients can establish a secure connection.
Private Key: This field specifies the path to the local file that contains the client’s private key. The private key is used in conjunction with the client certificate to establish a secure connection. It should be kept secure and not shared.
Passphrase: This is the passphrase used to decrypt the private key, if applicable. If your private key file is encrypted, you will need to provide the correct passphrase for the TLS configuration to work properly.
CA Certificate: This field specifies the path to the Certificate Authority (CA) certificate file. The CA certificate is used to verify the authenticity of the broker’s certificate, ensuring that you are connecting to a trusted broker.
Verify Server Certificate: This option determines whether to verify the server certificate presented by the broker. When enabled, the node will check the broker’s certificate against the CA certificate to ensure it is valid and trusted.
Server Name: This is the hostname of the server to which the client is connecting. It is used for hostname verification during the TLS handshake, helping to prevent man-in-the-middle attacks by ensuring the server’s identity matches its certificate.
ALPN Protocol: Application-Layer Protocol Negotiation (ALPN) allows the client and server to negotiate the protocol to use over the TLS connection. This field specifies the protocol(s) the client supports, facilitating the selection of the appropriate protocol during the handshake.
Name: This is an optional label for the TLS Config node, allowing you to give it a descriptive name for easier identification within your Node-RED flows. It helps in organizing and managing nodes, especially in complex configurations.
Security
Username: This is the username required to authenticate with the MQTT broker. It is typically set by the broker administrator and is used to identify the client. If the broker requires authentication, you must provide a valid username to establish a connection.
Password: This is the password associated with the username for authenticating with the MQTT broker. Like the username, it is set by the broker administrator and must be kept secure. Providing the correct password along with the username is necessary for successful authentication.
Messages
Message sent on connection (birth message): This is a message that will be published on the configured topic whenever the connection is established.
- Topic: This is the MQTT topic where the birth message will be published. It typically signifies the presence of a client in the network.
- Payload: This is the content of the birth message. It can be any data type (e.g., string, JSON) that conveys information about the client, such as its status or configuration.
- Retain: This setting determines whether the birth message should be retained by the broker. If enabled, the broker stores the last birth message sent on the specified topic and delivers it to any new subscribers immediately upon subscription.
- QoS: Quality of Service level for the birth message. It defines the guarantee of message delivery:
0: At most once (fire and forget).
1: At least once (guaranteed delivery but possible duplicates).
2: Exactly once (guaranteed delivery without duplicates)
Message sent before disconnecting (close message): This is a message that will be published on the configured topic before the connection is closed normally, either by re-deploying the node, or by shutting down.
- Topic: This is the MQTT topic for the close message, which indicates that the client is disconnecting or has gone offline.
- Payload: This contains the data to be sent with the close message. It can provide additional information, such as a reason for disconnection.
- Retain: Similar to the birth message, this option specifies whether the close message should be retained by the broker for new subscribers.
- QoS: The Quality of Service level for the close message, with the same definitions as above.
Message sent on an unexpected disconnection (will message): This is a message that will be published by the broker in the event the node unexpectedly loses its connection.
- Topic: This is the topic on which the LWT message will be published if the client unexpectedly disconnects. It acts as a way to inform other clients about the client’s status.
- Payload: This is the content of the LWT message, typically conveying a message indicating that the client is offline or has experienced an error.
- Retain: This option determines whether the LWT message should be retained by the broker for new subscribers, similar to the other message types.
- QoS: The Quality of Service level for the LWT message, ensuring the desired level of delivery assurance.
AWS
Now it is time to set up everything in AWS IoT Core to obtain the necessary files and create a new device for sending NCD sensor data using MQTT.
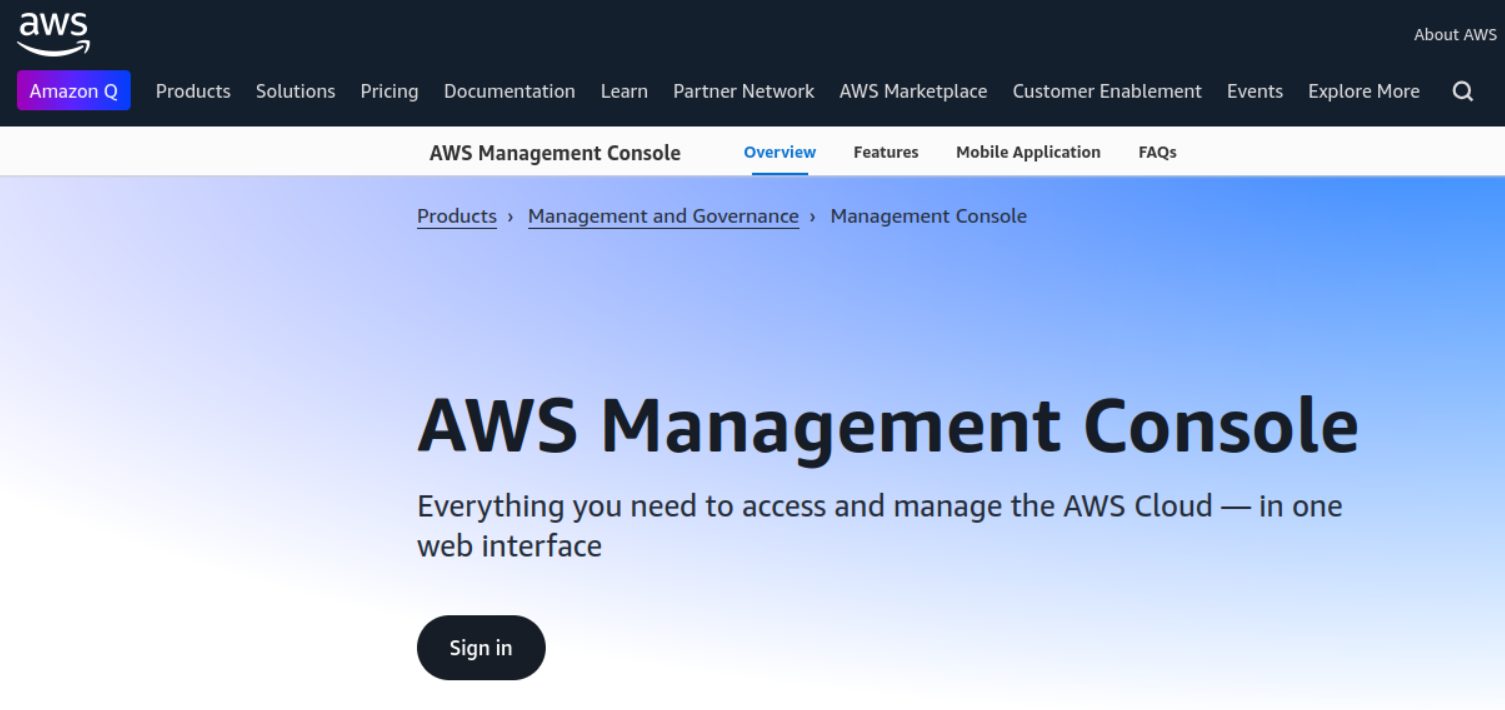
The first step is to access the AWS Management Console and sign in.

(Optional) You can test the connection to the MQTT broker from the Enterprise IIoT Gateway. If you have already confirmed that the Enterprise IIoT Gateway has an internet connection, you can skip this step.
If not, access the Enterprise IIoT Gateway using SSH and copy and paste the following command into the terminal. You should see an output similar to this:

In the next window, you will see the files contained in the connection kit:
- Certificate
- Private key
- Script to send and receive messages
- Policy
- AWS IoT Device SDK
You will need to click the ‘Download connection kit’ button to download the ZIP file to your PC.
Afterward, extract the contents of ‘connect_device_package.zip’ on your local PC. You will see the following files:
- NCD_Current_Sensor.cert.pem
- NCD_Current_Sensor.private.key
- NCD_Current_Sensor.public.key
- NCD_Current_Sensor-Policy
- start.sh
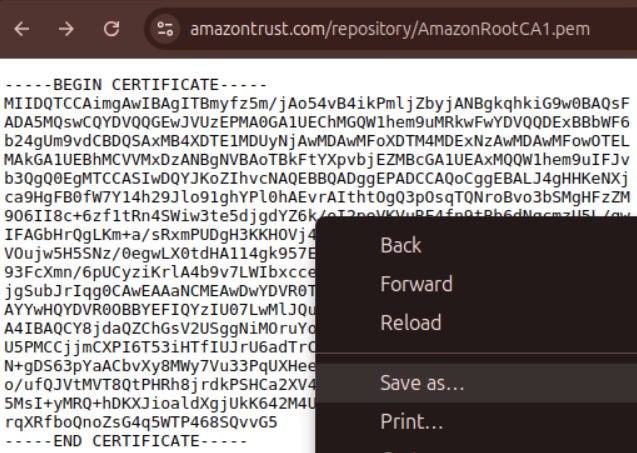
You will need to download the ‘AmazonRootCA1.pem‘ file, as this is a necessary file for establishing an MQTT connection from Node-RED. To download this file, visit the following link:
https://www.amazontrust.com/repository/AmazonRootCA1.pem
Then, right-click and select the ‘Save as…‘ option to save the file in the ‘connect_device_package‘ folder.
- AmazonRootCA1.pem
Now, if you open the ‘connect_device_package’ folder, you should see the following files:
- NCD_Current_Sensor.cert.pem
- NCD_Current_Sensor.private.key
- NCD_Current_Sensor.public.key
- NCD_Current_Sensor-Policy
- start.sh
- AmazonRootCA1.pem
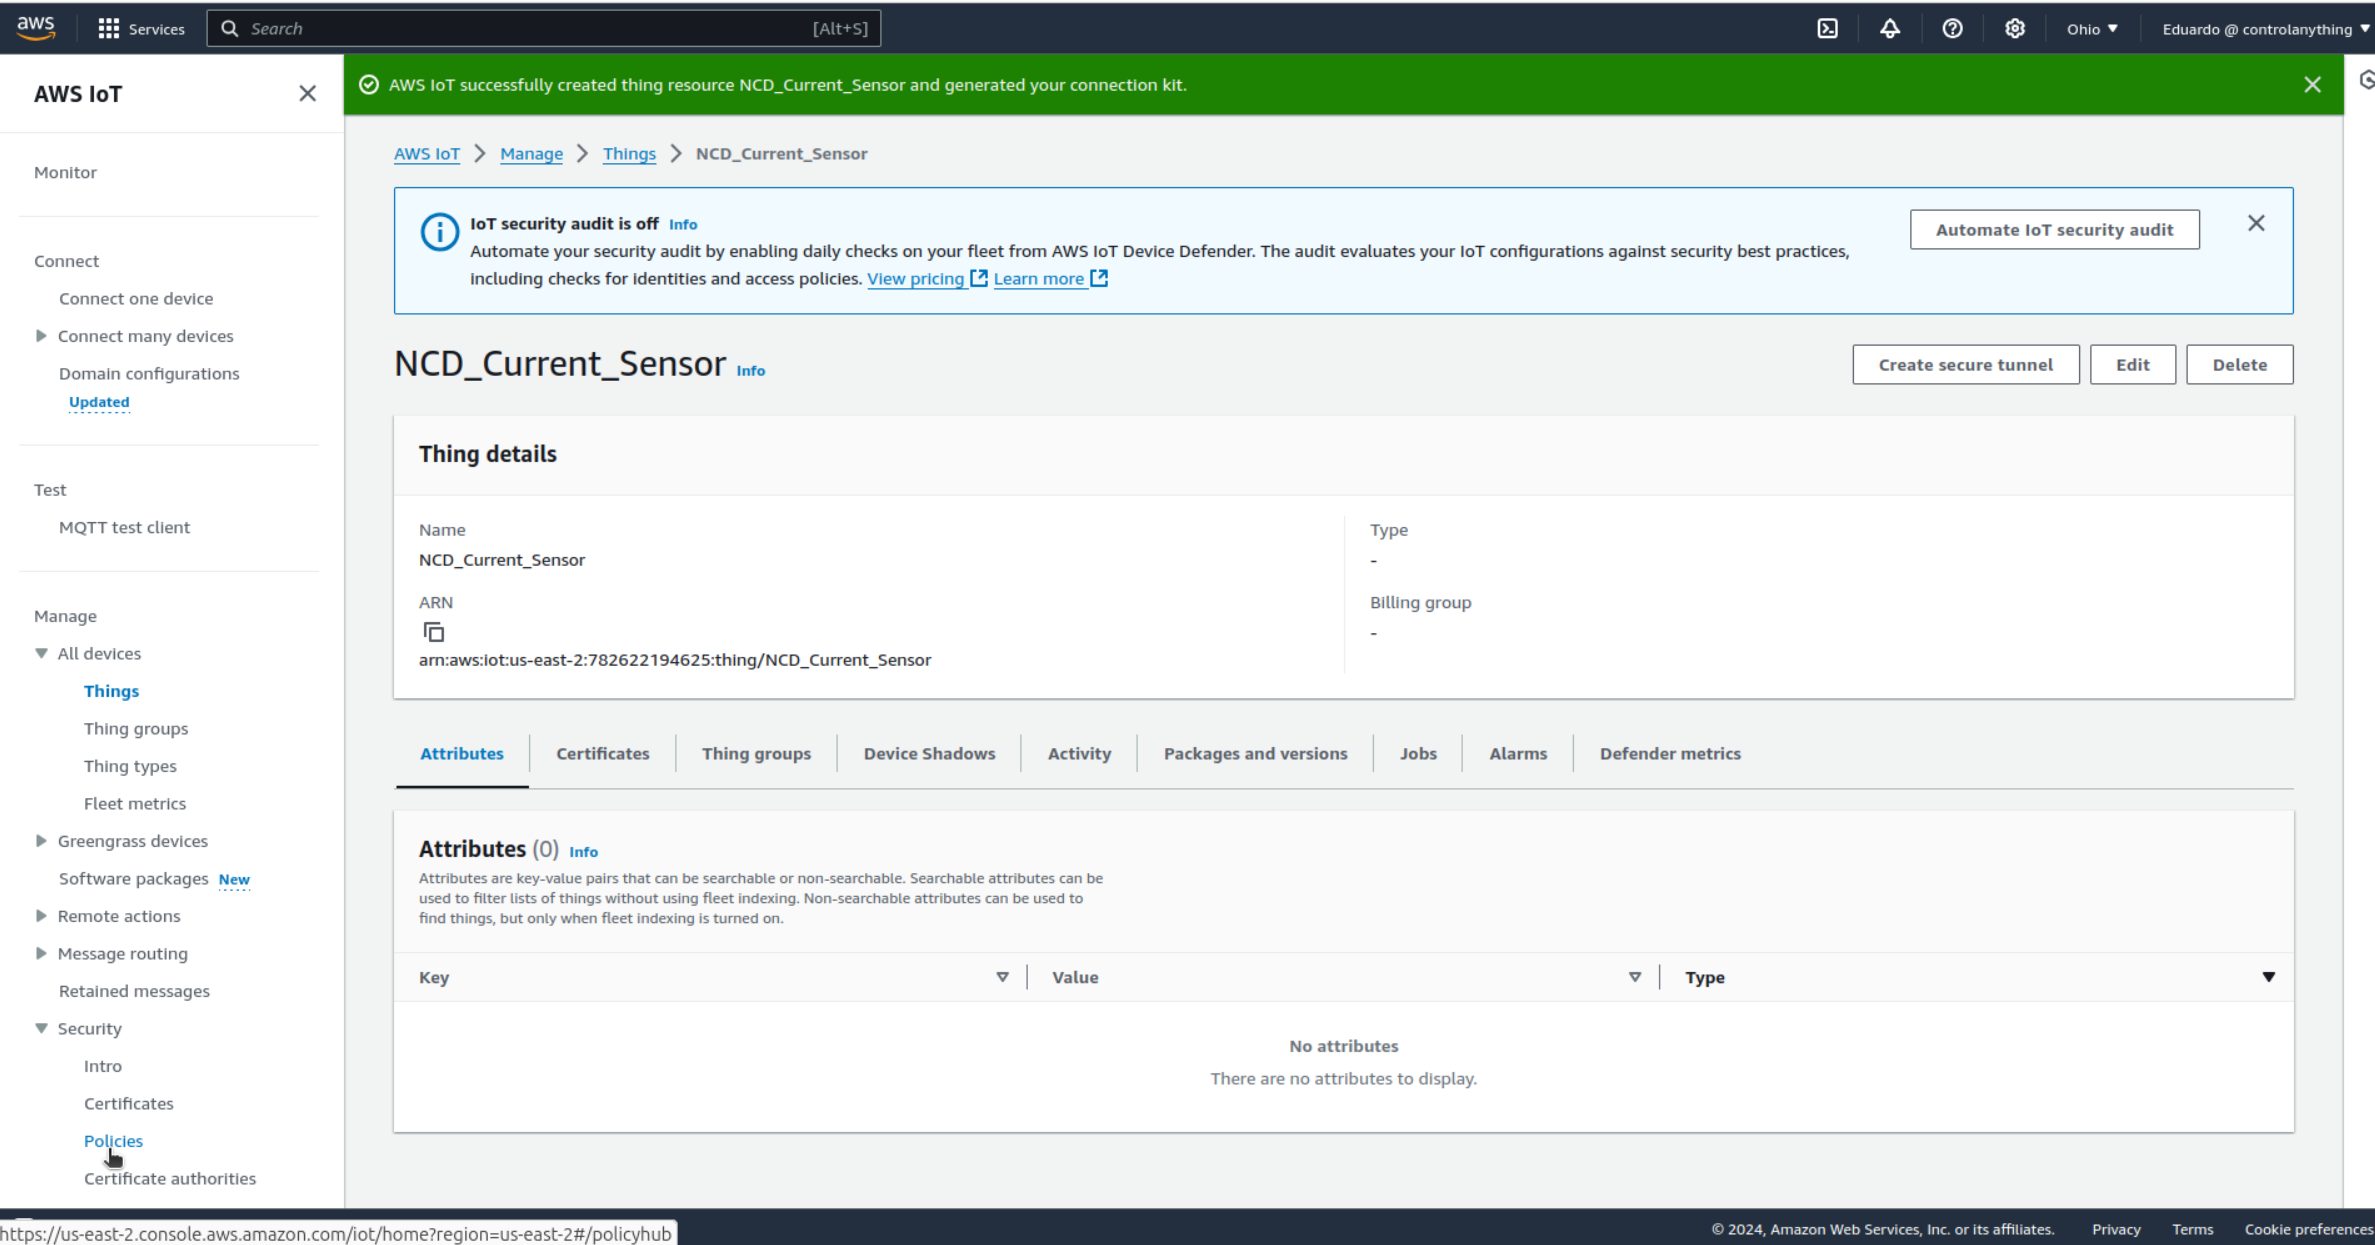
Now, AWS IoT Core has successfully created the ‘NCD_Current_sensor’ thing resource and generated the connection kit. You should see the following window.

Policies in AWS IoT Core
Policies in AWS IoT Core are JSON documents that define the permissions granted to a device or user for interacting with AWS IoT resources. These policies help control what actions can be performed and on which resources, enhancing security and access management.
You will need to modify the policies in AWS IoT Core. Click on ‘Policies’ in the left menu.
In this case, you need to delete the current policy documents to leave only one in the list:
You need to set new values for the policy action and policy resource with the following values:
- Policy Action “iot:*“: This grants permission for all actions in AWS IoT. It means that any IoT-related action, such as connecting, publishing, or subscribing, is permitted.
- Policy Resource “*“: This indicates that the permissions apply to all resources within AWS IoT. This means the policy would allow access to any IoT thing, topic, or resource in your AWS IoT Core account.
Node-RED Settings
The next step is to return to Node-RED, where we will add nodes to filter and send only the relevant data to AWS IoT Core. When a message is received from an NCD Sensor in the Enterprise IIoT Gateway, it includes a wealth of information, such as node ID, firmware version, battery percentage, counter, MAC address, and more. Therefore, you will likely want to send only the data related to the variable being measured by the sensor—specifically, the amperage on channels 1 and 2 in this case. We will demonstrate how to add and configure these nodes, which can serve as a foundational example for your application.
Sensor Data
Within the base flow configured in the Enterprise IIoT Gateway, we have a ‘Wireless Gateway‘ node and a ‘debug’ node. The ‘Wireless Gateway’ node transmits messages through its output terminal in various scenarios.
For example, when it establishes a connection with the radio frequency module, it sends the MAC address; when it connects to an NCD sensor, it sends a RUN message and a Sensor Data message, as illustrated in the following image:
You will notice that each of these messages has a defined msg.topic, such as:
- modem_mac
- sensor_mode
- sensor_data
In this specific case, the msg.topic property of interest is ‘sensor_data,’ as it pertains to the message that contains, among other information, the values of the variables being measured by the sensor.
Then, you can connect a new “debug” node to the output terminal of the “switch” node to visualize how the messages are being filtered inside the debug window:

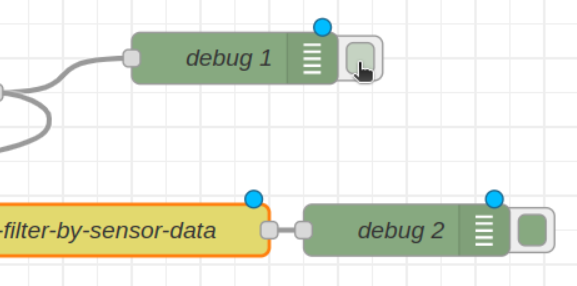
It is possible to disable the messages that are sent to the debug window, individually in each “debug” node, to do this it is necessary to click on the button on the right side of the node:
To save and apply the changes made within the workspace, you must press the “Debug” button:
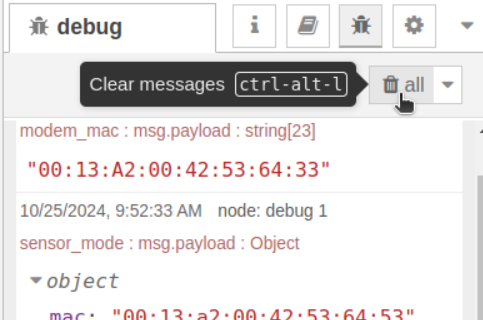
To clear incoming messages in the debug side window you should click on the “Clear messages” button:
Filter by NCD Sensor Type
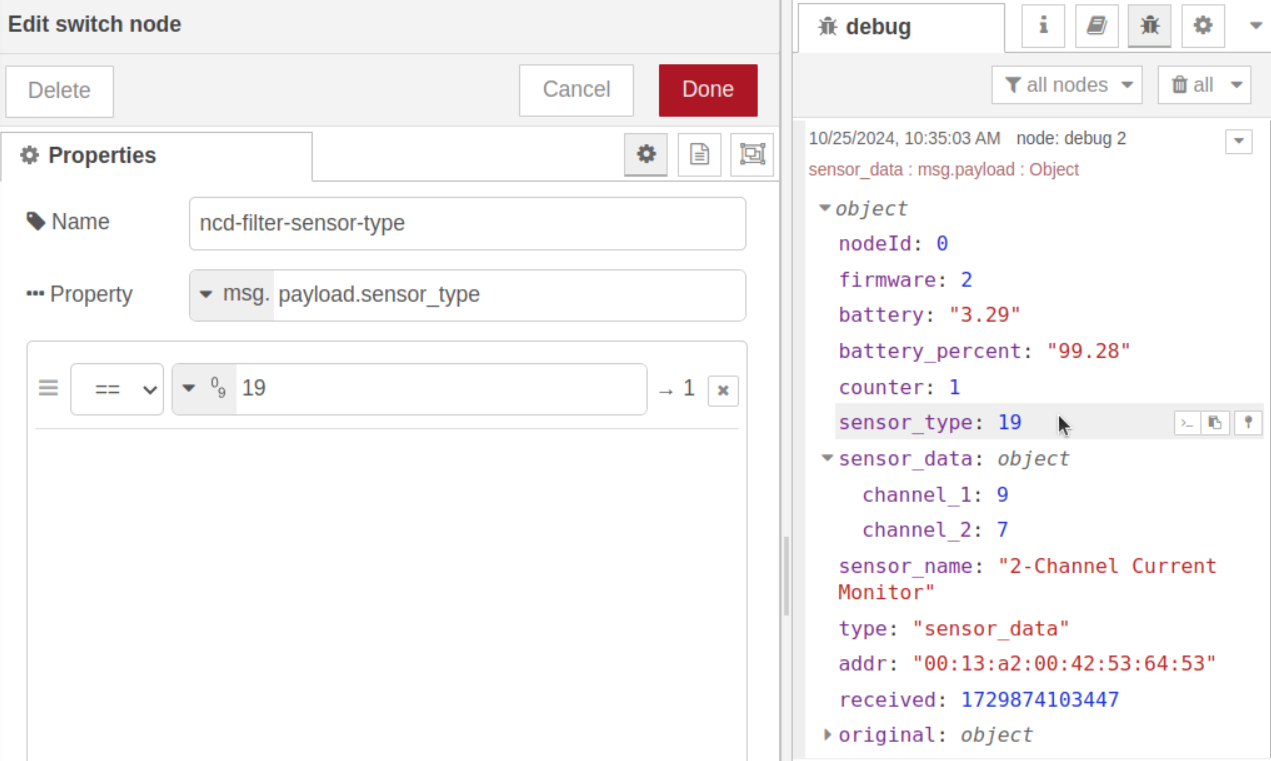
To add a filter by type, we apply the same principle (using a switch node). In this case, the property to evaluate is msg.payload.sensor_type, and the rule will be 19 with the type set to ‘number,’ as illustrated in the following image:

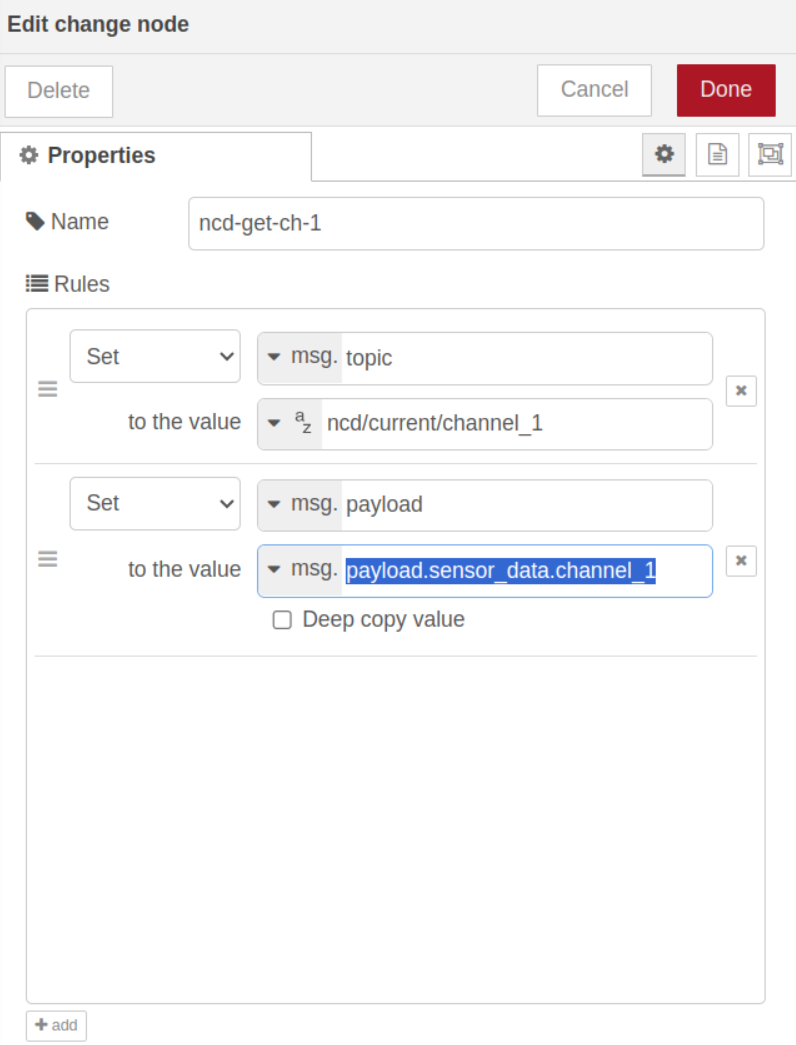
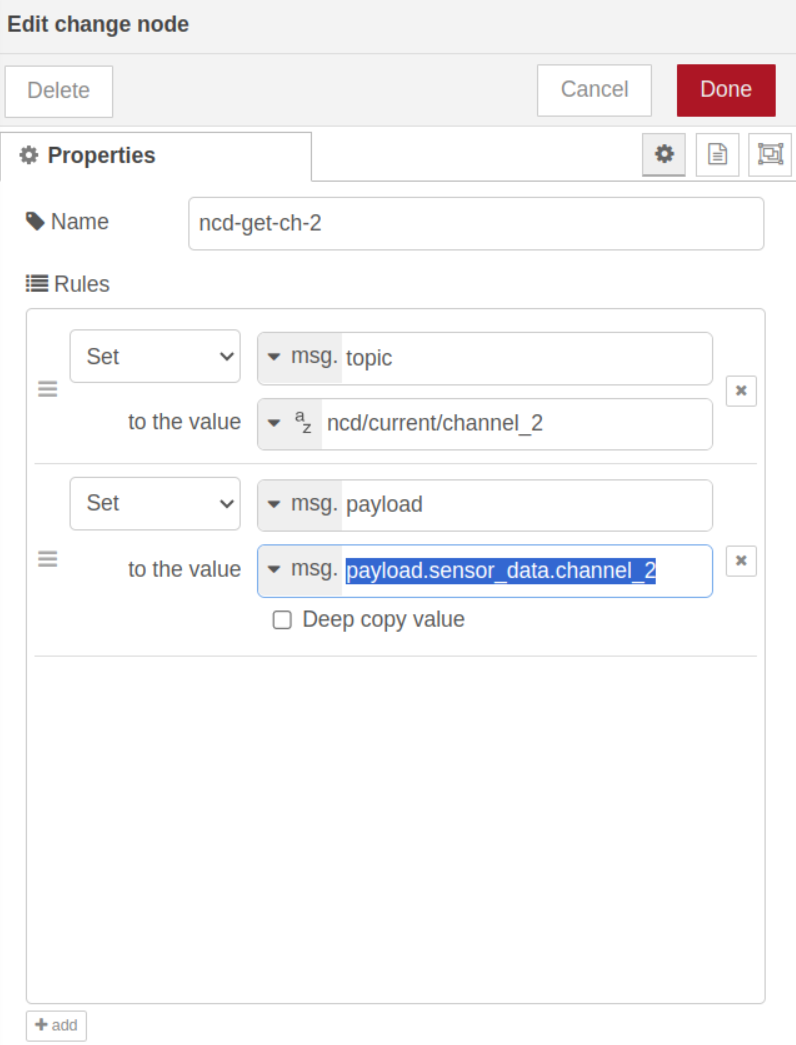
The next step is to add two ‘Change’ nodes. These nodes will be used to extract the data from the variables measured by the sensor individually, specifically for channel 1 and channel 2, respectively. Additionally, we will use these Change nodes to establish the MQTT topic, determining which MQTT topic the data will be associated with.
The two Change nodes will be connected to the output of the ‘ncd-filter-by-type’ node, as illustrated in the following image:

Within the Change nodes, we will create two rules: one to establish the MQTT topic for each channel, and the second to define the msg.payload message for its respective channel. The final configuration for each node is shown below:
Remember to deploy the changes in the flow to apply and save them.
In the next message received by the Enterprise IIoT Gateway, you should be able to see the values corresponding to channel 1 and channel 2 in the debug window. This will allow us to separate the messages and assign them their respective MQTT topics.

MQTT-out
Now that we have the current sensor variable data individually and have defined the MQTT topics for each, it is time to add the ‘mqtt-out’ node to the workspace. We will then configure it with the corresponding AWS IoT Core server credentials that we generated in the previous steps.
To use the mqtt out node, you can locate it on the left side of the Node-RED editor, in the “Network” group:
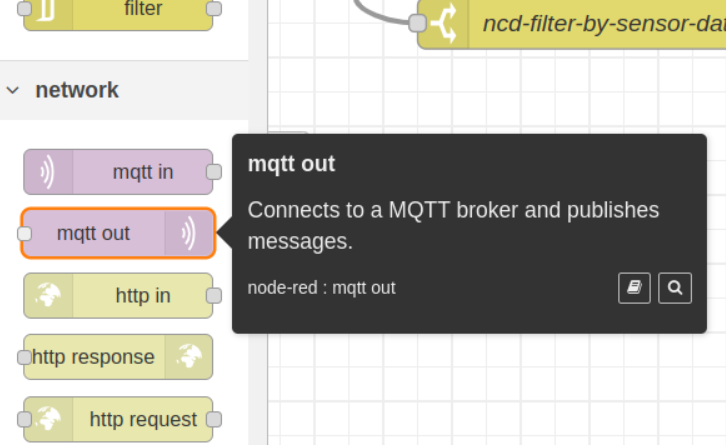
You should connect the output of the Change nodes to the input of the MQTT out node. The flow should look like this:

To configure the properties of this node, double-click on the ‘mqtt out’ node. You can assign an identifier to this node; in this case, we will use ‘AWS IoT Core.’ Next, configure the ‘Server’ property by clicking on the icon to ‘add new mqtt-broker config node.’
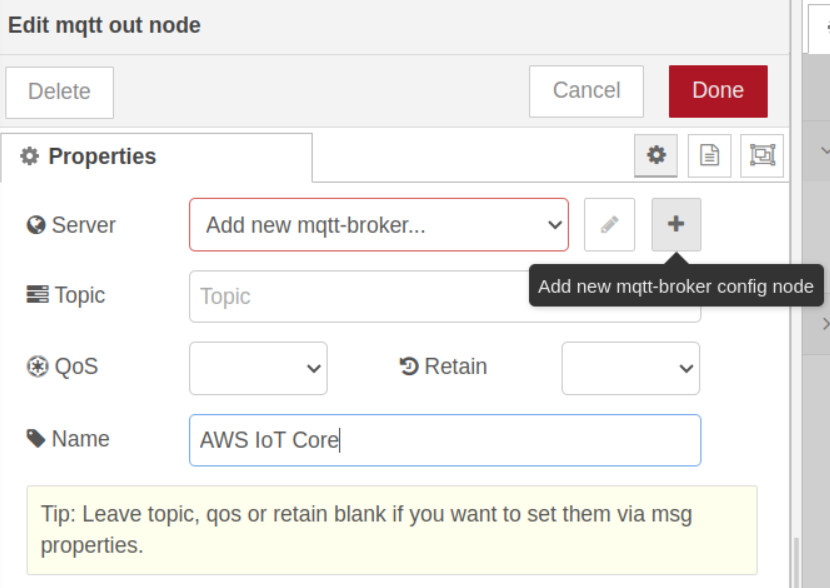
This will open a window with the properties of the ‘mqtt-broker’ configuration node. First, assign an identifier to the configuration node. Next, enter the server address, which you obtained in the earlier steps of this article, into the text box for the ‘Server’ property. Then, set the port to ‘8883.’ Ensure that the ‘Use TLS’ checkbox is enabled, and click on the ‘Add new tls-config config node’ button.
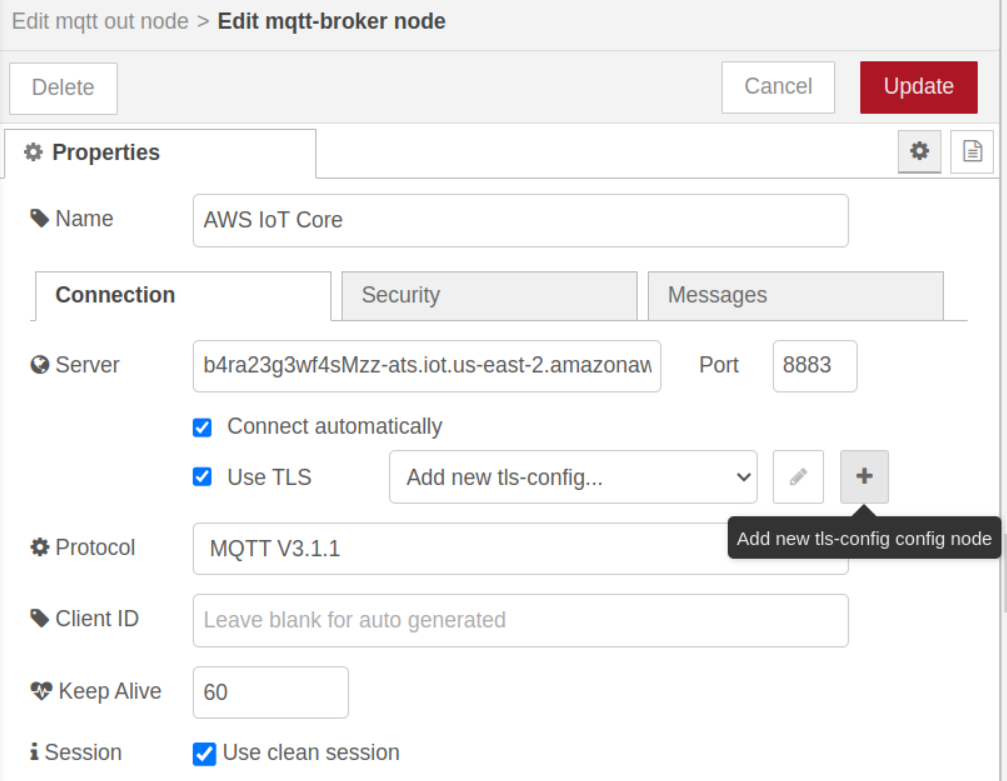
This will open a configuration window for the ‘tls-config’ node. Within this configuration node, you will need to upload the files that were previously downloaded from AWS.
To upload each file, click on ‘Upload’ and select the corresponding file from the ‘connect_device_package’ folder.
Additionally, enable the ‘Verify server certificate’ option.
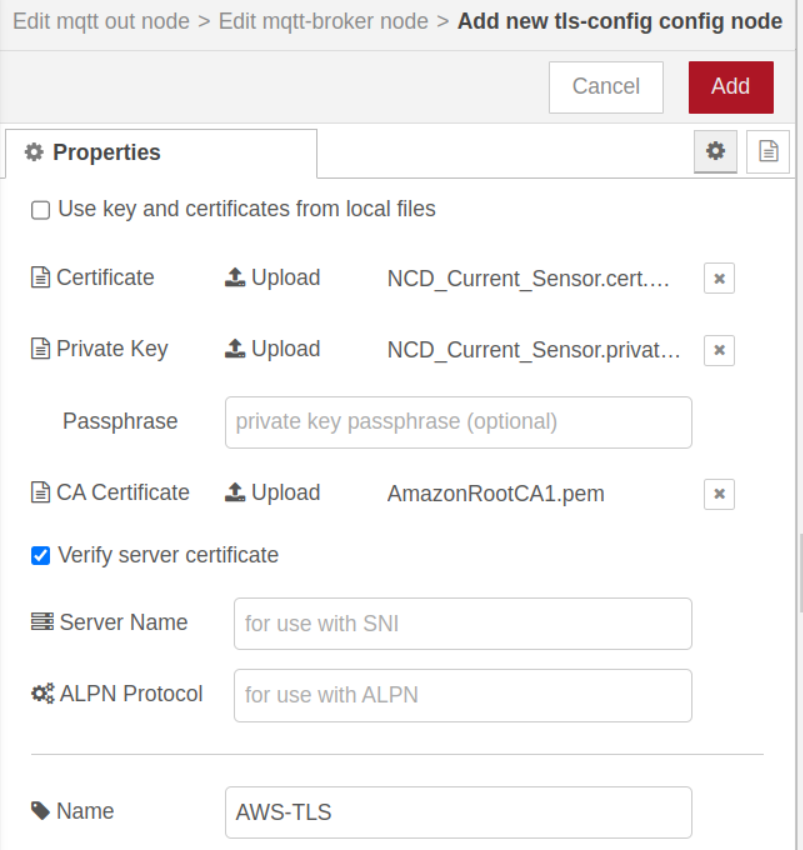
Once each of the TLS files has been uploaded in Node-RED, you should click the ‘Add’ button and then ‘Update’ button. After that, press the ‘Deploy’ button again to apply and save the changes.
If everything is configured correctly, you should see the status ‘connected’ beneath the ‘AWS IoT Core’ MQTT node, as shown in the following image.

Node-RED Basic Example Flow
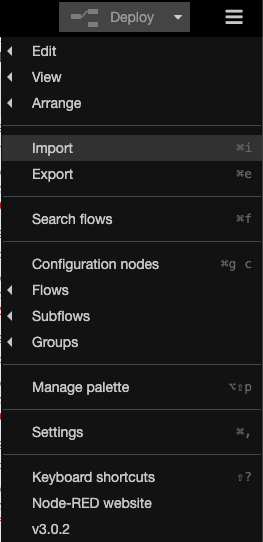
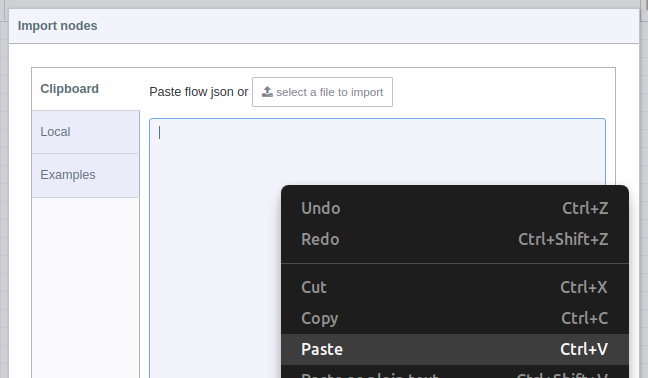
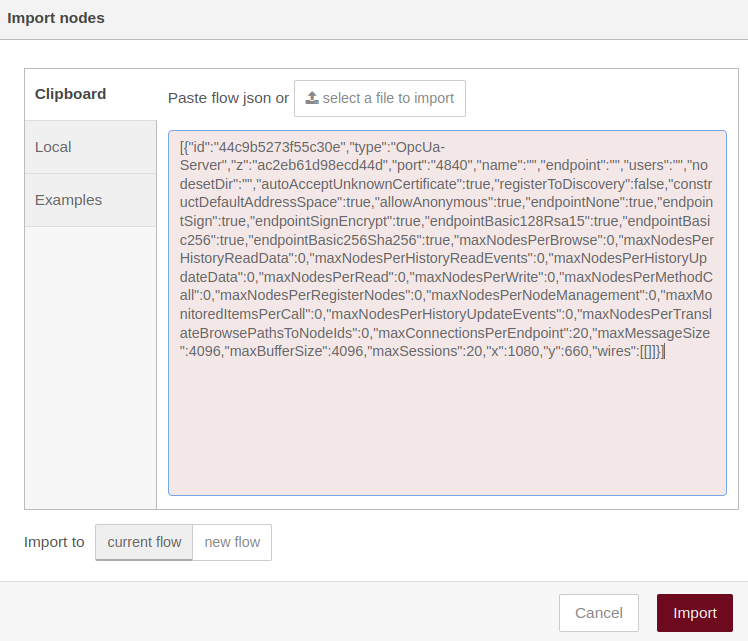
Below we provide the basic flow if you want to import it into your current project, you should click on the “copy” button at the top right of the box below:
[{"id":"aca8111b4fd88766","type":"switch","z":"0616dfa951537aa0","name":"ncd-filter-by-sensor-data","property":"topic","propertyType":"msg","rules":[{"t":"eq","v":"sensor_data","vt":"str"}],"checkall":"true","repair":false,"outputs":1,"x":410,"y":240,"wires":[["f68182b6e36e6806"]]},{"id":"f68182b6e36e6806","type":"switch","z":"0616dfa951537aa0","name":"ncd-filter-by-sensor-data","property":"payload.sensor_type","propertyType":"msg","rules":[{"t":"eq","v":"0","vt":"num"}],"checkall":"true","repair":false,"outputs":1,"x":650,"y":240,"wires":[["5c7a5891ea74c279","b743687754a6a204"]]},{"id":"5c7a5891ea74c279","type":"change","z":"0616dfa951537aa0","name":"ncd-get-property","rules":[{"t":"set","p":"payload","pt":"msg","to":"payload.sensor_data.channel_1","tot":"msg"}],"action":"","property":"","from":"","to":"","reg":false,"x":880,"y":220,"wires":[["d2f32f8100359350"]]},{"id":"b743687754a6a204","type":"change","z":"0616dfa951537aa0","name":"ncd-get-property","rules":[{"t":"set","p":"payload","pt":"msg","to":"payload.sensor_data.channel_2","tot":"msg"}],"action":"","property":"","from":"","to":"","reg":false,"x":880,"y":260,"wires":[["d2f32f8100359350"]]},{"id":"d2f32f8100359350","type":"mqtt out","z":"0616dfa951537aa0","name":"AWS IoT Core","topic":"","qos":"","retain":"","respTopic":"","contentType":"","userProps":"","correl":"","expiry":"","broker":"","x":1080,"y":240,"wires":[]}]
AWS MQTT test client
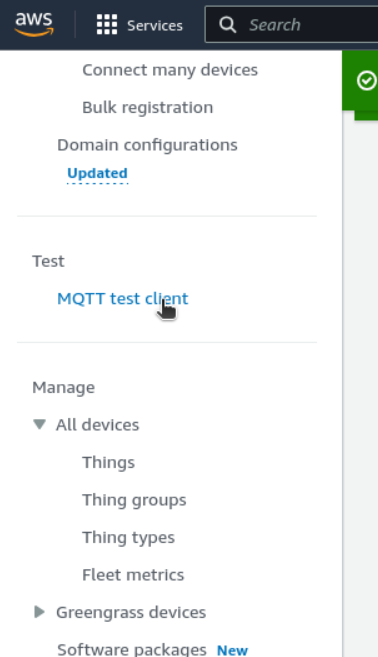
Now, to verify the communication between the NCD sensor and AWS IoT using Node-RED running on the Enterprise IIoT Gateway, AWS IoT Core provides an MQTT test client. You should return to AWS and navigate to the ‘MQTT test client’ option in the left-hand menu.
Summary
In this article, we explored the process of sending NCD sensor data to AWS IoT Core using MQTT and Node-RED, which is readily available on the Enterprise IIoT Gateway and Enterprise IIoT Gateway Lite. We discussed the key properties required to configure MQTT nodes, enhancing your understanding of the MQTT protocol and its application in transmitting data to various local and cloud brokers, including AWS IoT Core.
By leveraging the AWS IoT message broker, we demonstrated how to establish a seamless connection between your Industrial IoT NCD Sensors and the AWS cloud services. This setup not only facilitates real-time data transmission but also opens the door to advanced cloud-based IoT solutions.
With the steps outlined in this guide, you now have the knowledge and tools to successfully configure your Node-RED environment and transmit sensor data to AWS IoT Core, paving the way for innovative industrial applications.
Thank you, NCD Team.
Share this on:
You Might Also Like:
