In this article we will connect an MQTT Temperature/Humidity sensor to AWS IoT Core. However this article applies to all of our MQTT WiFi sensors available here.
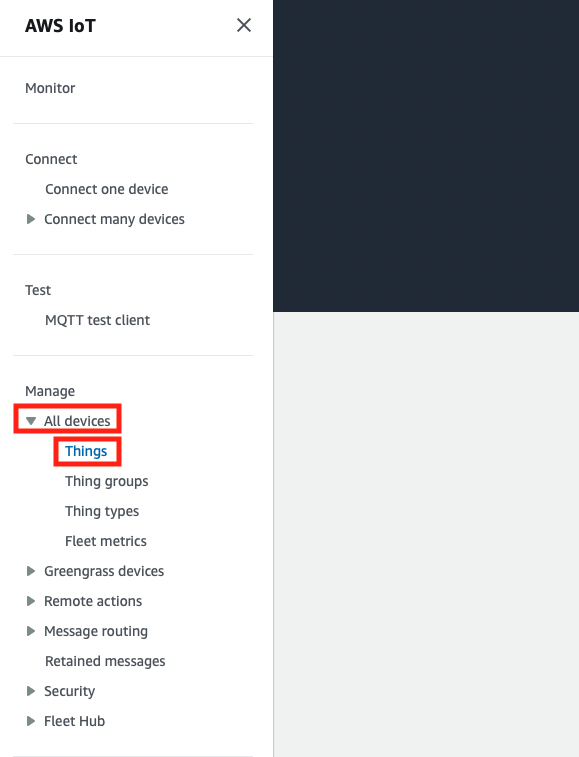
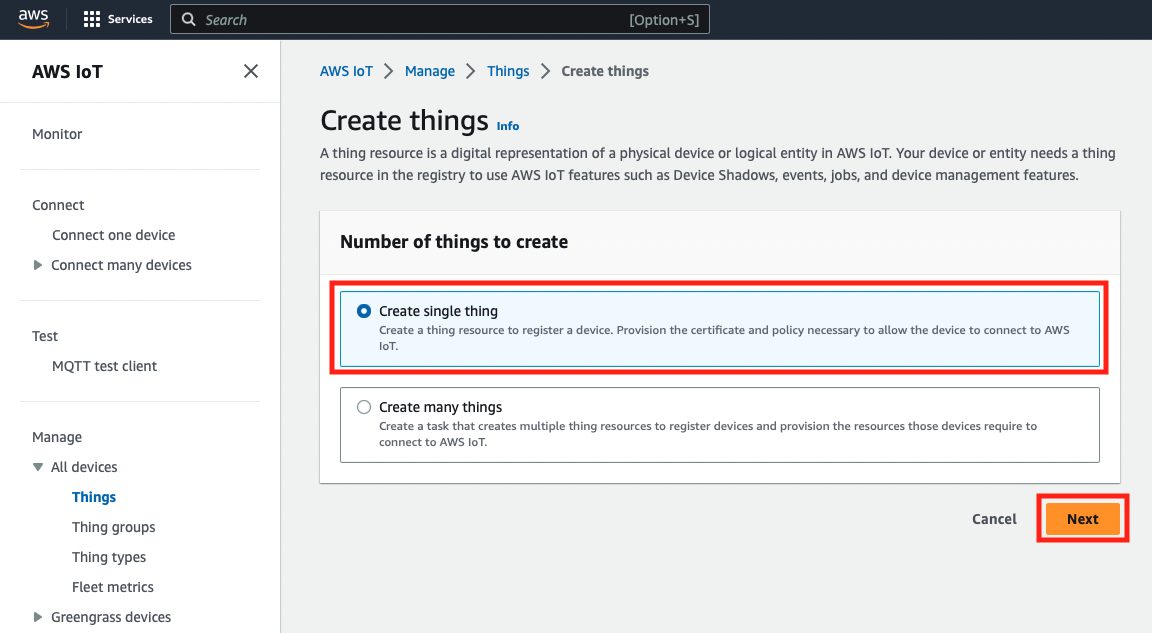
Sign into your AWS Console and Open AWS IoT Core. Click on Things on the left, then on the next page click the Create things button. Select create a single thing, give it a name, and select the Auto-generate a new certificate(recommended option).
Create AWS Policy
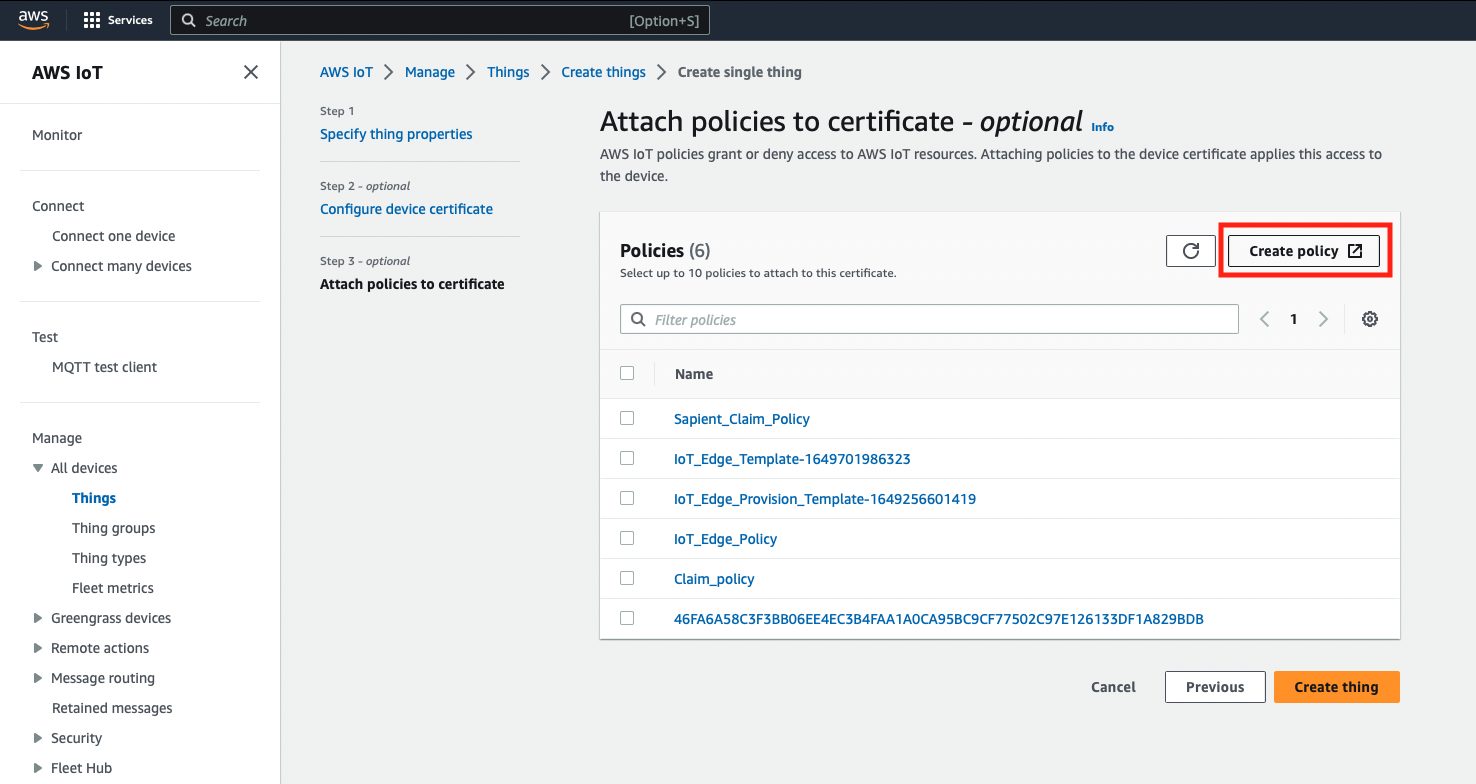
You will now be prompted to attach a policy. If you have not created an AWS IoT Thing through this process in the past you will need to create a new policy. This new policy can be used for all future Things you create for IoT Core.
Click Create Policy.
Give the Policy a Name.
Add two Statements to the policy.
The first to Allowiot:Connect with the policy resource set to arn:aws:iot:*:*:client/*
The second to Allow it:Publish with the policy resource set to arn:aws:iot:*:*:topic/*
Click Create at the bottom of the window.
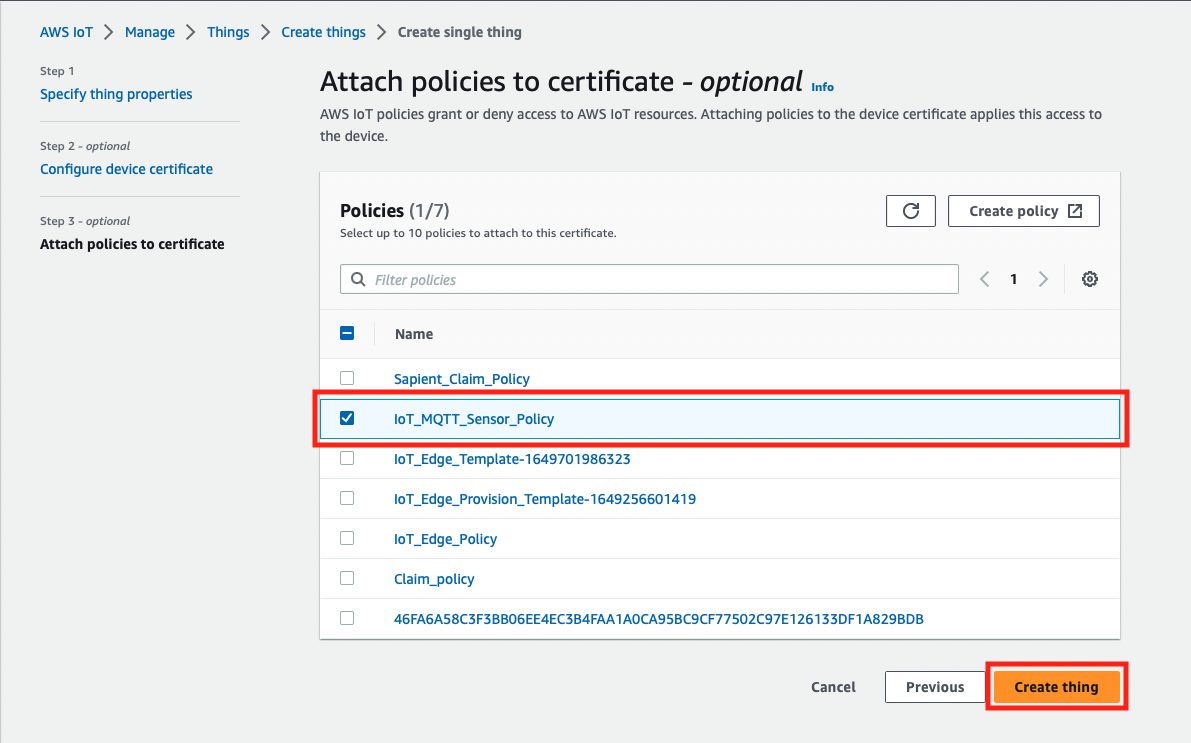
Back on the Thing Creation window select the newly created policy and click Create Thing at the bottom of the window.
Download Certs and get Endpoint
You will now be prompted to download certificate files.
Download the Device Certificate, Private Key, and the first Root Certificate. If forced you can download the public key but we do not need that. Store those files somewhere on your computer as you will need to upload them to the MQTT Sensor.
Now back on AWS IoT Core click on settings in the bottom left corner of the window. On the Settings page you will find the endpoint. Copy that to your clipboard or paste it into a text document on your computer as it will need to be entered on the MQTT Sensor as well.
Enter Settings on MQTT Sensor
If your MQTT sensor is not already in configuration mode indicated by a flashing blue LED then press the CFG mode on the sensor to put it into configuration mode.
It will appear as a WiFi Network you can connect to from your computer. Connect to the sensor and if prompted enter the password NCDBeast.
Once connected over WiFi open your web browser and enter 192.168.0.1 The Web interface for the sensor will then be displayed. You can enter WiFi and sensor settings as needed.
In the MQTT Settings section you will need to paste in the endpoint copied from AWS earlier into the MQTT Broker field. Set the port to 8883, set Client ID to anything you wish, check the box to enable TLS, upload the device certificate, private key, and root certs to the file fields, then in the topic field you can enter anything you wish. I have mine set to Travis_Office/::Sensor_ID:: so I can easily see all devices publishing by subscribing to Travis_Office/# which we will demonstrate in the next step.
Save the settings to the MQTT Sensor. It should reboot and the LED should Flash White while connecting to WiFi/AWS, then it should start flashing Green once it has valid connection to AWS.
Test function
Back on AWS IoT Core click Test on the Left, then click Test MQTT Messaging.
Under Subscribe to topic you can enter the first part of the topic you configured the sensor to publish to followed by the wildcard character(#). In my case I will enter the subscribe topic Travis_Office/#, then click Subscribe.
You should see messages flow in from the sensor. If so that concludes this article.


