Spreadsheets are like the trusty swiss army knife of the business world. They’re everywhere because they offer a simple and familiar way to organize and manipulate data in a table format. Think Microsoft Excel or Google Sheets – most people are comfortable using them for basic calculations, financial analysis, and even some statistics.
While powerful database systems exist, for smaller businesses or tasks with limited data volume, spreadsheets can be the perfect fit. By default, spreadsheet applications were not created to work as databases, although small businesses and simple applications are already using them in this way. This is because such uses require simple solutions, and a standard database management system increases the complexity of the project.
They’re quick to set up, require minimal investment, and the learning curve is gentler. Complex database systems can be costly, time-consuming to implement, and require specialized skills to manage effectively.
So, if you’re dealing with a manageable amount of data, need a budget-friendly solution, and value ease of use, spreadsheets might be your champion.
Why Use Google Sheets as Data Base for your ncd sensors
While heavyweight database programs exist, Google Sheets offers a surprisingly effective option for certain data storage needs. Here’s why it might be a good fit for your project:
Cloud-Based Convenience: No more lost files! Google Sheets lives online, so your data is always accessible and securely stored in the cloud.
Easy Sharing and Control: Grant view or editing access to your data with just a few clicks, ensuring your team stays on the same page.
Cost-Effective Choice: Unlike some database software, Google Sheets is completely free. This eliminates licensing fees and keeps your project budget-friendly.
Familiar and Friendly: Spreadsheets are a common business tool. Most users can quickly grasp how to navigate Google Sheets and leverage its capabilities.
Built-in Visualization Power: Google Sheets boasts a wealth of features to transform your data. Quickly format, structure, and visualize your information for clear analysis.
Think of Google Sheets as a database with training wheels. It’s a great option for smaller projects, budget-conscious teams, or anyone comfortable with a spreadsheet interface. In this article we present a guide that will allow you to write the data coming from your ncd sensors directly into Google Sheets. We have tried to present it in a clear and understandable way, let’s start.
Google Cloud Project
Create cloud project with Google
1.- Go to the project in Google consoleand sign in to your Google/Gmail account. Once signed in, you will see a list of existing projects (if there are any).
2.- Click “Create Project” to create a new one:
3.- In project name text-box you can add a name project or leave as default.
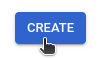
4.- Then click on “CREATE” button:
Note: You can see on the top right the process of creating our new project:
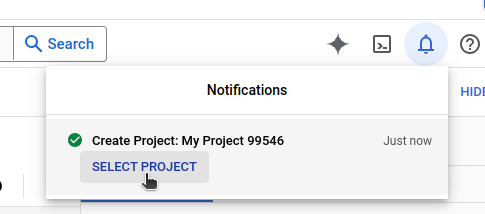
5.- Once the project creation process is completed you will click on the “SELECT PROJECT” button.
You will be able to see all the available elements of our project:
6.- Then go to the main menu (located at the top left), select from the “APIs & Services” menu the “Library” option:
Subsequently you will see a search box in the center of the page, enter “Google Sheet API“:
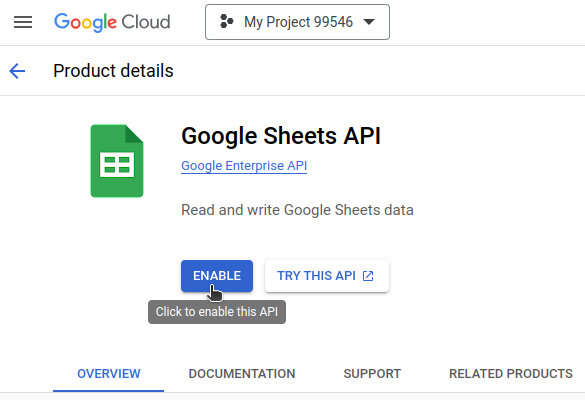
7.- Click on the result, in the next window click on the “ENABLE” button:
8.- At the end of the enabling process, the following window is automatically loaded, indicating that in order to use this API you need to create credentials:
9.- To create your credentials you can click on the “CREATE CREDENTIALS” button, or go back to the main menu and select the “Credentials” option:
10.- The following window will automatically open, where you must click on the “CREATE CREDENTIALS” button:
11.- Then, from the drop-down menu select the “Service account” option:
12.- Next is to add a “Service account name” is an identifier to generate your credentials, you can enter for example “ncd-node-red“, then press the “CREATE AND CONTINUE” button:
13.- The next step is to select the role, in this case you are going to select the “owner” option from the drop-down menu, once you have done this press the “CONTINUE” button:
14.- Point number 3 “Grant users access to this service account” is optional, to finish the process you must click on the “DONE” button:
15.-Now you can see in the “Service Accounts” section that a new “Email” has been created that you will use to communicate Node-RED with Google Sheets.
Now you must create the keys associated to this Email, to do this click on the link the Email, which should have the following form:
“id@—–.iam.gserviceaccount.com“:
16.- In the following window the “Service account” details are shown, first select, copy and save in a text file the Email that was generated (this will be used inside Node-RED), then click on the “KEYS” tab:
17.- Inside the window click on “ADDKEY” Drop-down and select the “Create new key” option:
18.- Automatically a pop-up window will appear, you must select the “JSON” option inside the key type, finally press the “CREATE” button:
19.- Once this process is completed, the keys will be downloaded automatically in “JSON” format:
Google Sheets
Now it is time to make some configurations in Google Sheets to allow the new user access through the keys you have generated.
1.- You must go to Google Sheets and create a “Blank spreadsheet“:
2.- Then go to menu “File -> Share -> Share with others“:
3.- Google Sheets will automatically ask you to assign a name to your sheet before continuing, you must assign an identifier:
4.- The next thing to do is to add the Email you generated and copied in the previous step in the box:
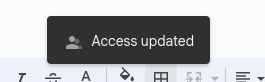
5.- Once added you must uncheck the “Notify people” option and then press the “Share” button:
You will see the following message:
Done, so far we have configured Google Sheets to provide access with the generated Email and keys.
Node-RED
Now you must start configuring Node-RED, the first thing to do is to access the Node-RED flow editor. Next step is to install a library that allows us to access the Google Sheets API from Node-RED, there are several options but for this example we will use the library “node-red-contrib-google-sheets“.
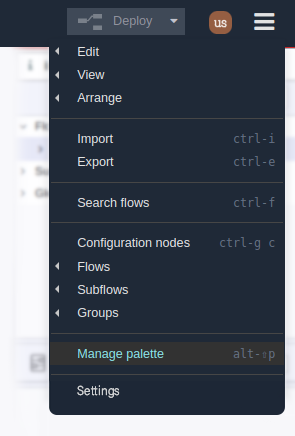
1.- To install the library go to the main menu of Node-RED, then select the “Manage Palette” option:
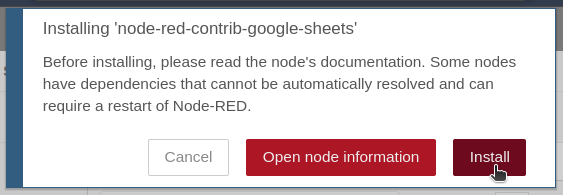
2.- Then go to the “Install” tab and enter in the “node-red-contrib-google-sheets” box in the option click on the “Install” button.
3.- You will see a pop-up window to confirm the installation, click on “Install“:
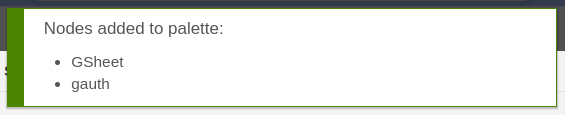
4.- Once the installation process is completed, you will see the following message.
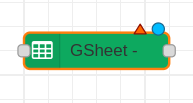
5.- Now go to the node editor and you will see in the “function” nodes group you should already have added the “GSheet” node:
6.- Now it is time to drag the node to our workspace to start configuring it, to start configuring it you must double left click on the node. You will be able to see all its properties, the first one you must configure will be “creds“, to do this click on the pencil icon on the right side.
7.- You will see a text box, in this box you must paste the content of your “KEY.json” file that you downloaded during the Google Project configuration, for this you must open your file with a text editor for example, then copyall the content of the file, and pasteit into this box, it should look like this:
Finally click on “Add” button.
8.- The next property to configure is “Method“, you must select the option “Appends Row“:
9.- Now you must assign the property “SpreadsheetID“, this value you obtain it from the URL of your Google Sheet, it is the part of the center of your URL:
Then go back to Node-RED and paste the selected text into the “SpreadsheetID” property:
You can leave the cells, Flatten Matrix and Name properties as default.
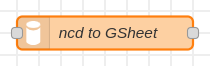
NCD to GSheet node
Here you have configured your node to communicate with your Google SheetAPI , now the next step is to import and use a simple node (ncd to GSheet) that we have developed to optimize the process of collecting and sending data from the ncd sensors to Google Sheets.
1.- Go to the following GitHub repository, and click on the “copy raw file” button.
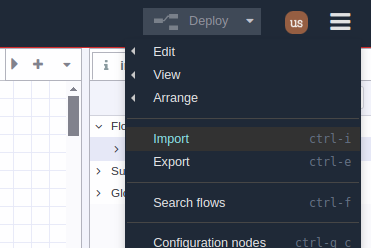
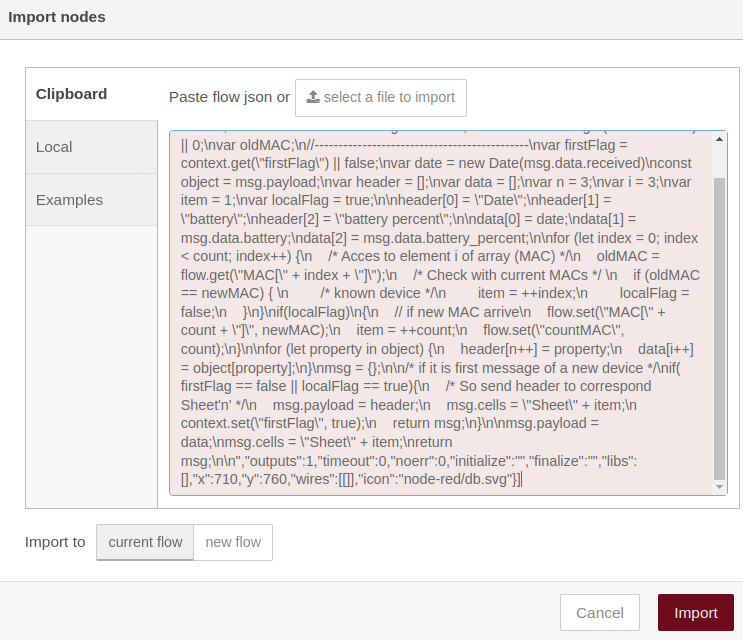
2.- Then in Node-RED go to the mainmenu and select the “Import” option:
3.- In the input box, paste the text you copied and then press the “Import” button:
Now you have the node “ncd to GSheet“in your workspace, it is a simple function node, which we optimize to get the data from the ncd nodes to be able to structure them and send them to the GSheet node:
4.- The next step is to configure your ncd (Wireless device) nodes within Node-RED, once configured, you must connect the output of the Wireless devicenode (corresponding to the type of sensor you are using) to the input of the “ncd to GSheet” node and the output of the “ncd to GSheet” node to the input of the “Gsheet” node.
5.- Now you must click on the DEPLOY button in order to save and apply the changes made, if everything is configured correctly as soon as you receive the first data from your ncd sensor you should be able to see in Google Sheet that the variable identifiers have been sent, you should be able to see something like this:
Subsequently, as soon as the next data is received from the sensor in Node-RED, you can observe how this data is written just below each identifier inside Google Sheets, you should be able to observe something like this:
ncd to GSheet node
What the “ncd to GSheet” node does is:
Identify the variables contained in your ncd-sensor.
It first sends or writes the identifiers of each variable to the Google Sheet as headers, in order to identify to which variable or identifier the stored data corresponds.
Subsequently, send or write the data associated with these identifiers.
node status
In order to identify these processes within the Node-RED node editor, the node has a status:
Header: it is shown when the identifiers of each variable are being sent/written as headers.
Note: this process occurs only the first time a data is received from the ncd sensor after executing a DEPLOY, therefore, every time changes are made in the flow within Node-RED and a DEPLOY is executed again, the node will interpret that it is the first time that the identifiers must be sent/written as headers in Google Sheets).
Data: it is displayed when the data of each variable associated to each identifier is being sent/written.
Note: this process occurs after the first cycle, i.e. after the identifiers are sent/written as headers and is always executed every time data is received from the sensor, it is only interrupted until changes are made to the flow and a DEPLOY is executed again.
Write data from two or more ncd sensors in Google Sheets.
With the “ncd to GSheet” node it is possible to process and send data to the “GSheet” node from one or more ncd sensors and in this way, the “GSheet” node will send this data to Google Sheets.
In order to have the informationorganized within Google Sheets you will have to make some previous adjustments.
For example, if you have two ncd sensors that you want to store/write their data within Google Sheets in an organized manner, you would first go to Google Sheets and make sure you have a Sheet for each sensor.
For the example then you need two Sheets:
Sheet1.
Sheet2.
Which will serve to organize and store the information of sensor 1 in Sheet 1 and sensor 2 in Sheet 2.
To add a new Sheet within the Google Sheet you have a button available at the bottom left “Add Sheet“
Pressing it automatically creates a new sheet with the identifier “Sheet2”:
Next go back to Node-RED and connect the output of the ncd sensors to the same input of the “ncd to GSheet” node, something like this:
In this way, when data is received from the sensors, the node will identify from which sensor the data comes from and send it to the “GSheet” node in an organized way, as a result inside Google Sheets you would get something like this:
Add one more
If you would like to add one moresensor to the ncd to GSheet node entry, then you must first add a new Sheet in Google Sheet, as mentioned above:
Then inside node-RED connect the node output of the new ncd sensor to the node input “ncd to GSheet“, something like the following:
You should be able to observe something like the following:
Note: remember that when deploying, the “ncd to GSheet” node will interpret that it is necessary to send again the identifiers of the sensor variables as headers.
Summary
Making ncd sensor data wirelessly available via Digi-Mesh through the Enterprise IIoT Gateway or Enterprise IIoT Gateway Lite provides a very large window of possibilities in terms of manipulation, processing and management of this data thanks to the incorporation of Node-RED as a service.
This allows us to have the data available in an easy and intuitive way. Node-RED has a wide range of libraries provided by its community to communicate with different databases, which being an open-source tool gives the user the opportunity to select the one that best suits their current needs without being tied to a single one, some examples are; MondoDB, InfluxDB, PostgreSQL, among many others, but at the same time that flexibility allows creating simple databases in local tools using CSV files or in the cloud using Google Sheets.
As in this article, where use is made of the Google Sheet platform as a database to store the variables from the ncd-sensors, this option offers a low cost solution for those who do not have paid storage services or those who are beginning to discover the importance of storing data for later analysis or simply for those who want to have their data in a cloud platform in a simple and accessible way, we hope the information is clear and useful to allow you to develop your own application.