In this article we will detail how to get Sensor readings from our Enterprise Wireless line into a dashboard on your Android device. This article applies to all sensor devices available on our Enterprise line.
If you do not already have one go over to https://beebotte.com and sign up for a free account and log in.
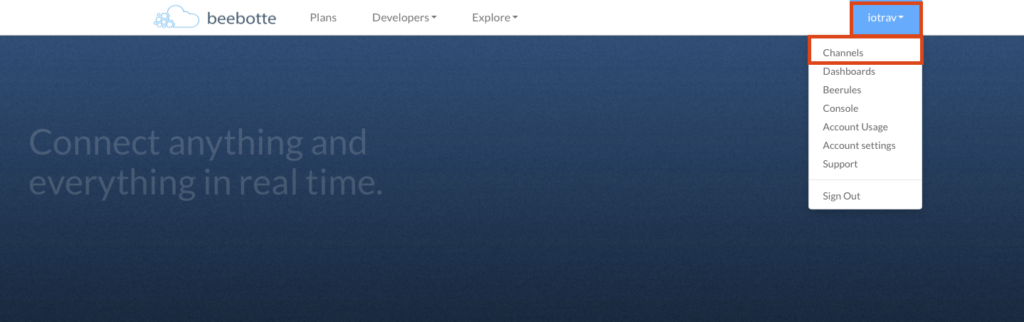
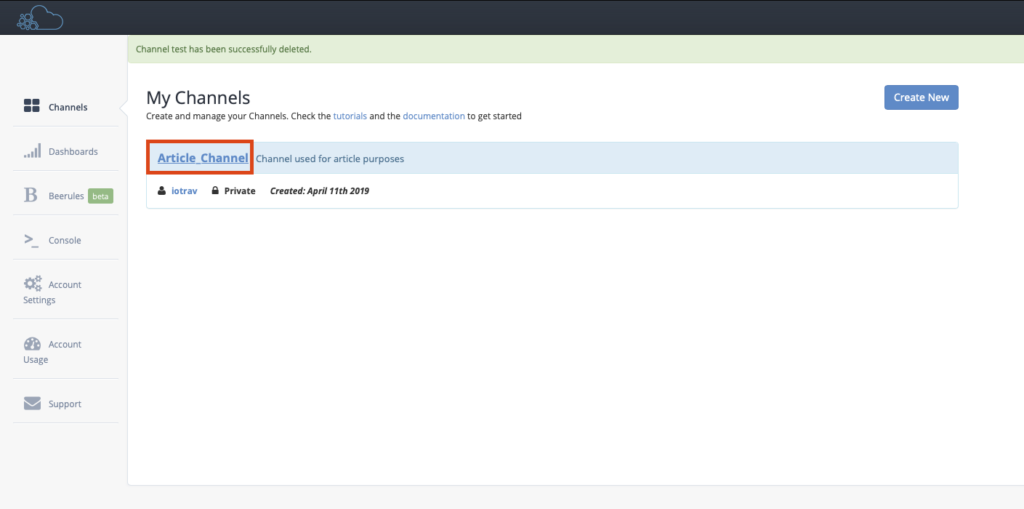
Once logged in click on your account name and then select Channels from the drop down menu.
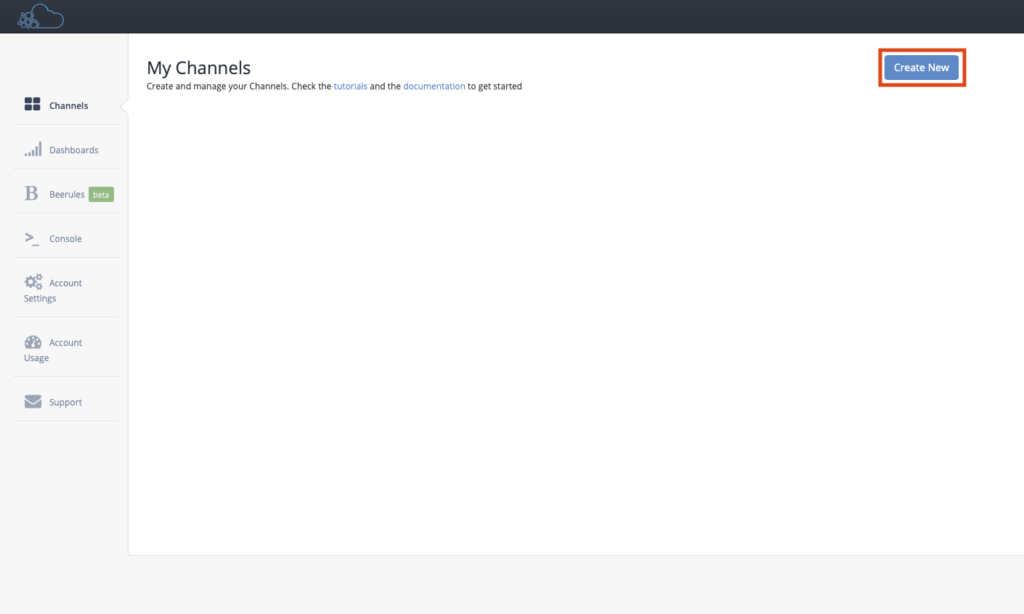
On the My Channels page click Create New to create a new channel.
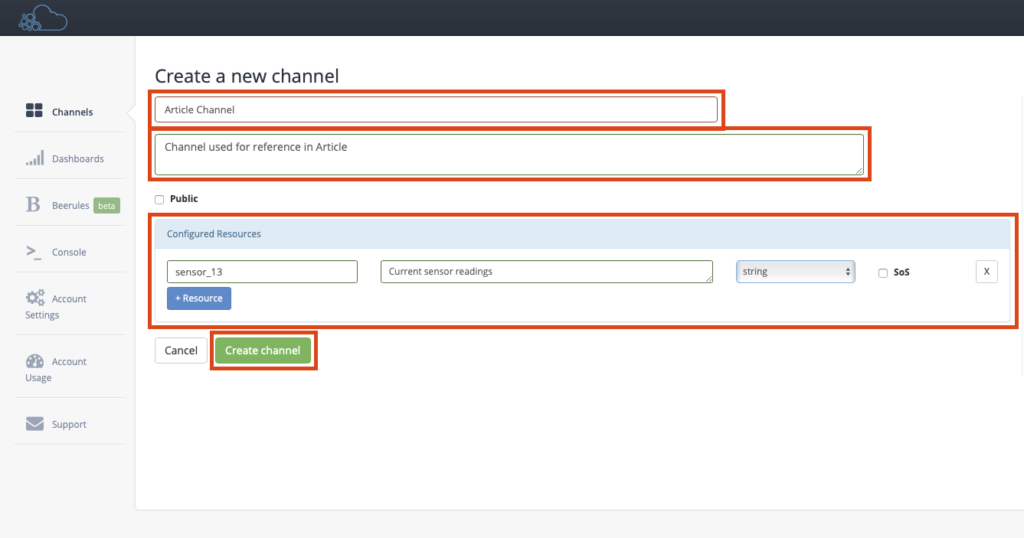
Here we need to input some information about the channel: Name, Description, and add some resources.
First enter a name for the channel, I named mine Article_Channel. This is really arbitrary so name it whatever you want.
Next you can optionally enter a description for the channel (Channel used for article purposes in my case).
In resource name we need to be a bit specific. The resource name should be “sensor_” and then the type of sensor you are using. I am using a 1 channel current sensor which has a sensor type of 13. You will need to consult the documentation for your particular sensor to see what it’s sensor type id number is. In my case I enter “sensor_13“
Next you can optionally enter a description for the resource (Current sensor readings in my case since I’m using a current sensor but enter anything you want there).
Set the Resource type to “string“.
Finally click Create channel.
After you create the channel you will be directed back to the channels page, however we still need one more piece of information so click on the channel you just created.
On the channel page you will see the Channel Token which will begin with “token_“. This authenticates the MQTT connection so we will need this token. Go ahead and copy that to a text editor so you have access to it later in this guide. You will also need to know the Channel name (“Article_Channel” in my case) and the resource name (“sensor_13” in my case) so you might go ahead and copy those down to your text editor so you have them for future reference.
This concludes setup of BeeBotte for this article. If you have copied all the relevant information down you can go ahead and close it if you like.
Step 2: NCD MQTT Gateway Setup
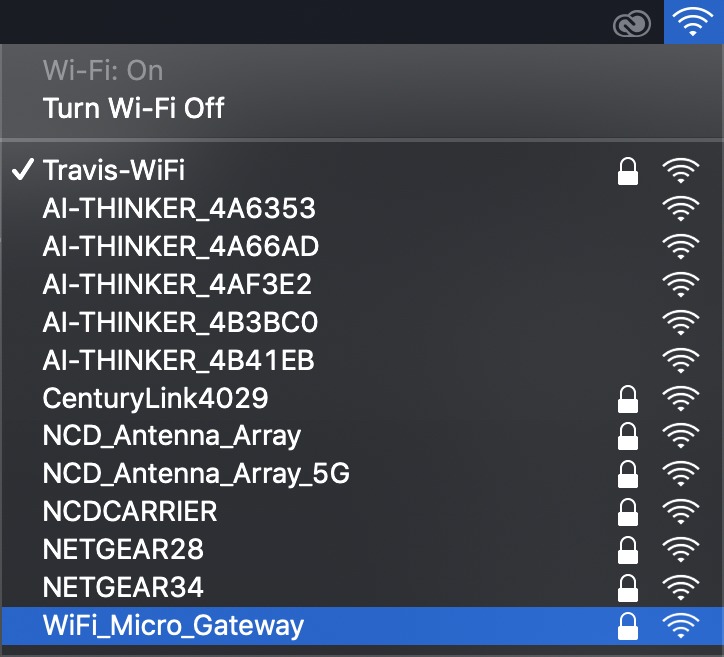
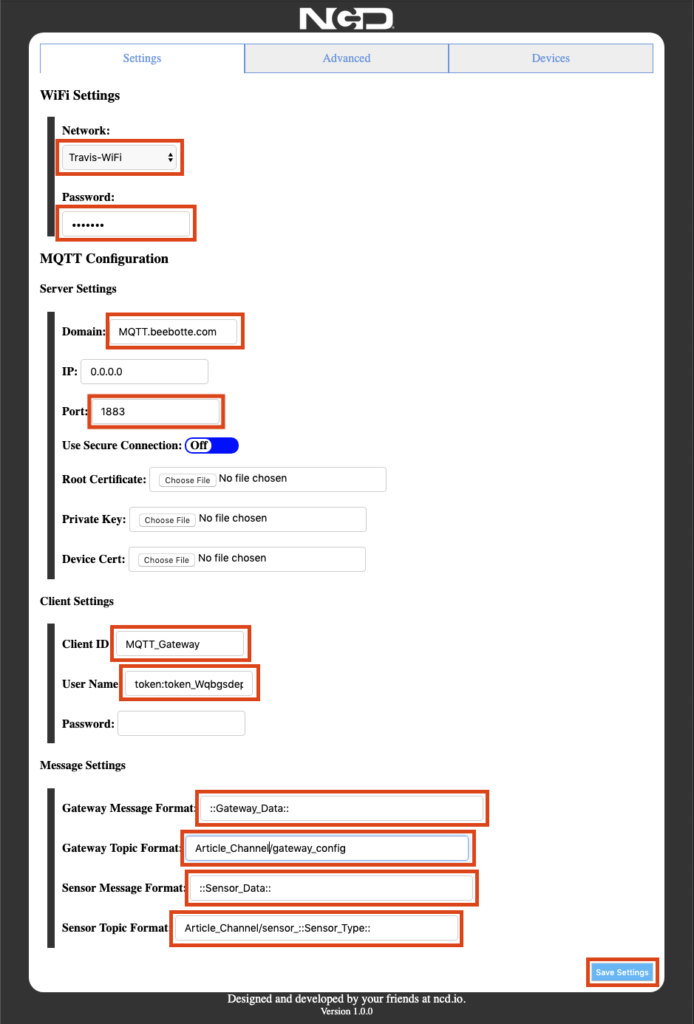
Make sure your Gateway is in setup modewhich is indicated by a flashing blue LED. Once it is in setup mode open the WiFi network preferences on your computer and scan for WiFi networks. The Gateway should show up in the WiFi network scan as WiFi Micro Gateway. Select WiFi_Micro_Gateway.
When prompted for a password enter: NCDBeast
Select your WiFi network from the drop down menu(Gateway needs to be in range of the WiFi router.
Enter the Password for the WiFi network.
For Domain Name enter mqtt.beebotte.com
For Port enter 1883
For Client ID you can enter anything you want, but you need to enter something. This is an identifier for the device being connected to BeeBotte over MQTT so I called mine “MQTT_Gateway“
For User Name you will need to enter: token: (+ the token which you copied for the Channel). So it should look something like token: token_XXXXXXXXXXX
For Gateway Message Format enter: ::Gateway_Data::
For Gateway Topic Format enter: “Name of Your Channel/gateway_config” so it should be something like “Article_Channel/gateway_config“. This will try to write data to a BeeBotte Resource(Topic) named “gateway_config“, now we don’t currently have a resource on our BeeBotte channel named “gateway_config” but it won’t hurt anything. You can go back to the BeeBotte channel and add a resource named “gateway_config” if you like.
For Sensor Message Format enter: ::Sensor_Data::
For Sensor Topic Format enter: Name of Your Channel/sensor_::Sensor_Type:: In my case I enter “Article_Channel/sensor_::Sensor_Type::“
I will not delve into this token based system where you are entering things like ::Sensor_Data:: for more information on that please consult the MQTT Gateway Guide.
After all of that click the Save Settings button.
After you click save settings the MQTT Gateway will reboot, connect to WiFi, and then connect to BeeBotte and start sending data. If the MQTT Gateway is flashing green then the Gateway is connected to BeeBotte and you can proceed. If the LED continuously flashes White then it is not able to connect to WiFi, if it is flashing red then there is an issue connecting to BeeBotte so you need to double check your settings in the gateway.
Step 3: MQTT Dash Setup on your Android Device
Download and install the MQTT Dash app on your Android device.
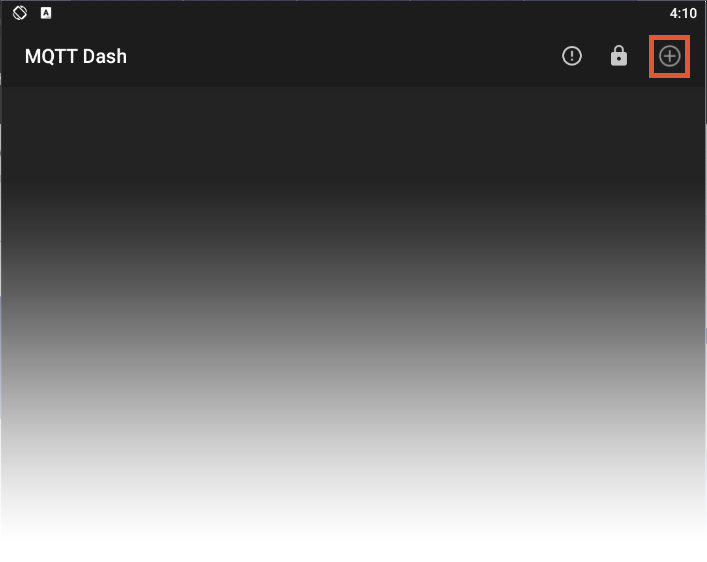
Once installed Open the MQTT Dash app and click the “+” button in the upper right hand corner.
Here we can setup the connection to the BeeBotte MQTT broker.
Make sure the Default (Automatically connect on start up) box is checked
Enter a name for this connection in MQTT Dash (Enter anything you want).
Enter “mqtt.beebotte.com” for the Address.
Enter “1883” for the Port.
Make sure “Enable connection encryption(SSL/TLS)” is not checked.
For User name enter: token:(The Token you copied from BeeBotte Channel)
For Client ID you can leave the default name MQTT Dash creates or enter something else.
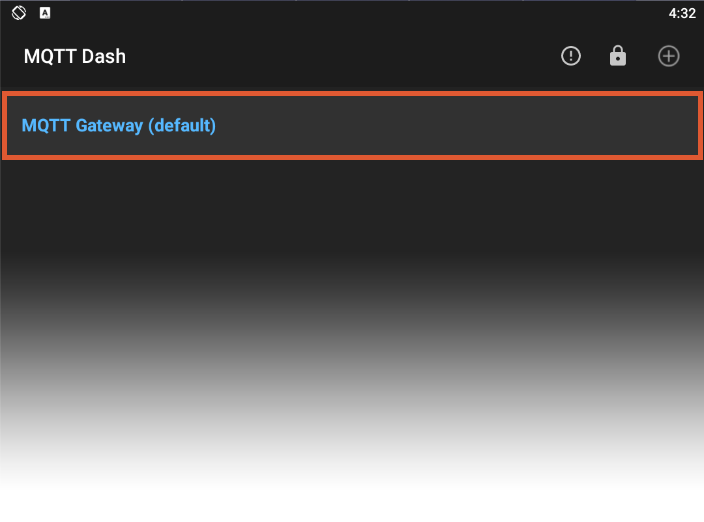
Click the Save Icon in the top right corner.
You’ll be taken back to MQTT Dash’s main window now. Click on the newly created Connection (MQTT Gateway (default) in my case).
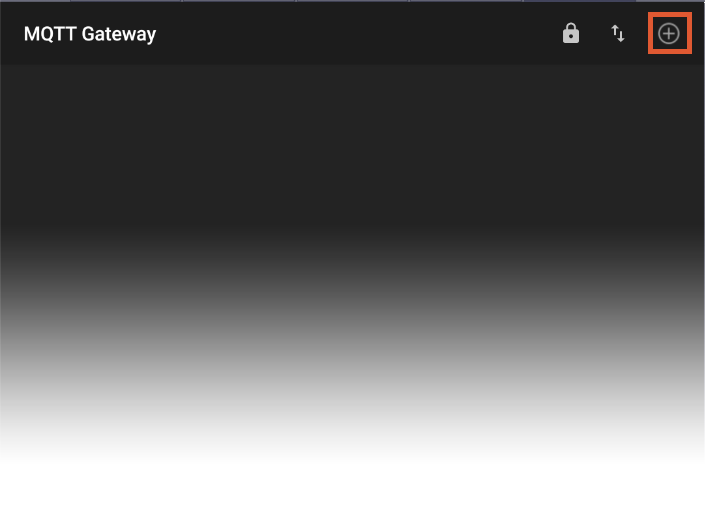
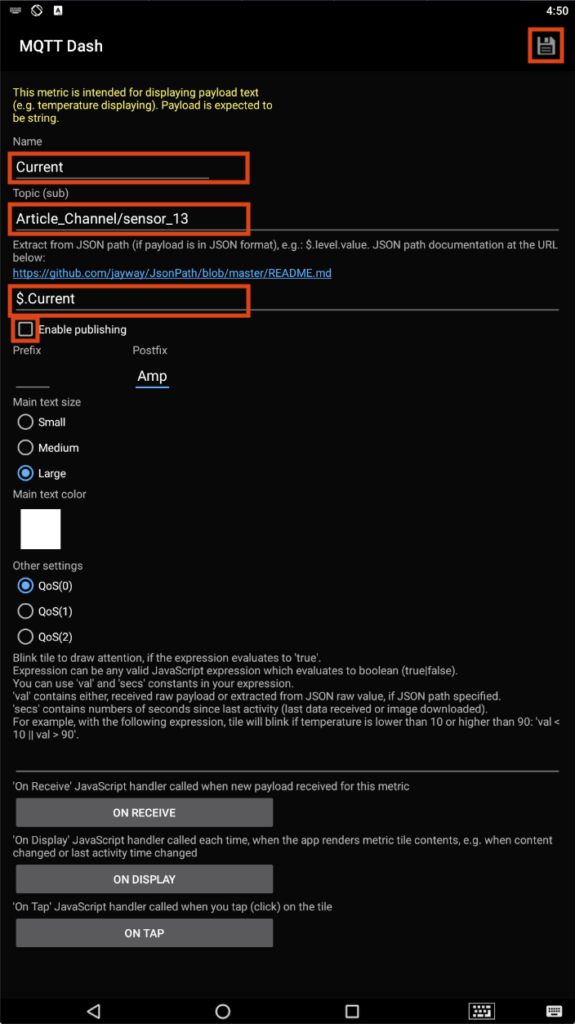
This will open the Dashboard for this MQTT connection. However we are not currently monitoring any Topics (or “Resources” as BeeBotte likes to call them). So click the “+” button in the upper right corner so we can add a topic/resource to monitor. When prompted to Choose type Select Text.
Enter a Name for the topic you are monitoring in the Name Field (“Current” in my case).
For Topic (sub) we need to enter: BeeBotte ChannelName/sensor_(+ whatever sensor type you have). So in my case it looks like “Article_Channel/sensor_13“
Now there is an “Extract from JSON path” field which is pretty handy. When our Sensor data comes through it will be in a JSON object form like: {“transmission_count”:1,”battery_level”:3.29406,”type”:13,”node _id”:0,”rssi”:100,”Current”:0} But we don’t want to display all of that, we just want the Current reading. So I’ll enter “$.Current“. You could however enter “$.Temperature $.Input_1” or whatever else applies to your particular sensor. Also if you are not sure what your sensor will be sending just leave this line blank to see the full JSON object, then edit to get only the information you want from that JSON object.
Uncheck Enable Publishing.
Feel free to change the color of the text and the size of the Tile if you like, then click the Save Icon in the upper right corner.
Step 4: Testing
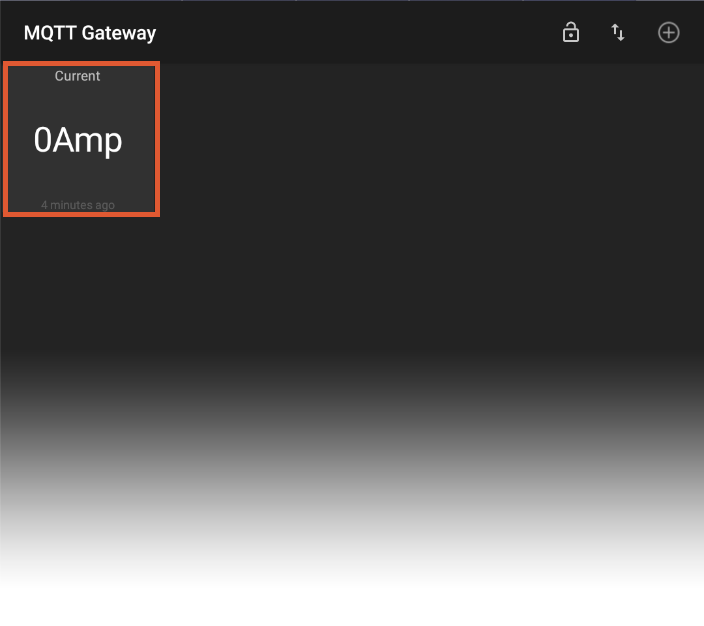
After you clicked save on the last step MQTT Dash will take you back to the dashboard for this BeeBotte connection. You should see a new “widget (or tile as beebotte calls it”). Go ahead and power up your sensor or press the reset button on it if it is already powered to force it to send a transmission. You should see data come in. Mine says “0 Amp” but that’s because it’s on my desk, the fact that there is a 0 there rather than nothing indicates it is working.
I hope this article was useful and of course you can add as many sensors in this way as you like, just add more resources to the BeeBotte channel and add more “tiles” to the MQTT Dash app.