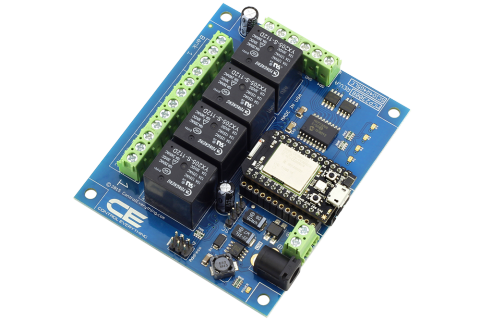
These guides will help you to make the most of your NCD Relay controller with Particle interface module. There are many ways to use this product so we will have several guides and tutorials to help you along. It should be noted that the Particle module in these controllers is not manufactured by NCD but by Particle you may visit their website here: www.particle.io To navigate these guides simply select a guide from the Menu on the left. Contextual links for each guide will appear below that menu. Enjoy.
IFTTT Setup
This guide will walk you through the process of setting up your new NCD Particle controller with pre-installed NCD/IFTTT firmware. We will explain the process step by step out of the box to a working solution for your application. We will discuss controlling relay outputs and monitoring digital inputs for monitoring/alert purposes. This guide is only applicable to boards with digital inputs, relays, or digital inputs and relays plus Particle Photon/Core interface modules(here on out will be referred to as your “controller”). It is not applicable for any other product. We should also notice that this guide will have you using accounts with Particle and IFTTT. These are both sites/services that NCD does not own however we have the up-most confidence in both companies to keep your information secure and confidential. If you have concerns you should contact them on your own behalf. NCD is not to be held liable for any wrong resulting from the use of these services. Lets get started!
Warning (Read before continuing):
It is very important during the setup process using the Particle App that you do not Flash the Tinker app. Doing so will require flashing NCD firmware into the module which can be quite complicated.
Connect Controller to Cloud
In order to communicate with IFTTT which is an internet based server our controller needs to be connected to the internet. This means your controller should be well within range of an accessible WiFi network. You will need to know the name of this network and the password/phrase required to associate with it. Setup of WiFi credentials to this controller requires either an Android or iOS device. We will use an app provided by Particle to store your WiFi credentials to the module. Your Android or iOS device will also need to be connected to the WiFi network you wish to connect the module to.

Android
Download and install the Particle application to your Android Device. The application is available on the google play store. Just search Particle. Then install the application. Make sure your controller is powered up and within range of your WiFi network, then start the Particle application.
If you do not already have an account with Particle you can create one from the app. This account will be very important to this process. Your controller will register to this account which will be it’s connection to the outside world. This account will send commands to the controller and the controller will send notifications/events to this account which. The IFTTT server will send commands to this account to be forwarded to your controller. IFTTT will also monitor events on this account pushed by your controller.
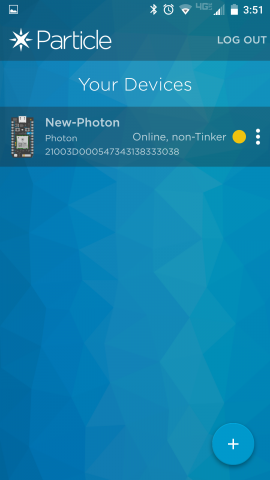
Follow the in App instructions which are very intuitive to associate your controller with your WiFi network. Once the controller is associated with your network you should see a slow breathing cyan LED on the module. Also the application should be able to tell you that your module is online. This means the module is communicating with Particles server. You should see something like the screen to the right.

Controller to Cloud Communication
Your controller has pre-loaded firmware in it which will listen for commands for controlling relays from your Particle account. If your controller has inputs it will also publish the status of these inputs to your Particle account when the controller first powers up and any time the status of these inputs change. At this point if your controller has a good connection to the internet(breathing Cyan LED) then it and your Particle account are ready for action.
We will not go into great detail as it is outside the scope of this guide but here is a general description of what is going on here.
There are essentially to communication paths here(only 1 if your controller only has relays).
The first is IFTTT sends a command to your Particle account which then in turn sends that command to your controller which in turn will control relays. Pretty simple.
The second is your controller publishes a variable to your Particle account. On interval IFTTT will connect to your account and check the status of variables if you have it setup to do so. This is how the controller will notify IFTTT that something happened like someone pushed the launch button. Keep in mind this is on an interval so it is not instant. You will experience some delays.
IFTTT is a great service which allows you to connect so many things using what they call If this then this(IFTTT) recipes. There are entirely to many possibilities to list in this guide but you could send an email when a button is pressed, turn on a relay in another location when a float switch is tripped, etc. The possibilities are nearly endless.
IFTTT account setup
At this point you should go to www.IFTTT.com and create an account if you have not done so already.
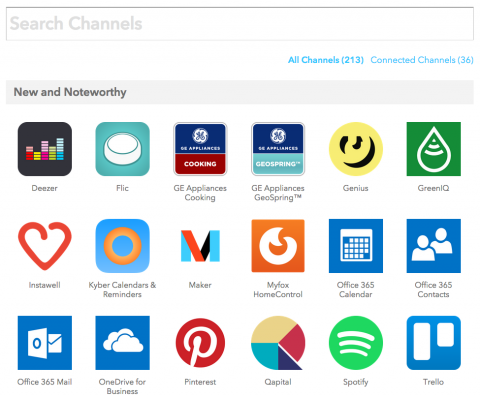
Once you have your IFTTT account created and you are logged in you need to connect your Particle account to your IFTTT account. This is quite easy. Just click on Channels at the top of IFTTT.com then in the Search Channels box type in Particle and click on the Particle Star logo that pops up below. Now on the Particle channel page click the Connect button. You will be taken to the sign in page for your Particle account. Enter your Particle account information and click Sign In. You will be prompted to allow IFTTT to access your Particle account, if you want to go any further you should say that is ok. You should now see that the Particle channel is now connected. IFTTT now has a communication channel to your Particle Cloud account and thus to your controller.

Channels
In the last step we connected your Particle account to IFTTT. IFTTT calls this a channel. Now this is not a TV channel, but a communication channel through which data can flow between these two accounts(IFTTT and Particle). You can connect several other channels to your IFTTT account and this is where IFTTT’s true power comes to light. You can connect your Gmail account for checking or sending emails. Connect your Android phone so you can send commands, receive notifications, etc. Link your Facebook account so a siren goes off when someone tags you in a post. The possibilities as we said earlier are endless. So now go and connect some channels to your IFTTT account. The site is quite intuitive through the IFTTT site.
In the next step we will be turning on a relay when we receive an email with a particular subject line. We will be using Gmail for this so if you have a Gmail account hook the channel up on your IFTTT account to follow along.

Lets get cooking
IFTTT calls its decisions recipes. IFTTT stands for If this then that. So a recipe consists of two parts. The action(this) and the reaction(that). So lets do the thing.
On IFTTT click My Recipes at the top. You will be shown a list of your Recipes or lack there of. Click the Create a Recipe button and you will be on your way.
We will create a Recipe that will turn on relay 1 when we receive an email with the subject “Help, Timmy fell down the well again!”

Step 1. Here we define the channel which will spark the action. Type in Gmail and then select the Gmail Channel(Note you must have first connected your Gmail to IFTTT by adding it as a channel).
Step 2. Here we define what Gmail will do to trigger this action. We will select “New email in inbox from search”.
Step 3. Here we enter the text in the email we want to search for; Naturally, “Help, Timmy fell down the well again!”
Step 4. Here we define the channel which will react to this action. In this case “Particle”, so type that in and then select the Particle channel logo that appears.
Step 5. Here we define what Particle will do when triggered. We will have particle call a function on our controller so select Call a function.
Step 6. Here we define which controller(the name of your Particle Module) and what function we are passing to it. This will be “controlRelay on ‘Your Module Name’ “. We also define here what Input to pass to the controller. This is where the NCD firmware comes in. It has a predefined list of commands it is listening for. These commands are outlined under IFTTT Relay Commands
So for this particular action we will enter 1On for input since we want relay 1 to turn on. You could use 1Toggle if you just want to turn the relay on and off for fun from the email.
Step 7. Enter a title for your recipe. You can also check the box to get a notification when the Recipe runs. This can be handy at first while learning but can quickly drive you mad.
That is it for this Recipe. You can now send your gmail account an email with the subject “Help, Timmy fell down the well again!”
Wait, nothing happened you’re thinking. Keep in mind IFTTT is free and every time it communicates it costs the company money. For this reason it does not check your Gmail account all that often so be patient, it will work. Or you can go to MyRecipes and click the refresh/check button and it will check your gmail account right then. Other recipes are really very fast. We will be adding more recipes and guides. See Additional guides on the left navigation bar.
IFTTT Do
IFTTT Do
So in our original IFTTT guide we showed you how to turn on a relay when an email was received indicating that Timmy had fallen down the well again. Well as we saw that can take a long time to trigger due to IFTTT only checking your gmail account every 15 minutes or so. Well what if we want to alert the proper authorities a bit faster about this horrible event and call for help. That is what IFTTT DO recopies are for. You will notice when you create a recipe on IFTTT you select IF or DO. Well this is going to be a DO recipe. In order to use this you should have the IFTTT DO app installed on your Android or iOS device so go to the app store and search for IFTTT DO and lets get started.

Add the Recipe
Open the newly installed DO Button app on your phone. All of our configuration will be done right here. No need to open the IFTTT site at all. If you get lost in the instructions below be sure to watch the video to the right, it will provide a visual step by step reference to what we are doing.
Step 1. Click the Add Recipe button button if prompted.
Step 2. Click the + button to add a new Recipe
Step 3. Swipe left twice to bring up the Channels Tab/View, or just tap the channels tab at the top of the screen. If the Particle channel is not viewable type Particle into the search to bring it up, then select the Particle channel.
Step 4. Click the Create a New Recipe button.
Step 5. For this Recipe we want to call a function on the module so click the “Call a function” button.
Step 6. Enter a name for the button at the top. I recommend keeping it short like “1 ON” since we will be turning on relay 1. Then select the function to call which should be “controlRelay on ‘Your module name’ “. Now we need to enter the argument to pass to the controller. We want to turn on relay 1 so we will pass “1on” as the Function Input. These commands are outlined in the Relay Commands guide.
After clicking the Add button you should be taken to a view where you can click the button to test it out. If needed you can edit this Do recipe here or on IFTTT.com Keep in mind Do Recipes can be added through IFTTT.com if you wish rather than through the app. To access your newly created button you need to open the app.
IFTTT Input Notifications
In this guide we will explain the setup of notifying IFTTT that an event has occurred, in the case of this example Input 1 on our controller has closed. This gives us endless possibilities for triggering other actions on IFTTT such as sending email/text notifications, triggering relays on other boards, etc.The firmware in your controller will post events to the Particle server. IFTTT can monitor the Particle server on your account’s behalf to see if anything interesting has happened and if so do something about it. Events published to the Particle server have an Event name and a value. If you want to check the status of Input 1 then the name of that event is Input_1 The same goes for other inputs(Input_2, Input_3, etc). These events also have values which in the case of these digital inputs are either On or Off. If the input on the board is closed the value will be ON, if the input on the board is Opened the value will be OFF. Keep in mind these event names and values are case sensitive. So enough talking lets get cooking.
Create Recipe
Our Trigger channel in this Recipe will be Particle. The Action Channel will be Android Notifications. We will be getting a Notification on our Android device when Input 1 on our board closes which is probably a PIR sensor at the bottom of a well because Timmy fell down there again. He cant expect us to keep bailing him out though. Make sure you have the IFTTT app installed on your Android device, if not just search IFTTT on the google play store and install it. You will also need to make sure the Android Notification Channel says connected on IFTTT. Once you have your Android device connected to IFTTT we are ready. So go to www.IFTTT.com and click My Recipes at the top, make sure you are on the IF tab, then click the Create a Recipe button.
Step 1. Start typing Particle in the channel search box, the select the Particle Channel.
Step 2. We will be monitoring an Event that the controller posts so select New event published
Step 3. Enter Input_1 for Event Name and ON for Event Contents. Then select your Particle module from the Device Name or ID drop down menu.
Step 4. Start typing Android into the channel search box, then select Android Notifications.
Step 5. Click on the only option for Android Notifications which fittingly is Send a notification.
Step 6. Enter the Notification you would like to receive when Input 1 on the board closes like: “Guess what, Timmy fell down the well again.”
Step 7. Enter a name for this recipe.
Now generate a contact closure on the first Input on your board. You should get a notification on your device letting you know that Timmy, who I am beginning to believe has some deep seeded issues, has once again fallen down the well.
You may also monitor events on your board through Particles new Dashboard This is handy for monitoring whether or not your controller is online when Events occur, when IFTTT checks in, etc.

Hardware Notes
Often we will refer to inputs 1, 2, 3, etc. This does not however always correspond to the labeling on your controller. When we refer to Input 1 we are referring to the first GPIO port on your controller. Keep in mind some controllers do not have GPIOs and some controllers do not have relays.
IFTTT Relay Commands
IFTTT Relay Commands
This is a list of the commands that may be passed to your NCD Particle Relay controller. These are passed as Function Input in Function Calls when creating an IFTTT recipe.
If Your controller has only 1 relay then these are the commands for it
- ON
- OFF
- TOGGLE
- MOMENTARY
If your controller has more than 1 relay then these are the commands for it
- TurnOnAllRelays
- TurnOffAllRelays
- SetBankStatus
- SetBankStatus:var For controllers with 8 or less relays. var is a number from 0-255. Example SetBankStatus:255 would turn on all relays
- SetBankStatus:var1,var2 For controllers with more than 8 relays. var1 is a number from 1-4(bank), var2 is a number from 0-255. Example SetBankStatus:2,255 would turn on relays 9-16.
- varOn var is is the relay number you want to turn on. Example: 1On would turn on relay 1.
- varOff var is is the relay number you want to turn off. Example: 1Off would turn off relay 1.
- varToggle var is the relay number you want to toggle the state of. Example 1Toggle would turn relay 1 on if it were previously off or off if it were previously on.
- varMomentary var is the relay number you want to turn on for 300 milliseconds then back off. Example 1Momentary would turn relay 1 on for 300 milliseconds, then back off.
Commands listed above are not case sensitive. 1ON will work the same as 1on.


