This guide will walk you through the process of setting up your new NCD Particle controller with pre-installed NCD/IFTTT firmware. We will explain the process step by step out of the box to a working solution for your application. We will discuss controlling relay outputs and monitoring digital inputs for monitoring/alert purposes. This guide is only applicable to boards with digital inputs, relays, or digital inputs and relays plus Particle Photon/Core interface modules(here on out will be referred to as your “controller”). It is not applicable for any other product. We should also notice that this guide will have you using accounts with Particle and IFTTT. These are both sites/services that NCD does not own however we have the up-most confidence in both companies to keep your information secure and confidential. If you have concerns you should contact them on your own behalf. NCD is not to be held liable for any wrong resulting from the use of these services. Lets get started!
Warning (Read before continuing):
It is very important during the setup process using the Particle App that you do not Flash the Tinker app. Doing so will require flashing NCD firmware into the module which can be quite complicated.
Connect Controller to Cloud
In order to communicate with IFTTT which is an internet based server our controller needs to be connected to the internet. This means your controller should be well within range of an accessible WiFi network. You will need to know the name of this network and the password/phrase required to associate with it. Setup of WiFi credentials to this controller requires either an Android or iOS device. We will use an app provided by Particle to store your WiFi credentials to the module. Your Android or iOS device will also need to be connected to the WiFi network you wish to connect the module to.
Android
Download and install the Particle application to your Android Device. The application is available on the google play store. Just search Particle. Then install the application. Make sure your controller is powered up and within range of your WiFi network, then start the Particle application.
If you do not already have an account with Particle you can create one from the app. This account will be very important to this process. Your controller will register to this account which will be it’s connection to the outside world. This account will send commands to the controller and the controller will send notifications/events to this account which. The IFTTT server will send commands to this account to be forwarded to your controller. IFTTT will also monitor events on this account pushed by your controller.
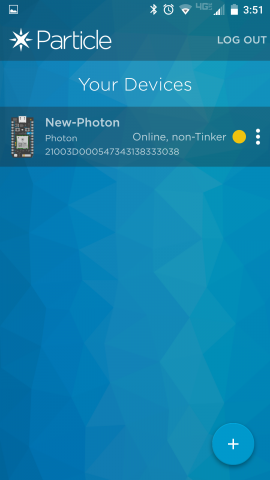
Follow the in App instructions which are very intuitive to associate your controller with your WiFi network. Once the controller is associated with your network you should see a slow breathing cyan LED on the module. Also the application should be able to tell you that your module is online. This means the module is communicating with Particles server. You should see something like the screen to the right.
Controller to Cloud Communication
Your controller has pre-loaded firmware in it which will listen for commands for controlling relays from your Particle account. If your controller has inputs it will also publish the status of these inputs to your Particle account when the controller first powers up and any time the status of these inputs change. At this point if your controller has a good connection to the internet(breathing Cyan LED) then it and your Particle account are ready for action.
We will not go into great detail as it is outside the scope of this guide but here is a general description of what is going on here.
There are essentially to communication paths here(only 1 if your controller only has relays).
The first is IFTTT sends a command to your Particle account which then in turn sends that command to your controller which in turn will control relays. Pretty simple.
The second is your controller publishes a variable to your Particle account. On interval IFTTT will connect to your account and check the status of variables if you have it setup to do so. This is how the controller will notify IFTTT that something happened like someone pushed the launch button. Keep in mind this is on an interval so it is not instant. You will experience some delays.
IFTTT is a great service which allows you to connect so many things using what they call If this then this(IFTTT) recipes. There are entirely to many possibilities to list in this guide but you could send an email when a button is pressed, turn on a relay in another location when a float switch is tripped, etc. The possibilities are nearly endless.
IFTTT account setup
At this point you should go to www.IFTTT.com and create an account if you have not done so already.
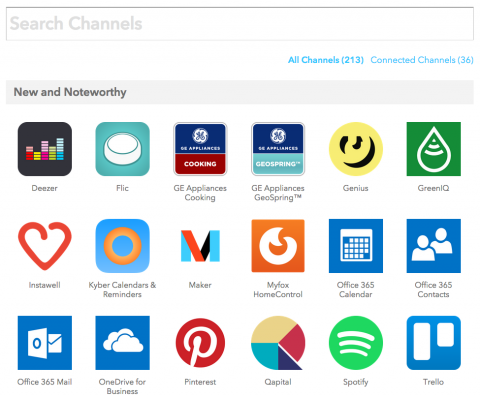
Once you have your IFTTT account created and you are logged in you need to connect your Particle account to your IFTTT account. This is quite easy. Just click on Channels at the top of IFTTT.com then in the Search Channels box type in Particle and click on the Particle Star logo that pops up below. Now on the Particle channel page click the Connect button. You will be taken to the sign in page for your Particle account. Enter your Particle account information and click Sign In. You will be prompted to allow IFTTT to access your Particle account, if you want to go any further you should say that is ok. You should now see that the Particle channel is now connected. IFTTT now has a communication channel to your Particle Cloud account and thus to your controller.

Channels
In the last step we connected your Particle account to IFTTT. IFTTT calls this a channel. Now this is not a TV channel, but a communication channel through which data can flow between these two accounts(IFTTT and Particle). You can connect several other channels to your IFTTT account and this is where IFTTT’s true power comes to light. You can connect your Gmail account for checking or sending emails. Connect your Android phone so you can send commands, receive notifications, etc. Link your Facebook account so a siren goes off when someone tags you in a post. The possibilities as we said earlier are endless. So now go and connect some channels to your IFTTT account. The site is quite intuitive through the IFTTT site.
In the next step we will be turning on a relay when we receive an email with a particular subject line. We will be using Gmail for this so if you have a Gmail account hook the channel up on your IFTTT account to follow along.
Lets get cooking
IFTTT calls its decisions recipes. IFTTT stands for If this then that. So a recipe consists of two parts. The action(this) and the reaction(that). So lets do the thing.
On IFTTT click My Recipes at the top. You will be shown a list of your Recipes or lack there of. Click the Create a Recipe button and you will be on your way.
We will create a Recipe that will turn on relay 1 when we receive an email with the subject “Help, Timmy fell down the well again!”

Step 1. Here we define the channel which will spark the action. Type in Gmail and then select the Gmail Channel(Note you must have first connected your Gmail to IFTTT by adding it as a channel).
Step 2. Here we define what Gmail will do to trigger this action. We will select “New email in inbox from search”.
Step 3. Here we enter the text in the email we want to search for; Naturally, “Help, Timmy fell down the well again!”
Step 4. Here we define the channel which will react to this action. In this case “Particle”, so type that in and then select the Particle channel logo that appears.
Step 5. Here we define what Particle will do when triggered. We will have particle call a function on our controller so select Call a function.
Step 6. Here we define which controller(the name of your Particle Module) and what function we are passing to it. This will be “controlRelay on ‘Your Module Name’ “. We also define here what Input to pass to the controller. This is where the NCD firmware comes in. It has a predefined list of commands it is listening for. These commands are outlined under IFTTT Relay Commands
So for this particular action we will enter 1On for input since we want relay 1 to turn on. You could use 1Toggle if you just want to turn the relay on and off for fun from the email.
Step 7. Enter a title for your recipe. You can also check the box to get a notification when the Recipe runs. This can be handy at first while learning but can quickly drive you mad.
That is it for this Recipe. You can now send your gmail account an email with the subject “Help, Timmy fell down the well again!”
Wait, nothing happened you’re thinking. Keep in mind IFTTT is free and every time it communicates it costs the company money. For this reason it does not check your Gmail account all that often so be patient, it will work. Or you can go to MyRecipes and click the refresh/check button and it will check your gmail account right then. Other recipes are really very fast. We will be adding more recipes and guides. See Additional guides on the left navigation bar.