Introduction
In this guide we will discuss the functionality and use of the NexGen modules. The NexGen module implements all the same functionality from our previously supplied WiFi Bluetooth and USB modules but adds additional functionality including a simple web interface for configuration, Bluetooth interface, USB interface, we built in web interface for rudimentary control of select relay products, and MQTT compatibility. We will now cover the configuration of the module.
Configuring the NexGen module
To configure a new NexGen module make sure it is installed in a Host board(Relay controller or other product) and it’s LED is flashing Blue. A Blue flashing LED indicates it is in configuration mode. In this mode the module will appear as a WiFi Access point and should show up as an available WiFi network on your computer called NCD_NexGen. Connect to the NCD_NexGen network and enter NCDBeast as the password.
Your computer may now automatically pop up a browser window where you can configure the module. If not simply open your web browser and enter 172.217.28.1
You should now see the Configuration Web Interface. We will now cover those options.
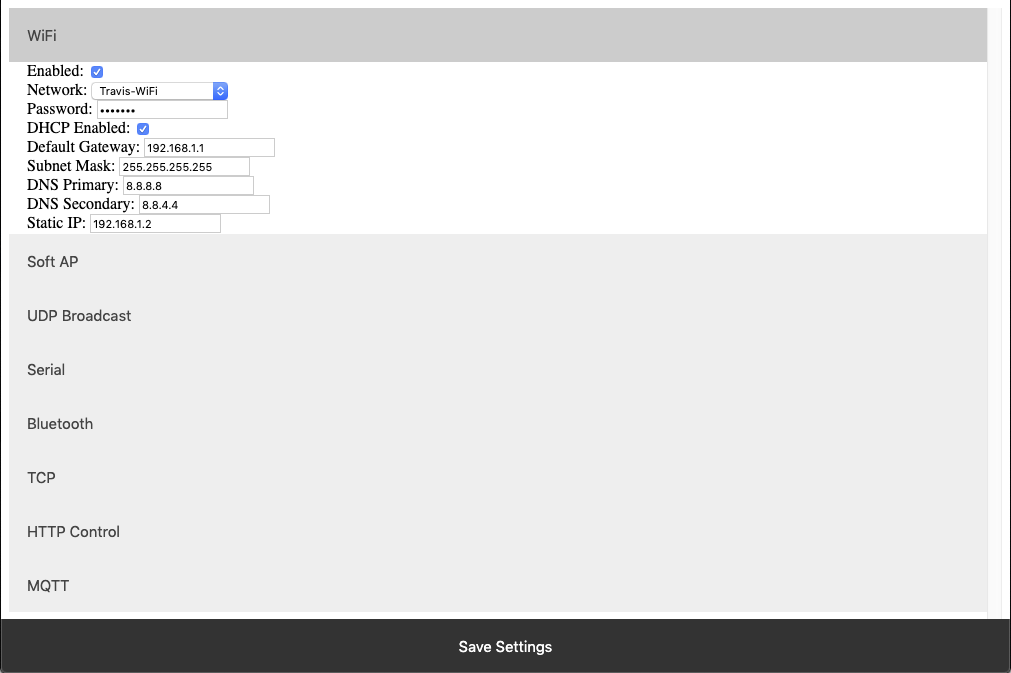
WiFi
Here we will cover the WiFi options section of configuration. These are configuration options for associating the WiFi module with your WiFi network. Note that the NexGen module will scan for networks on initial power up and these will be displayed. If you have a hidden network(does not broadcast an SSID) please contact support.
Enabled
- This setting configures whether or not the module should attempt to associate with a WiFi Network.
Network
- This Setting indicates the SSID of the network the module should associate with on power up.
Password
- This Setting indicates the password which should be used to associate with the network configured through the Network setting.
DHCP Enabled
- This setting indicates whether the NexGen module should obtain an IP address from a DHCP managed router or if it should use following static IP address settings. Checked indicates to utilize DHCP(Recommended for most applications).
Default Gateway
- This setting indicates the default gateway the module should communicate through(IP of router). This setting is only applicable if DHCP is not checked.
Subnet Mask:
- This setting indicates the subnet mask which should be utilized on the network. This setting is only applicable if DHCP is not checked.
DNS Primary
- This setting indicates the default DNS server to utilize for internet connection to host URLs. This setting is only applicable if DHCP is not checked. If DHCP is checked the default DNS server of the network router will be used.
DNS Secondary
- This setting indicates the backup DNS server to utilize for internet connection to host URLs. This setting is only applicable if DHCP is not checked. If DHCP is checked the backup DNS server of the network router will be used.
Static IP
- This setting indicates the Static IP address the NexGen module should utilize once connected to the host network. This setting is only applicable if DHCP is not checked.
Soft AP
In configuration mode the NexGen module is broadcasts and SSID which devices can connect to. This Soft AP is configurable. It is possible to change the broadcast SSID network name, the password for authenticating, and the default web interface which should be displayed to the user upon initial connection. We will cover those settings here.
Soft AP SSID
- The SSID the NexGen Module should broadcast while in configuration mode.
Soft AP Password
- The authentication password required for associating with the NexGen Module’s network.
Default HTML Page
- Some devices support captive gateways. This setting determines the web interface to display to the user through the captive portal upon initial connection.

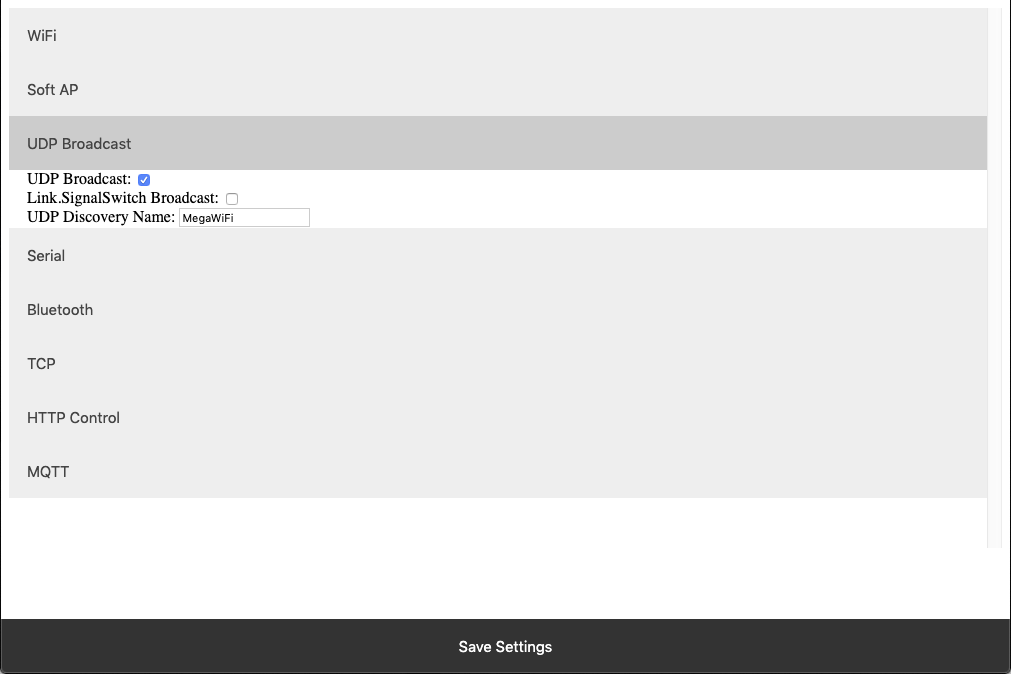
UDP Broadcast
The NexGen module broadcasts a UDP packet on ports 55555 and 13000 for network discovery purposes. These settings enable this broadcast, forward the broadcast to link.signalswitch.com and alter the name in the discovery packet.
UDP Broadcast
- This setting indicates whether or not the WiFi module should send out a network discovery UDP packet on interval.
Link.SignalSwitch Broadcast
- This setting indicates whether or not the WiFi module should send a discovery packet to link.signalswitch.com on interval or not.
UDP Discovery Name
- This setting configures the Name field to be send in UDP broadcast packets. This can be used to differentiate multiple devices on the same network.
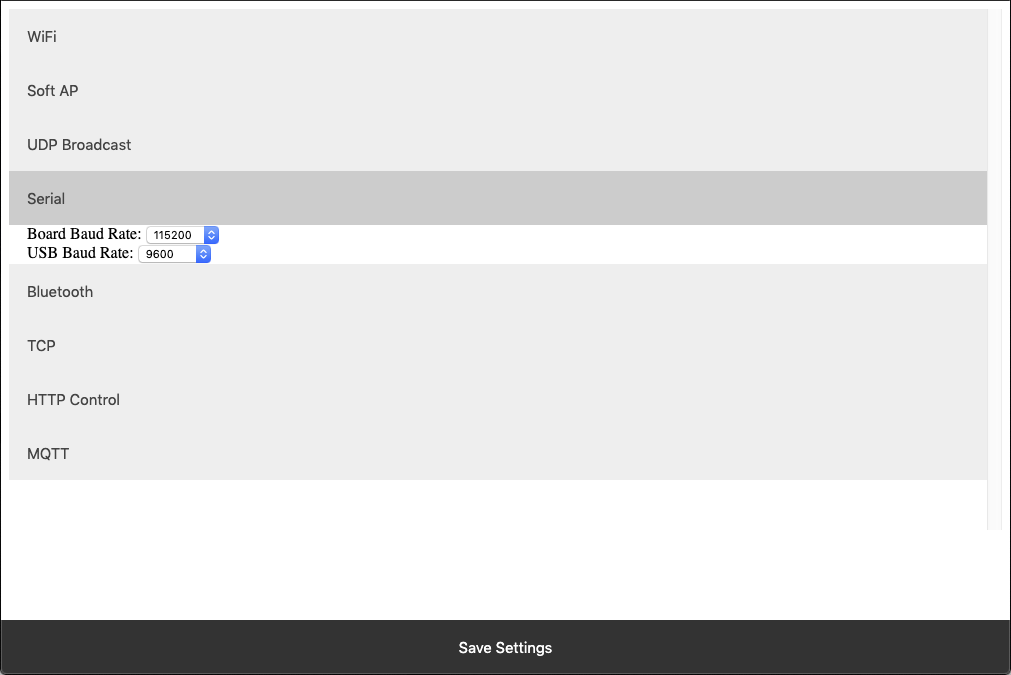
Serial
The WiFi module technically has two serial interfaces. One which communicates through the USB port on the module and a second that communicates to the host board. These settings apply to those ports. Keep in mind most Host boards manufactured by NCD have a default baud rate of 115200.
Board Baud Rate
- Baud rate of the NexGen module’s serial interface connected to the Host board. Most NCD boards have a default baud rate of 115200. This setting must match the baud rate of the host board.
USB Baud Rate
- The baud rate for WiFi module’s USB connection. Software connected to the board via USB must match this baud rate.
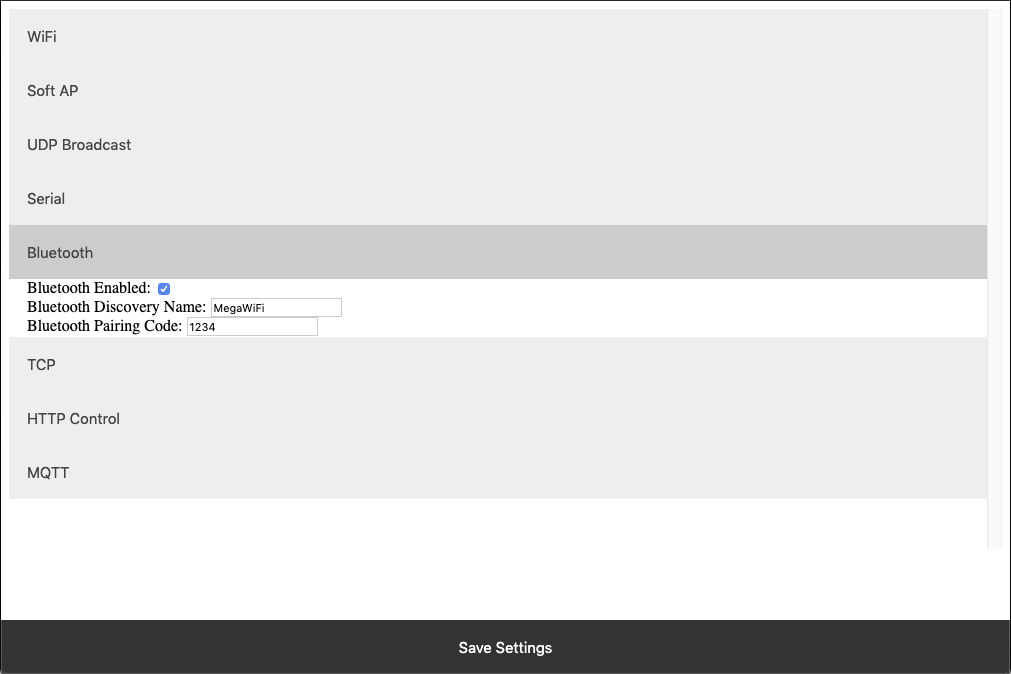
Bluetooth
The NexGen module supports Bluetooth connectivity via the Bluetooth Classic protocol. It implements the functionality of a Bluetooth Serial Port Profile device(SPP). It does not implement Bluetooth 4.0 or LE functionality and thus is not compatible with all devices such as iOS.
Bluetooth Enabled
- This setting indicates whether or not the NexGen Module should implement bluetooth connectivity.
Bluetooth Discovery Name
- This is the name which will appear in Bluetooth device scans.
Bluetooth Pairing Code
- Pairing code required for Bluetooth pairing with the device.
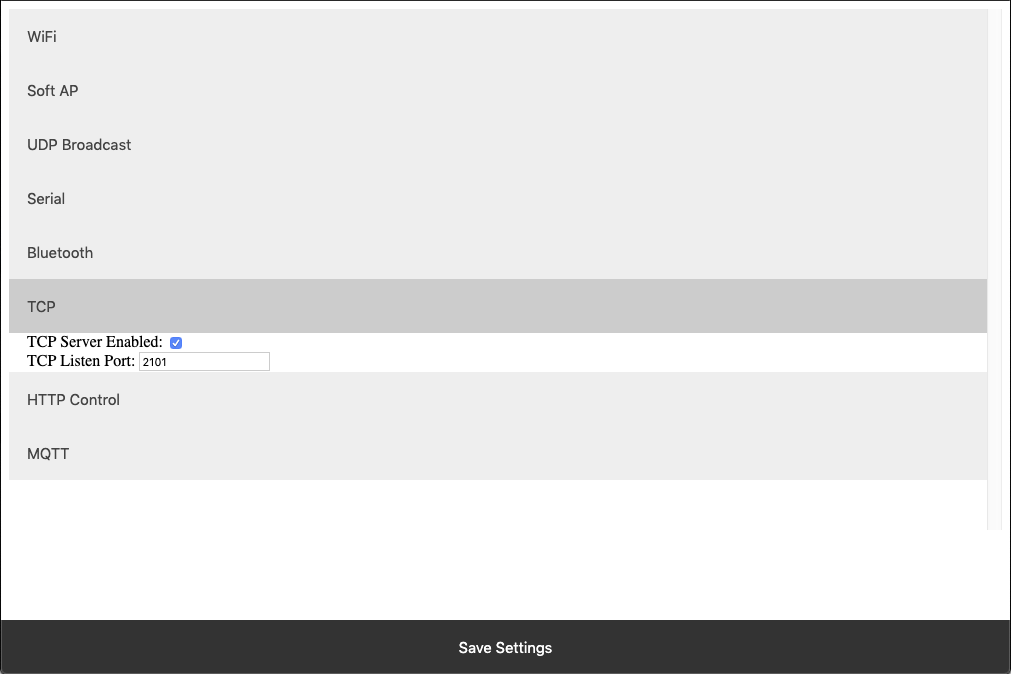
TCP
The NexGen module implements the functionality of a TCP server. In this implementation the module opens a socket which clients(software) can connect too . These settings configure this TCP Server functionality.
TCP Server Enabled
- Whether or not to allow TCP clients to connect.
TCP Listen Port
- The port on which to listen and allow for TCP Client connections.
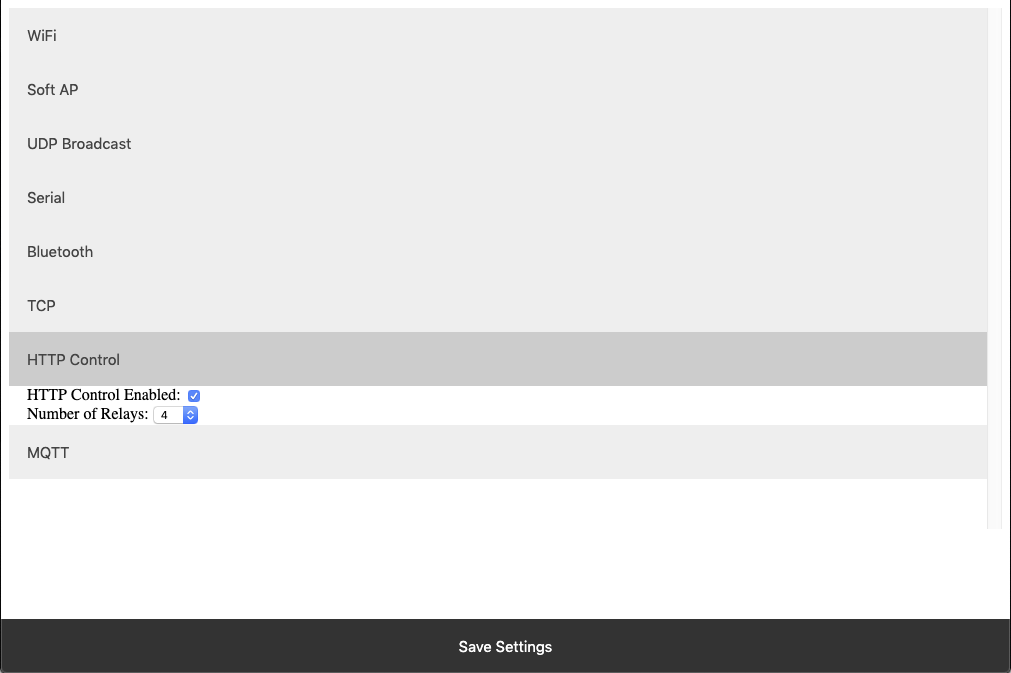
HTTP Control
The NexGen module supports a rudimentary web interface for manually turning relays on and off. This interface only supports ProXR, ProXR Lite, Fusion, and Taralist relay controllers with 8 or fewer relays. This interface is available at {device IP address}/Control
HTTP Control Enabled
- Whether or not to display the HTTP control interface.
Number of Relays
- This setting determines the number of relay control sets to display on the control interface. Match this to the number of relays on the board.
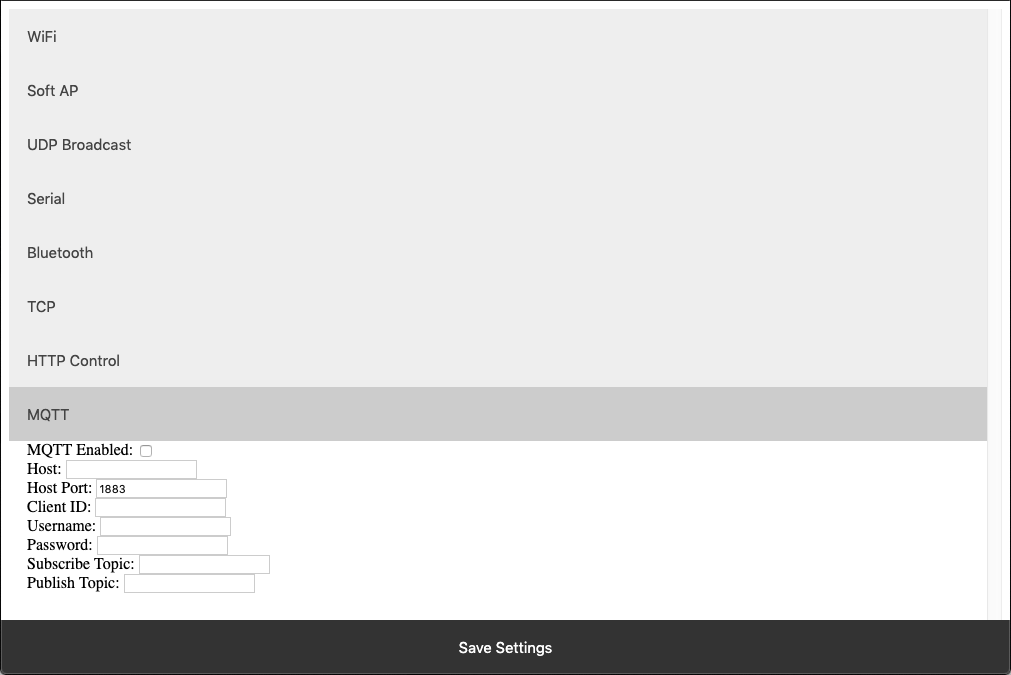
MQTT
The NexGen module supports very basic MQTT usage. It can be configured to connect to an MQTT broker using no auth or basic auth(username/password). Testing of this functionality was done using beebotte.com
The module only implements one subscribe topic and one publish topic. It listens for control commands over the subscribe topic and sends command responses to the publish topic. Commands should be published to the subscribe topic in a JSON packet. The JSON packet must contain one key value pair with a key of sendCommand and the value for that pair must be a JSON array of command bytes. Example: {“sendCommand”:[254,108,1]}. The WiFi module will publish data received from the host board to the Publish topic. This Publish payload will contain a JSON packet. The format of the packet is a single key value pair with the key of data and the value will be an array of bytes. Example: {“data”:[170,1,85,1]}
MQTT Enabled
- Whether or not to implement MQTT functionality and establish connection to an MQTT broker on boot.
HOST
- The Host URL for The MQTT broker.
Host Port
- The port on which to connect to The MQTT broker.
Client ID
- The Client ID to use for The MQTT connection.
Username
- The user name to use for basic authentication with The MQTT broker.
Password
- The password to use for basic authentication with The MQTT broker.
Subscribe Topic
- The Topic to subscribe to for host board control commands
Publish Topic
- The Topic which to publish data to when data is received from the Host board.
HTTP API
The NexGen module supports HTTP GET requests for sending commands to the host board. There are a few different end points for the HTTP Get requests:
/relayCount
- A Get request to this end point will return the number of relays on the board(this is configured under Number of relays setting under HTTP Control.
- Example: 192.168.1.10/relayCount
/relayON
- A GET request to this end point will turn the specified relay on. This GET request requires one arg with the key relay and the value of the relay which to control(valid range for relay number is 1-256)
- The board should respond to this GET request with an 85.
- Example: 192.168.1.10/relayON?relay=1
/relayOFF
- A GET request to this end point will turn the specified relay off. This GET request requires one arg with the key relay and the value of the relay which to control(valid range for relay number is 1-256)
- The board should respond to this GET request with an 85.
- Example: 192.168.1.10/relayOFF?relay=1
/sendCommand
- A GET request to this end point allows the user to send any command to the board they wish. This GET request requires one arg with the key of data and a value of an array of bytes which to send to the host board.
- Once the host board has processed the command this GET request will respond with the data returned from the host board.
- Example: 192.168.1.10/sendCommand?data:[254,108,1]
Web Socket
The NexGen module supports web sockets. Users can establish a web socket to the board via ws://{controller IP}/ws
This web socket expects command bytes to be sent in the form of a JSON array, for example “[254,108,1]”. Note this array should be sent in TEXT/String format as shown with quotes.
Any data received from the host board will be sent to the web socket in the same format(JSON Array).
RGB status LED
The NexGen module has an RGB status LED which is used to indicate the current state of the module to the user visually. Possible statuses are:
Flashing Green
- The module is running normally but no connections to it have been established.
Solid Green
- The module is running normally and a connection has been established with the board via software. This will happen when a TCP socket is connected to the board.
Flashing Blue
- Module is in configuration mode and should appear as a network in WiFi Scans.
Flashing Yellow
- Module is booting.
Orange Flash
- The LED will flash Orange any time data is received over any connection(USB, TCP, Bluetooth, MQTT, etc).
Flashing Red
- Indicates the module is unable to connect to the WiFi network.
Taralist
Taralist NTP Sync Enabled
- This option enables Network Time Protocol time syncing of the Taralist Real Time clock. When enabled, once per day the NexGen module will sync it’s time with time.google.com, then it will update the on board Taralist Real Time clock. Note that this feature is only valid on Taralist series relay controllers and will only work if WiFi is enabled and internet connectivity is present on the connected WiFi Network.
UTC Timezone Offset
- This setting determines the timezone for NTP clock syncing. Set it to your particular timezone’s UTC offset not factoring in DST. For instance Central Standard Time’s UTC offset is -6, Eastern Standard Time is -5, etc.
Enable Daylight Savings Time
- When enabled the controller will offset it’s clock during Daylight savings time.
Viewing the NexGen Module’s NTP time and the on board Taralist Real Time Clock Time.
- After Taralist settings have been entered and WiFi settings have been entered and saved to the NexGen module it should connect to your WiFi network and the RGB LED should be flashing green indicating everything is functional. On a computer on the same network as the controller open a web browser and enter the controller’s IP address followed by /Taralist for example: 192.168.0.2/Taralist. The returned HTML page will display both the NTP clock time and the on board Taralist real time clock time. This time is updated nearly once per second. If everything looks valid go ahead and close the page, Taralist is now fully functional. Note do not leave this page open as it taxes the processor to update the web page once per second.