WiFi Sensor User Guide for use with MQTT
Introduction
MQTT allows the complete line of NCD WiFi sensors to communicate via the internet to any MQTT Broker service using a WiFi connection. It only requires network connection credentials, connection information about the MQTT Host Broker, and authentication information for the MQTT connection if applicable.
The WiFi Sensor for MQTT supports connection to MQTT Brokers via open connection, basic authentication, as well as TLS. Topics and message payload formats are fully customizable for compatibility with each MQTT Broker service. WiFi communication is also fully encrypted for the security of each device.
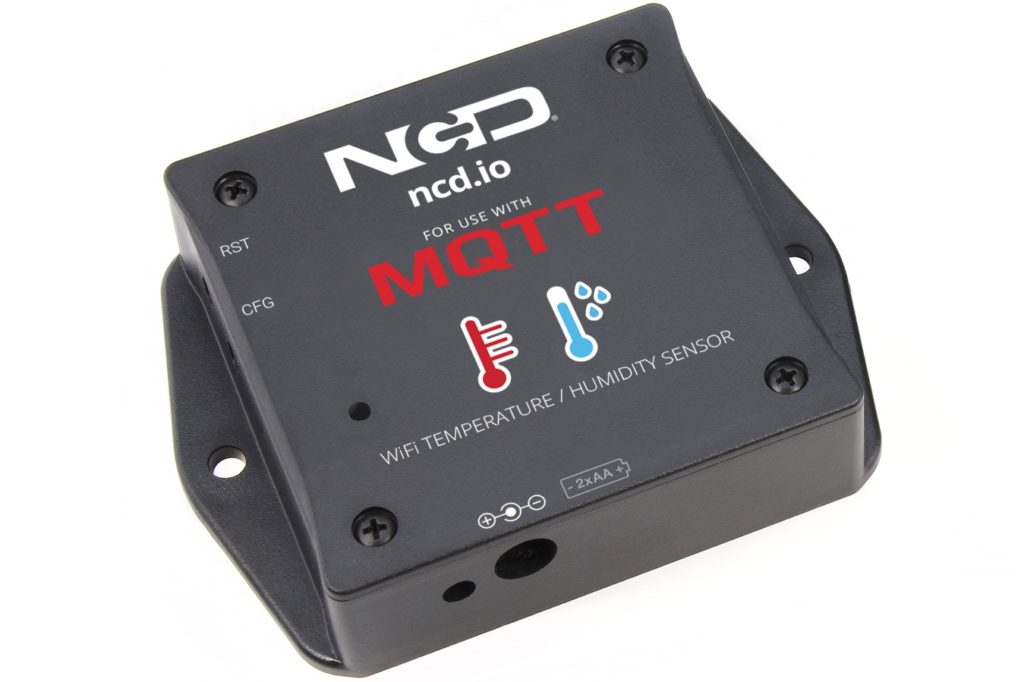
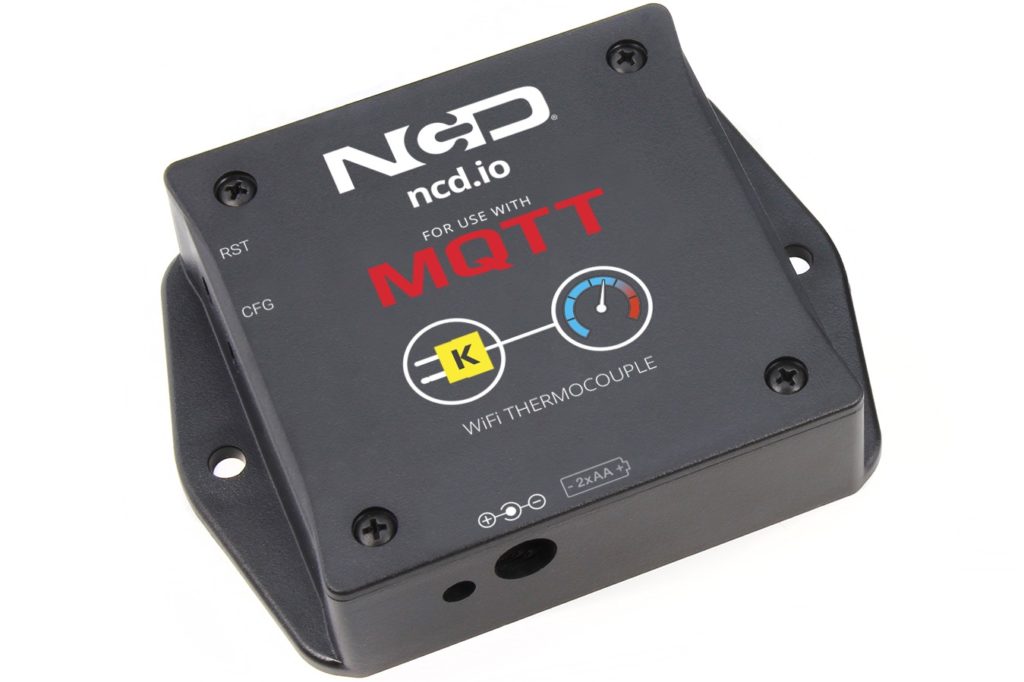
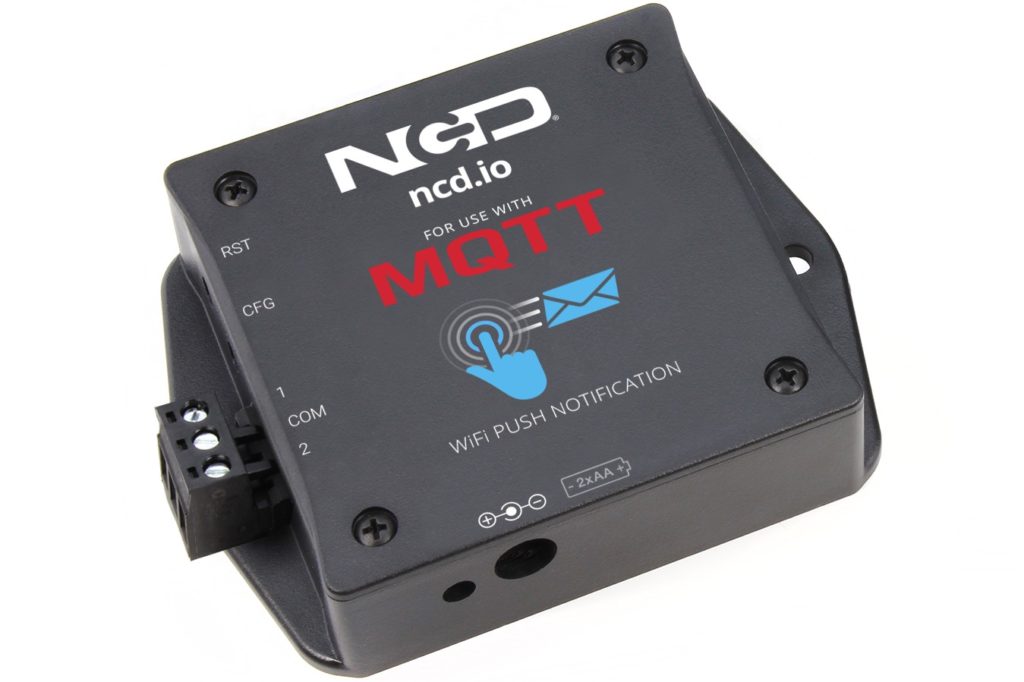
This guide is applicable to all of the NCD WiFi MQTT Sensors. Some information such as the displayed data at the end of this guide may differ depending on the sensor in use. To get started using the WiFi MQTT Sensor, follow the steps outlined below.

Setup Instuctions
Getting Started
This guide is broken up into 3 sections:
- MQTT Broker
- Web Interface Sensor Settings
- MQTT.fx
Each sections contains step-by-step instructions on how to setup the WiFi Sensor for use with MQTT. Follow the sections in order for a stress free, easy setup.
Step 1. Establish a MQTT Broker
When the WiFi sensor begins transmitting data, it needs a location to transmit data to. It needs a broker. Therefore, a channel must be created on beebotte.com. Although a different broker can be used, this guide uses beebotte for example. It is a free, valid MQTT broker that happens to be easy to use.

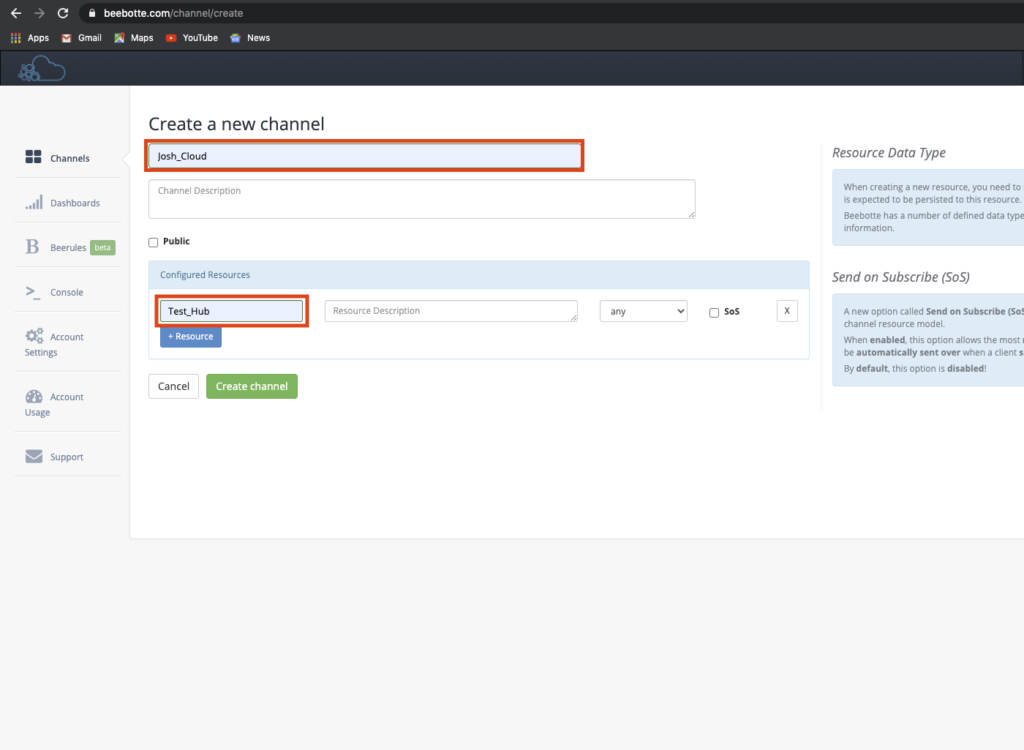
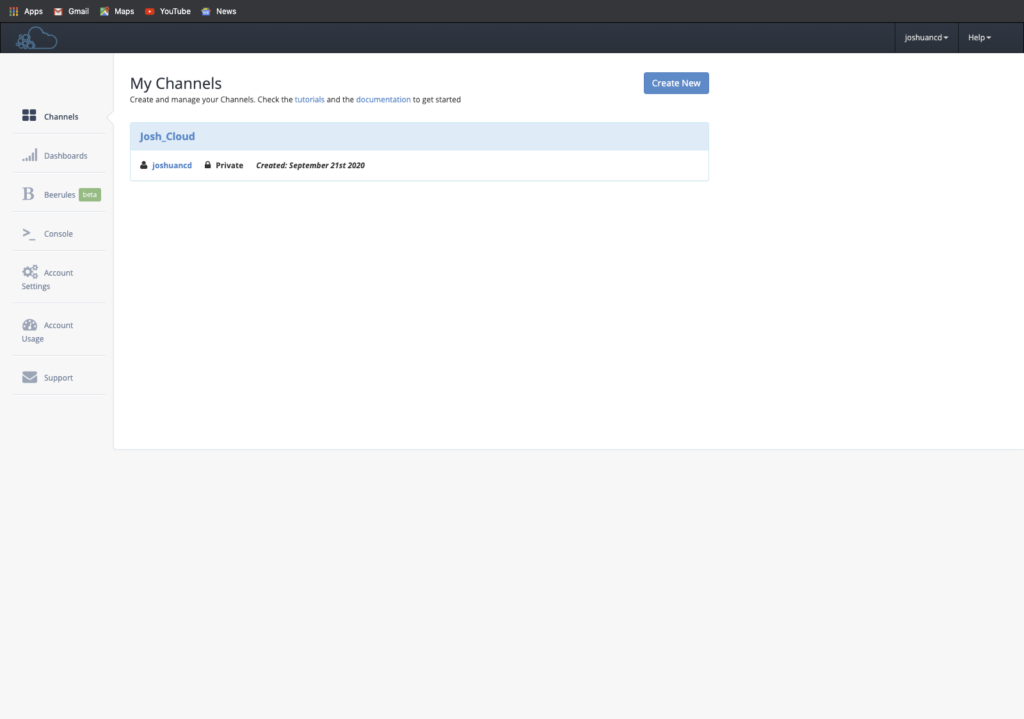
Create a channel. The name of the channel is optional for the user, as well as the name of configured resources.
The channel name for this example is Josh_Cloud and the configured resource is titled as Test_Hub.
Leave everything else as is.
Click Create channel.
The newly created channel will then be listed in the Channels tab.
At this point, Beebotte channel creation is complete.
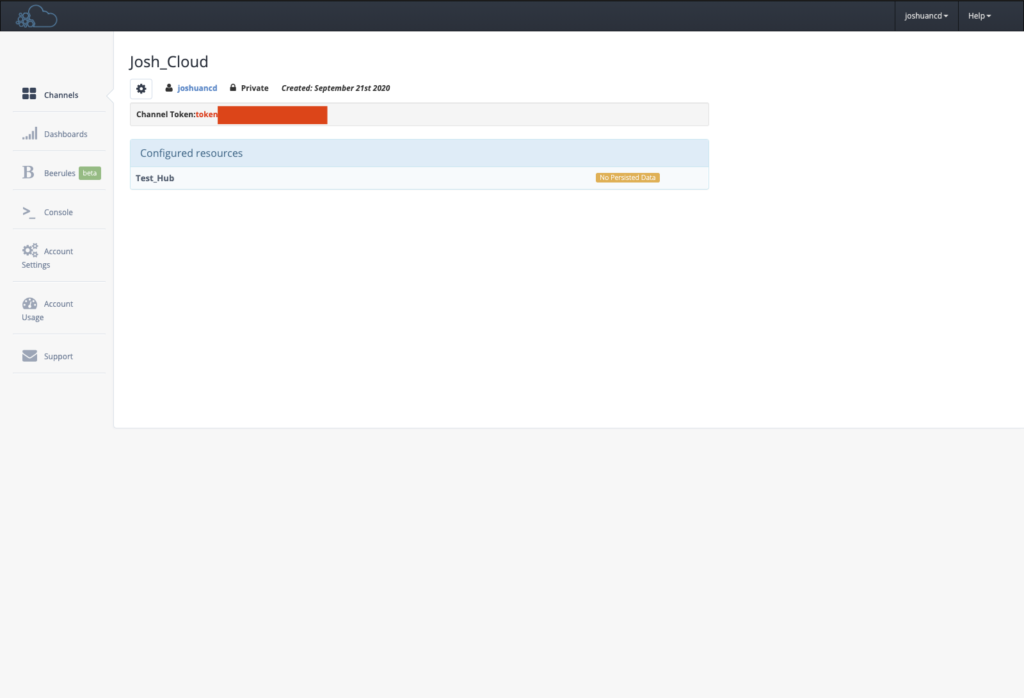
Lastly, get the Channel Token.
To find this, open the channel that was just created by clicking on it.
After opening the channel, this screen will be displayed.
Copy the Channel Token. It is needed to configure the settings on the sensor. This token should not be shared.
Be sure to copy from where it initially says Token in black lettering, all the way until the end of the token code. It look like this when entered in later:
token:token_###########
Make sure token is undercase. Making a small document or notepad that contains this token code for easy access is recommended.
Step 2. Setup NCD WiFi Sensor
Now configure the sensor’s settings. Begin by getting the Sensor into Setup Mode and connecting to it. To do so, hold the configuration button (c) which is found on the WiFi module near the micro USB port. If the LED is flashing blue, it is already in setup mode and ready to be connected to. This NCD web interface is extremely beneficial and easy to use.
While the device is in setup mode, open the WiFi network preferences and scan for WiFi networks. The Sensor should show up in the WiFi network scan as NCD_MQTT_Sensor.
Connect to NCD_MQTT_Sensor.
When prompted for a password enter:
NCDBeast

Once connected to the WiFi Sensor, a NCD browser window will appear. If for some reason this browser window does not appear, open a web browser and type the IP address 172.217.28.1 then press enter.
This browser interface tells the Sensor which WiFi network to connect to for internet access, the network’s password, and all connection information for the MQTT broker.
Reference the information below to configure the settings on this browser interface and click the Save Settings button. Once saved, wait for the light on the Sensor’s WiFi module to turn green and it will close the browser interface automatically.
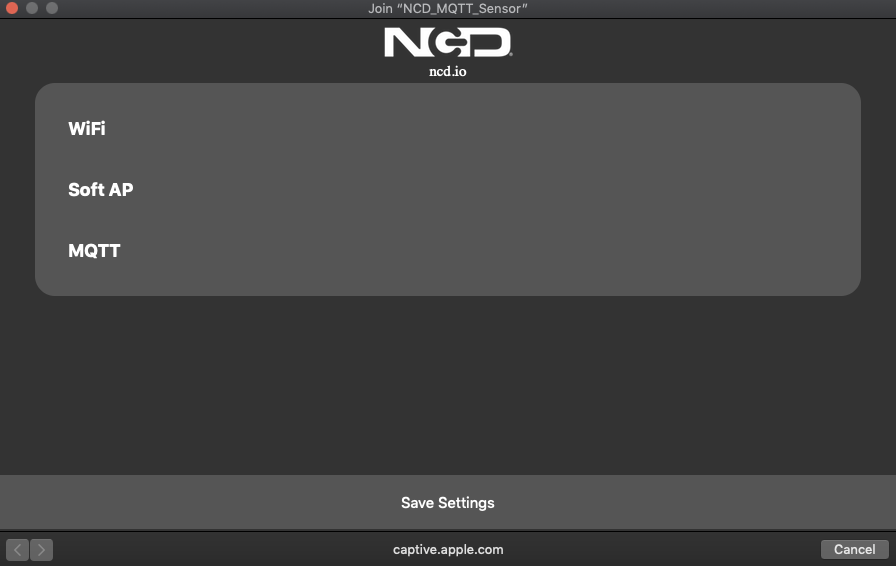
Sensor Configuration:
WiFi Settings -
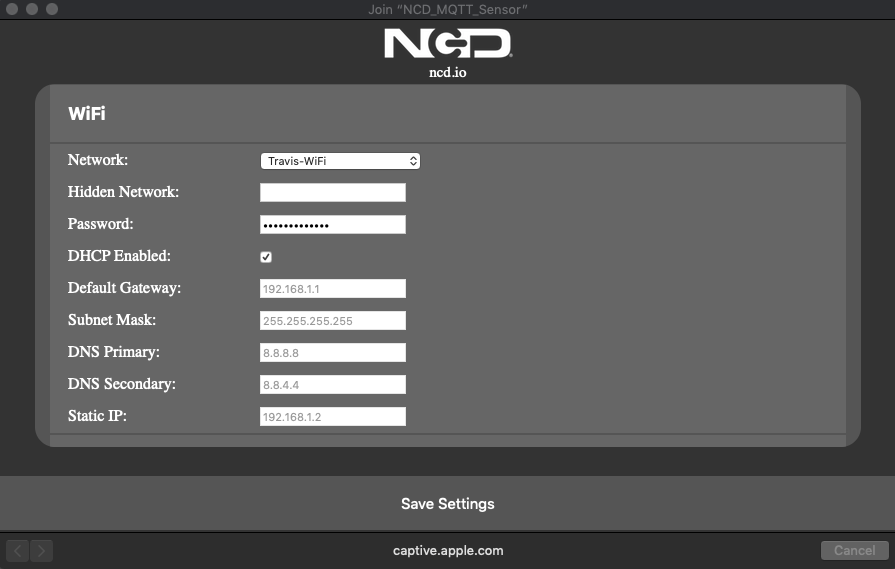
Network: Select the SSID that this device should connect to.
Hidden Network: If applicable, enter hidden SSID here.
Password: Enter the password for the Network or Hidden Network this device will be connecting to.
DHCP Enabled: Uncheck this if only if the settings below need manual configuration. Otherwise, move onto Soft AP.
Default Gateway: If applicable, enter Default Gateway address.
Subnet Mask: If applicable, enter Subnet Mask address.
DNS Primary: If applicable, enter DNS Primary address.
DNS Secondary: If applicable, enter DNS Secondary address.
Static IP: If applicable, enter Static IP address.
Soft AP Settings -
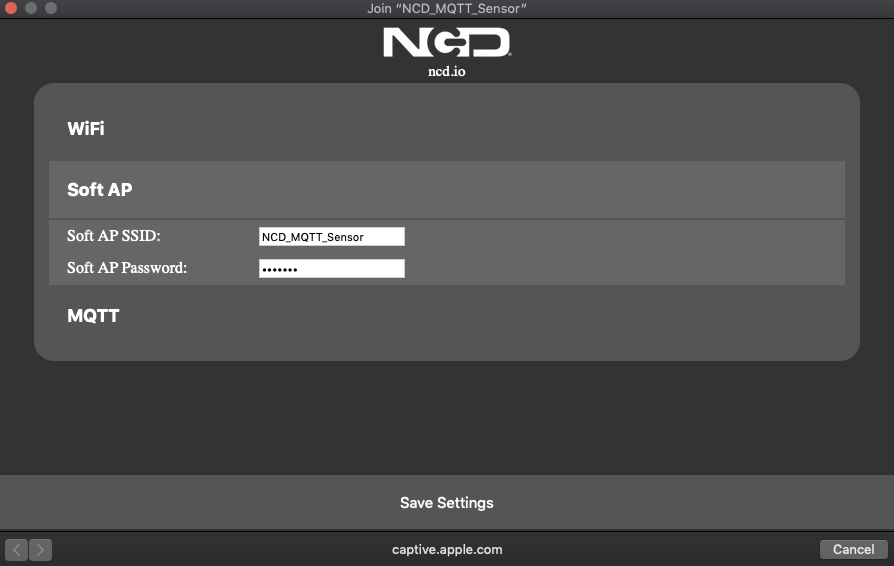
Soft AP SSID: This is where the SSID that the sensor will broadcast can be changed. Remember to use underscores or dashes instead of spaces if the ID entered contains multiple words
Soft AP Password: This is the password that will need to be entered when trying to access this device’s network.
MQTT Server Settings -
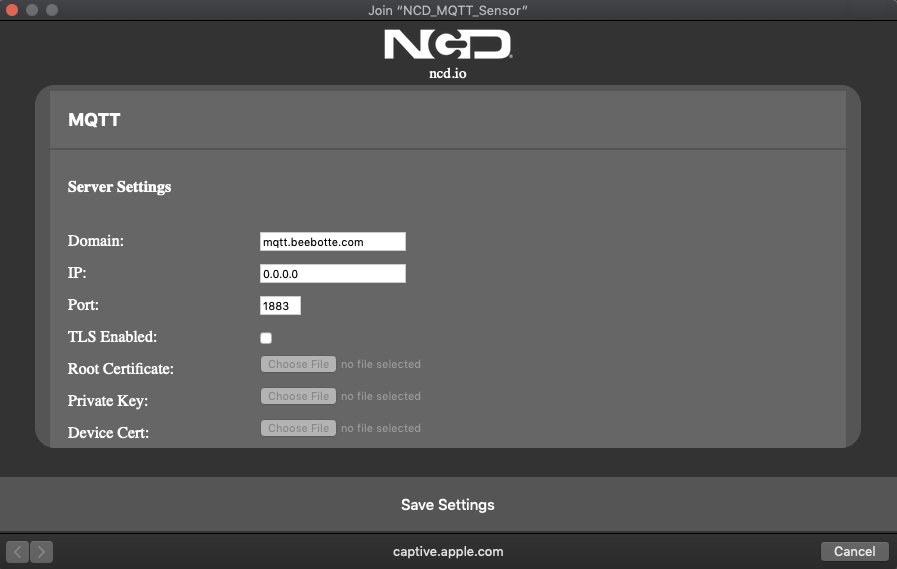
Domain: Enter the URL for the MQTT broker in this Field. Alternatively, the IP address may be entered for the MQTT broker in the IP field. This field must be left blank if you intend to use the IP field
IP: Enter the IP address for the preferred MQTT broker. Leave this field set to 0.0.0.0 if using the Domain instead.
Port: The Port number the MQTT broker listens on for inbound connections.
TLS Enabled: If the MQTT broker implements TLS then be sure to check this box.
Root Certificate: If applicable upload the Root CA Certificate here for TLS connections.
Private Key: If applicable upload the private key for TLS connection here.
Device Cert: If applicable upload the connection specific certificate for TLS connection here.
Root CAs are required for TLS connection the Root CA must be uploaded if TLS on the connection is required. Optionally , the user may also upload a Private Key and Device Certificate. Note that Security on MQTT servers, as NCD has found, are wildly different in their authentication methods. Some use TLS with a root CA but no private key. Some use TLS with a root CA but also require basic auth credentials. Some just require a User name. There really is almost no way to make an off the shelf solution that will work with anything however this product hopes to fulfill the need of 99% of users out there. NCD cannot however guarantee that it will work with any MQTT broker so be sure to check the authentication procedure for your intended MQTT broker before purchasing this Gateway. Also note that NCD sells gateways specifically designed for other cloud services such as Azure, AWS, Losant, etc.
MQTT Client Settings -
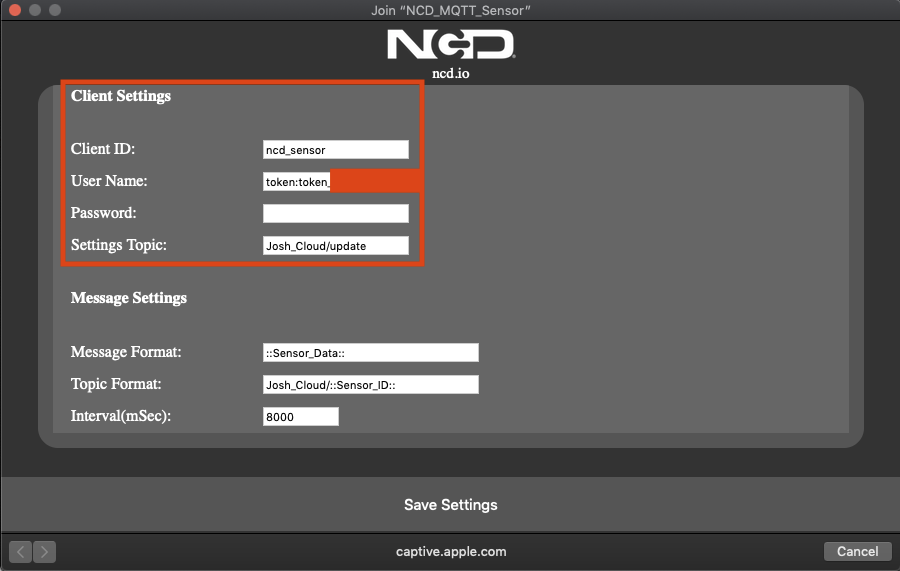
Client ID: Enter a client ID to use for the MQTT connection from the Sensor. If no Client ID is entered, then the MAC address of the Sensor will be used as the Client ID. Also note that the Client ID may also be used in Topics and Messages.
User Name: Enter a User Name for the MQTT connection. Some MQTT servers use basic authentication for security. The User Name can be found under User Credentials in the MQTT.fx application or on Beebotte.com.
Password: Optionally, enter a Password for the MQTT connection.
Settings Topic: Enter the Settings Topic that can be used to update new settings while in the MQTT broker. This example shows how JSON can be used to change the transmission interval of the device by publishing to the Settings Topic while in the MQTT broker. More keys are provided at the end of Step 3 further in this guide.

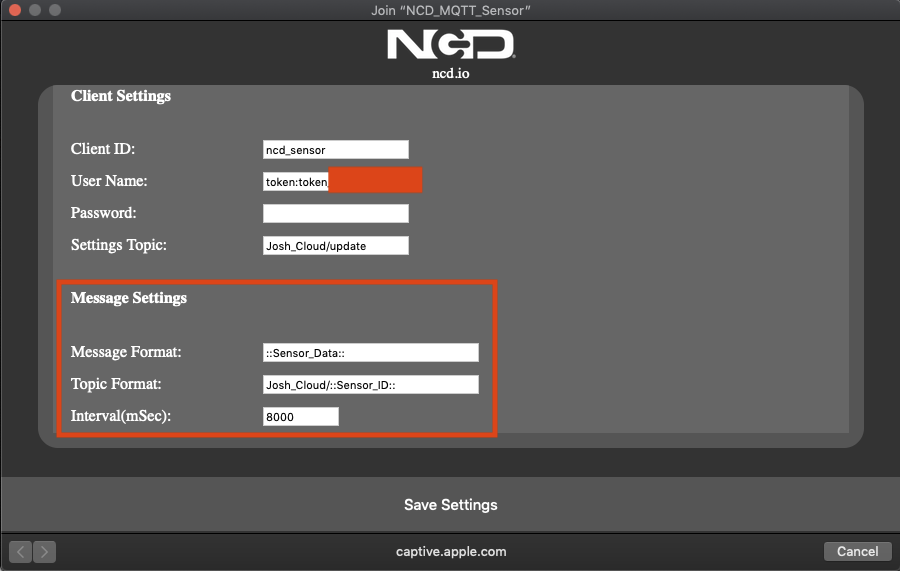
MQTT Message Settings -
NCD has implemented a token replace system for MQTT topics and payloads in order to facilitate compatibility with numerous cloud based systems which implement MQTT. This means a user can embed information about the sensor or the data coming from the device into the topics and message payloads. This is a very powerful feature of the WiFi Sensor for MQTT.
Message Format: Token based formatting for the message payload sent when the sensor updates information about itself to the MQTT broker.
Supported tokens are ::Sensor_ID:: and ::Sensor_Data::
Topic Format: Token based formatting for the topic to which sensor information is written to on boot.
Supported tokens are Your_Topic/::Sensor_ID::
Interval(mSec): Customize the interval of transmission here. 8000 mSec in this setting means that data will be published to the cloud topic from this sensor every 8 seconds.
Below is a list of more acceptable Token Definitions for optional use in the message settings.
Token Definitions:
- ::Sensor_ID:: This is the unique identifier of the wireless sensor which triggered the MQTT Topic write currently occurring. Embed it into the message topic or message payload to suite unique applications.
- ::Sensor_Type:: Each type of wireless sensor has a type identifier which is simply a number. Embed this token into the sensor message or topic as needed.
- ::Sensor_Data:: This token will embed the data from the sensor as needed into the Sensor Message payload. Note that sensor data is a keyed JSON object.
Step 3. Stream Data on MQTT.fx
Open the MQTT.fx application if it is not already open. This application will be used to stream sensor data.
Begin by clicking the settings icon next to the connect button.
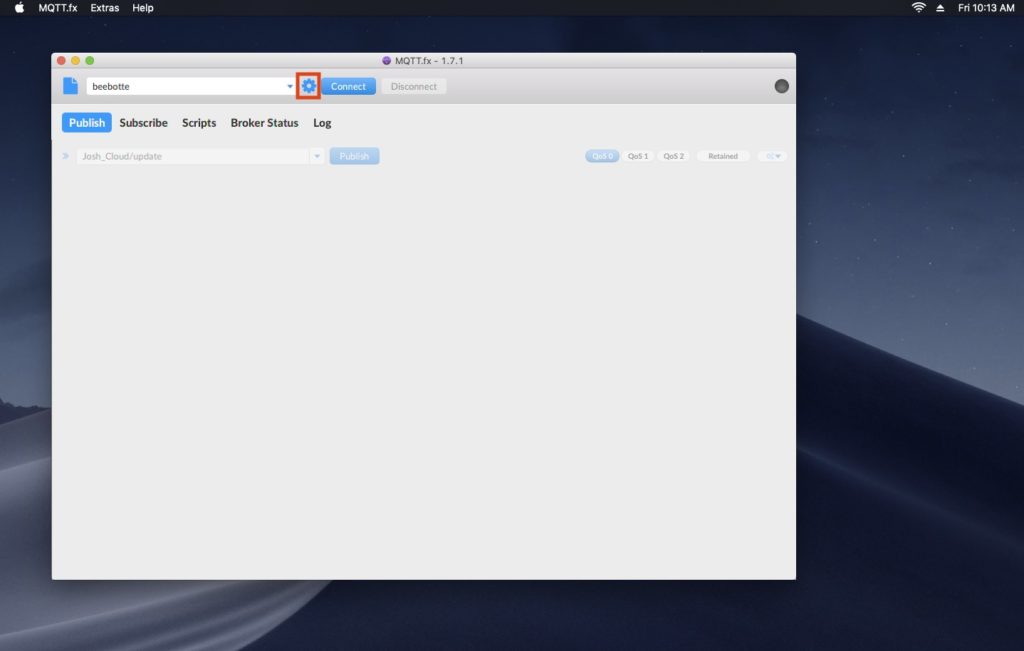
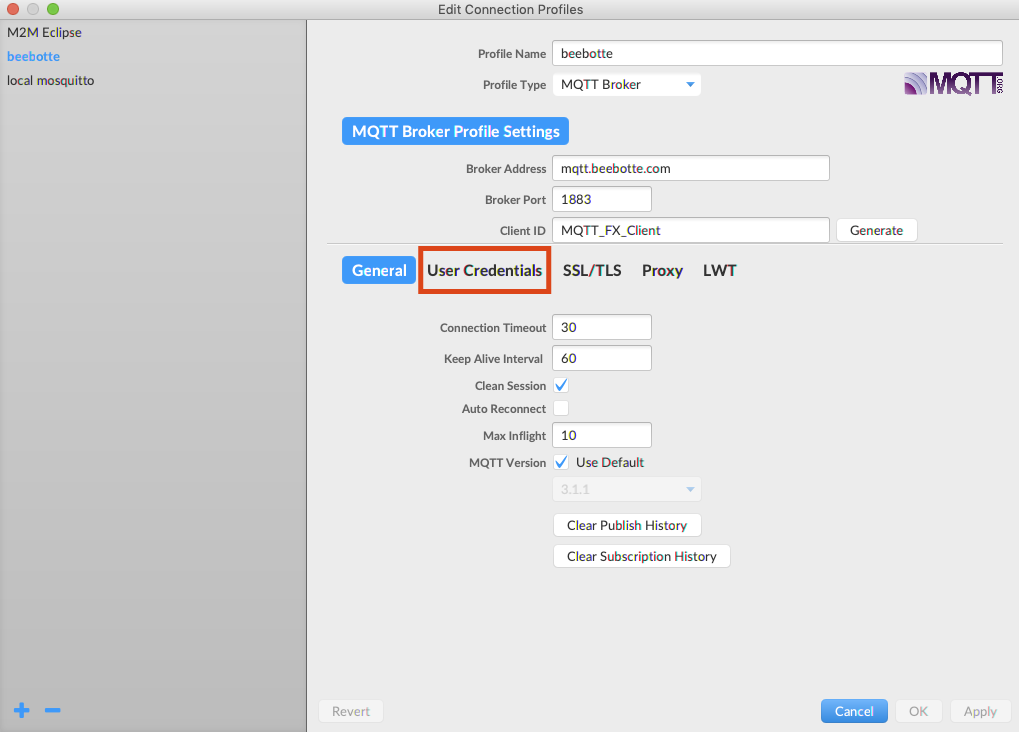
Most of the settings are automatically generated. Enter these settings when using beebotte:
Profile Name: beebotte
Profile Type: MQTT Broker
Broker Address: mqtt.beebotte.com
Broker Port: 1883
Client ID: MQTT_FX_Client
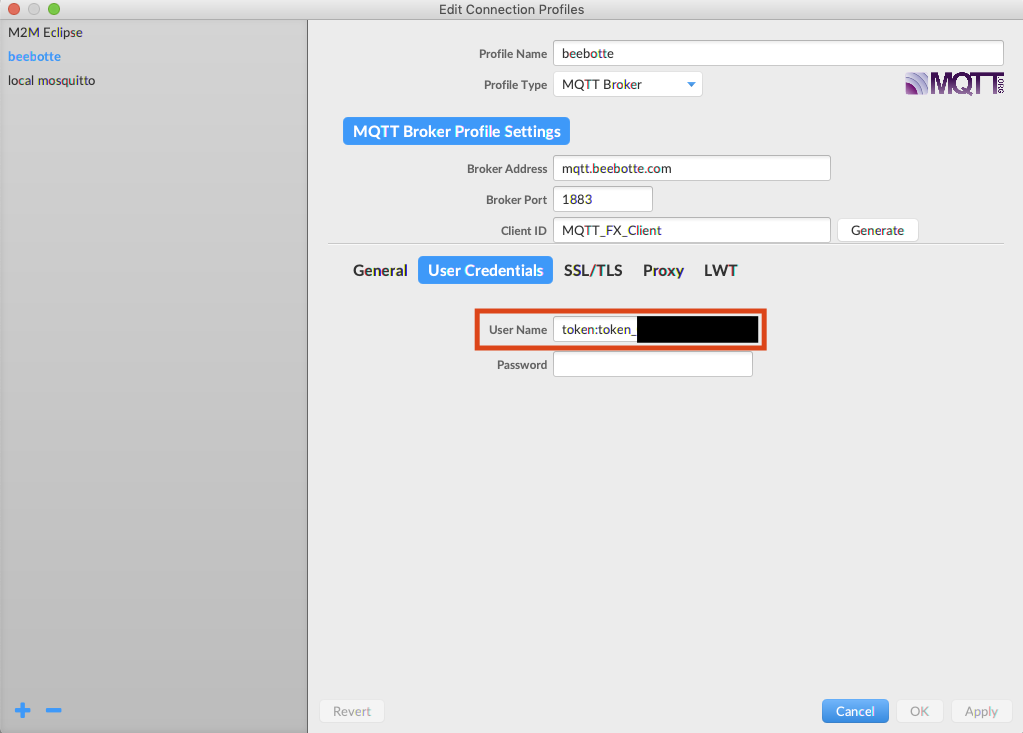
When finished editing the settings, select User Credentials as indicated in the image to the right.
Paste the token:token_#### copied earlier from the beebotte channel as the User Name.
Select Apply.
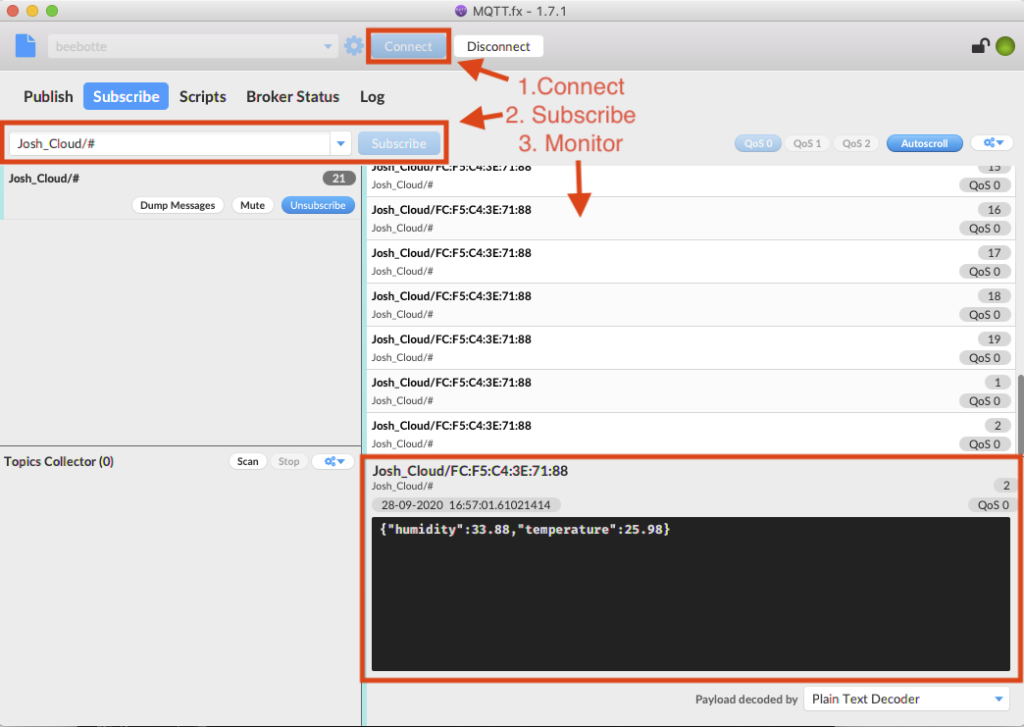
Return back to the main screen.
1) Make sure beebotte is selected and Connect.
2) Then, under the Subscribe tab, type the channel name created on beebotte followed by a forward slash.
Note: After the forward slash, enter a # sign to subscribe to all topics listed under that channel. Otherwise, to subscribe to a specific subtopic, type the name of that subtopic after the forward slash. In this case, the subtopic in the example to the right is the ::Sensor_ID:: in JSON. This is code uses the actual MAC Address of the sensor and embeds it as the ID. Therefore, if multiple sensors are set up and a user just wants to subscribe to this sensor, type the MAC Address of the sensor after the forward slash to subscribe to it.
3) Wait for the sensor data payload to display on screen. The sensor should send it’s first transmission within seconds of being powered on and connected. If no data transmissions are displayed within a minute, press the reset button and wait again. Sometimes getting the first transmission takes a couple resets or even powering the sensor on and off.
How it looks in MQTT.fx:
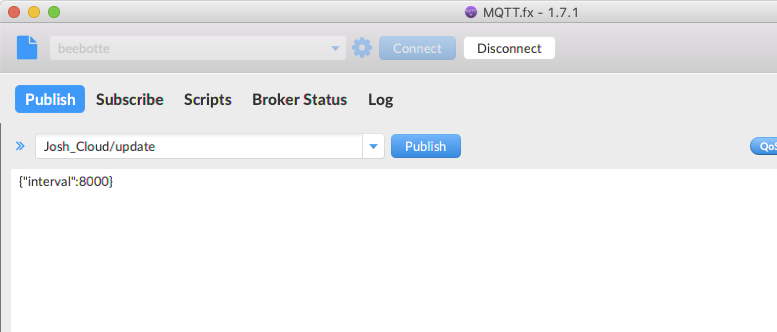
Optionally, settings such as the interval of transmission can be changed by publishing to the settings topic using JSON format. The settings topic will be what was entered in for Step 2 – Client Settings. The settings topic used in this example is Josh_Cloud/update, therefore, valid JSON format can be used to publish to Josh_Cloud/update while in MQTT.fx to change various settings.
As seen on the right, the interval was changed from 5 seconds (5000 ms) to 8 seconds (8000 ms). Therefore under the subscribe tab where incoming sensor data can be viewed, a new post will be displayed every 8 seconds.
Below is a list of keys that can be used to change the settings while in MQTT.fx. Remember to make sure each key is entered in valid JSON format when used.
List of Settings Keys and Definitions:
WiFi:
- ssid – Updates the SSID of the network the device should connect to.
- ssid_password – The Password which should be used to connect to the network specified by the SSID setting.
- interval – The interval at which the device publishes it’s sensor telemetry to the Broker.
- apSSID – Update the SSID used by the device during config mode.
- apPass – The password required to connect to the device’s Soft AP.
MQTT:
- host – The URL of the MQTT Broker
- host_ip – The IP Address of the MQTT Broker (ignored if host parameter is set)
- tls – Boolean Value (0 or 1). Whether or not to utilize TLS when connecting to the MQTT Broker. If this field is set, a root CA must be provided.
- user_name – User Name to utilize for Basic AUTH with Broker.
- password – Password to utilize for Basic AUTH with Broker.
- user_topic_format – Topic which sensor telemetry data should be published to. Supports Token Replace Variables for Sensor ID and Sensor Type.
- message_format – Format which sensor data (payload) should be published to the topic. Supports Token Replace Variables for Sensor ID, Sensor Type, and Sensor Data.
- settings_update_topic – MQTT Topic that the sensor will subscribe to in order to receive settings update sent by the user.
Hardware
Factory Reset:
- Hold Config button until it goes from flashing green to flashing blue, then release.
- Hold Config button again until it stops flashing blue, then release.
- LED will flash multiple colors, wait for this process to complete.
- Once LED is done flashing random colors, it will return to the flashing blue status.
- After 1-4 is complete, the module is successfully factory reset.
LED Status:
- Flashing Yellow – Sensor is booting up
- Flashing Blue – Sensor is in configuration (setup) mode
- White – Sensor is attempting to connect to the WiFi Network
- Flashing Green – Sensor has a valid connection to the MQTT Broker
- Flashing Random Colors – Sensor is applying factory default settings
- Repeated 3 Red Flash – Sensor is unable to communicate with MQTT Broker, check client credentials
- Repeated 2 Red Flash – Sensor is unable to connect to WiFi Network