WiFi Micro Gateway for LOSANT®
Setup Instructions
Introduction
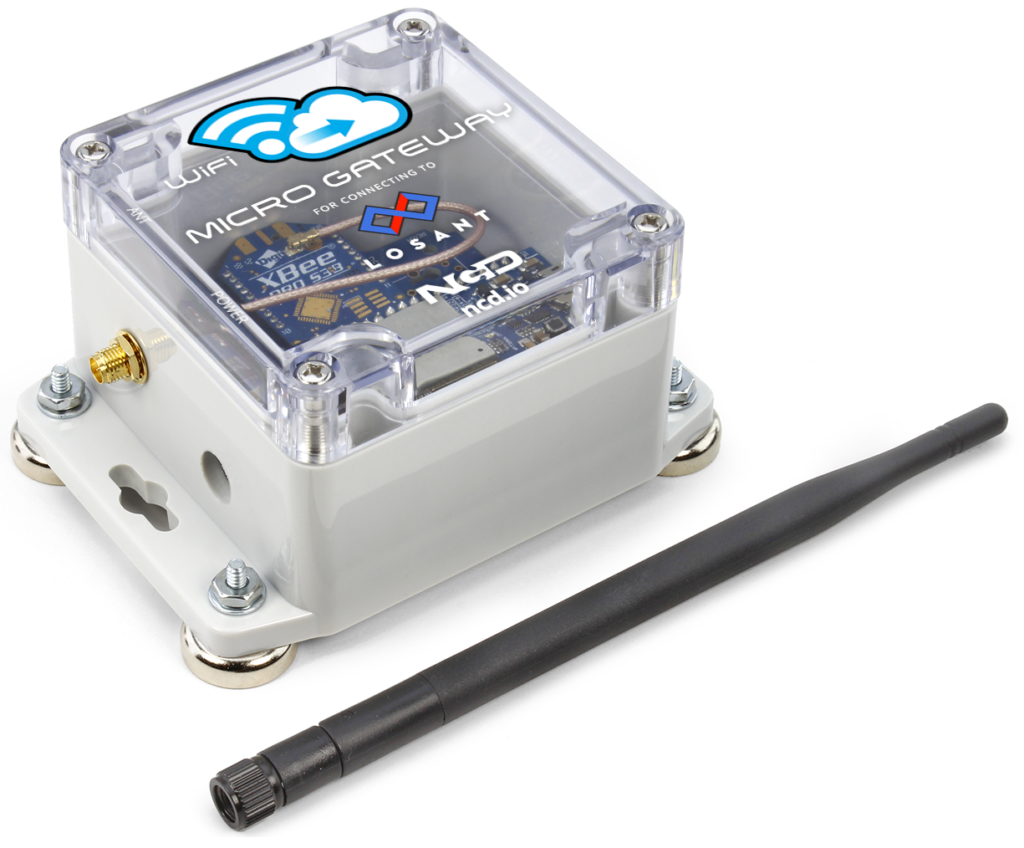
The NCD WiFi Micro Gateway allows the complete line of NCD sensors to communicate over the internet to Losant using a WiFi connection. The NCD Micro Gateway is very easy to use, as it only requires network connection credentials and a Losant Connection String. All sensors are fully encrypted using 128-bit AES encryption. WiFi communications is also fully encrypted for your security. To get started using the WiFi Micro Gateway, follow the steps outlined below.
Losant Account Setup
If you have not yet created a Losant account then proceed to https://losant.com and create one now.
Log into your Losant account and it will take you to https://app.losant.com.
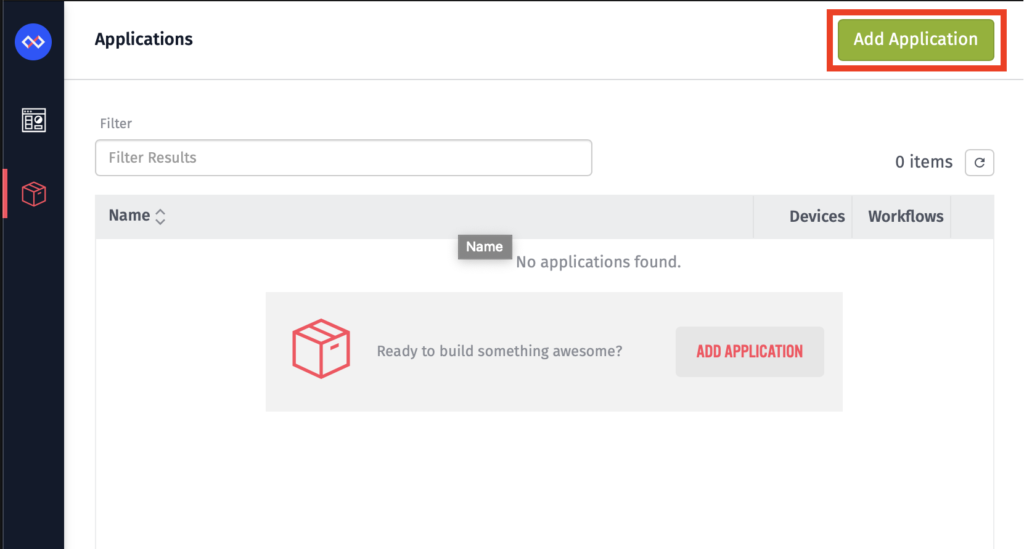
Once logged in you will need to create a new application. To do this just click the Add Application button.
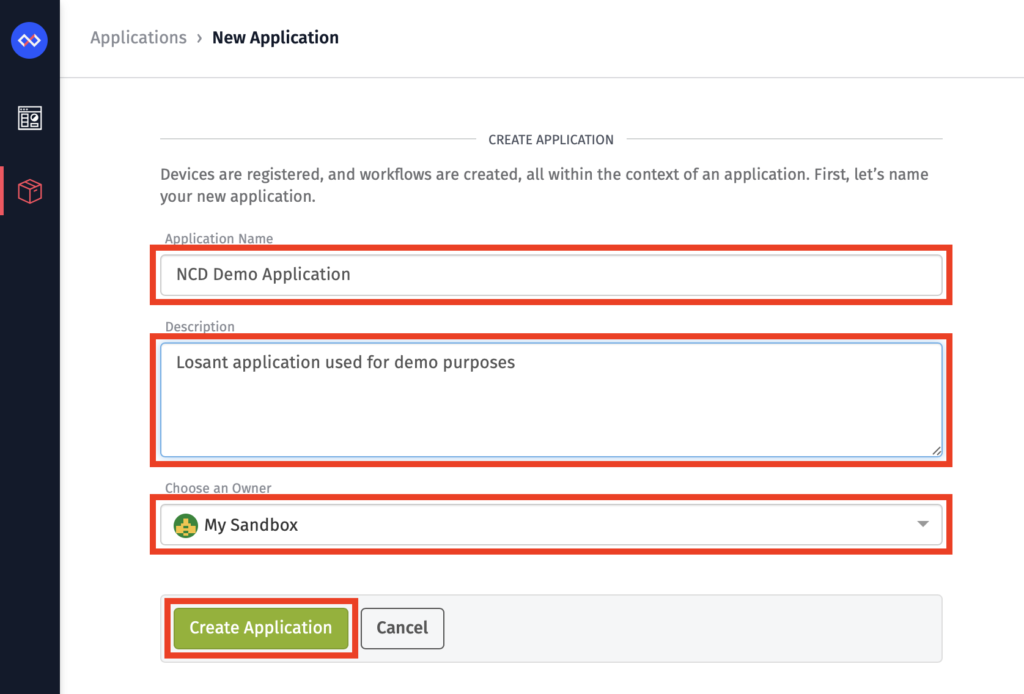
When creating the new Application on Losant you will need to enter a name for the application, enter a description (optional), and choose an Owner. By default your account should have an owner named “My Sandbox” which is what we generally use for testing but you can consult Losant documentation on “Owners” if you like. Once information is entered to your liking click Create Application.
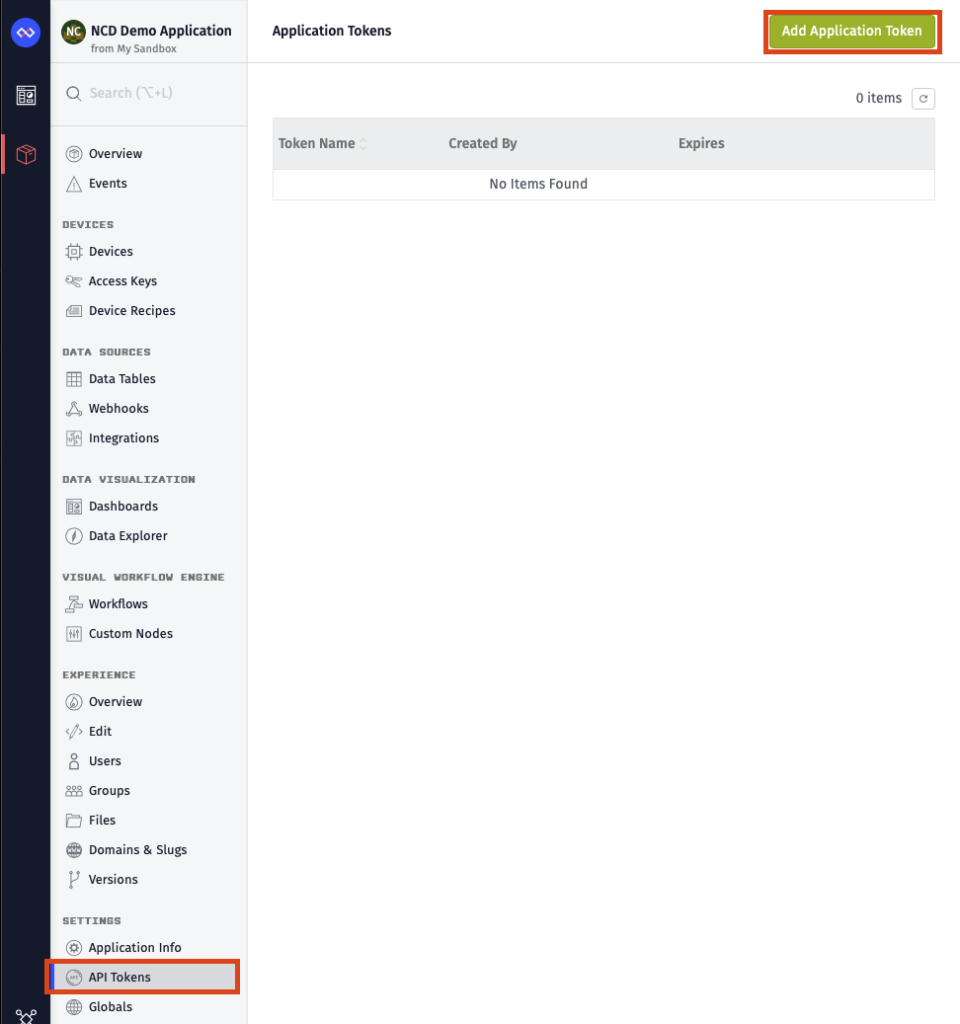
Now we will need to create an Application Token which the NCD Losant Gateway will use to authenticate with your Losant account and establish REST API and MQTT connections. To do this click on API Tokens on the left under the newly created application, then click Add Application Token.
While setting up the Application Token you will enter a name for the token, enter a description for the Token (optional), set the expiration date, and you may restrict permissions. For the purposes of this demo we will set the Token to never expire and grant all permissions. Please feel free to read more about token expiration and permissions on Losant docs. Once all information is entered to your liking click Create Application Token.
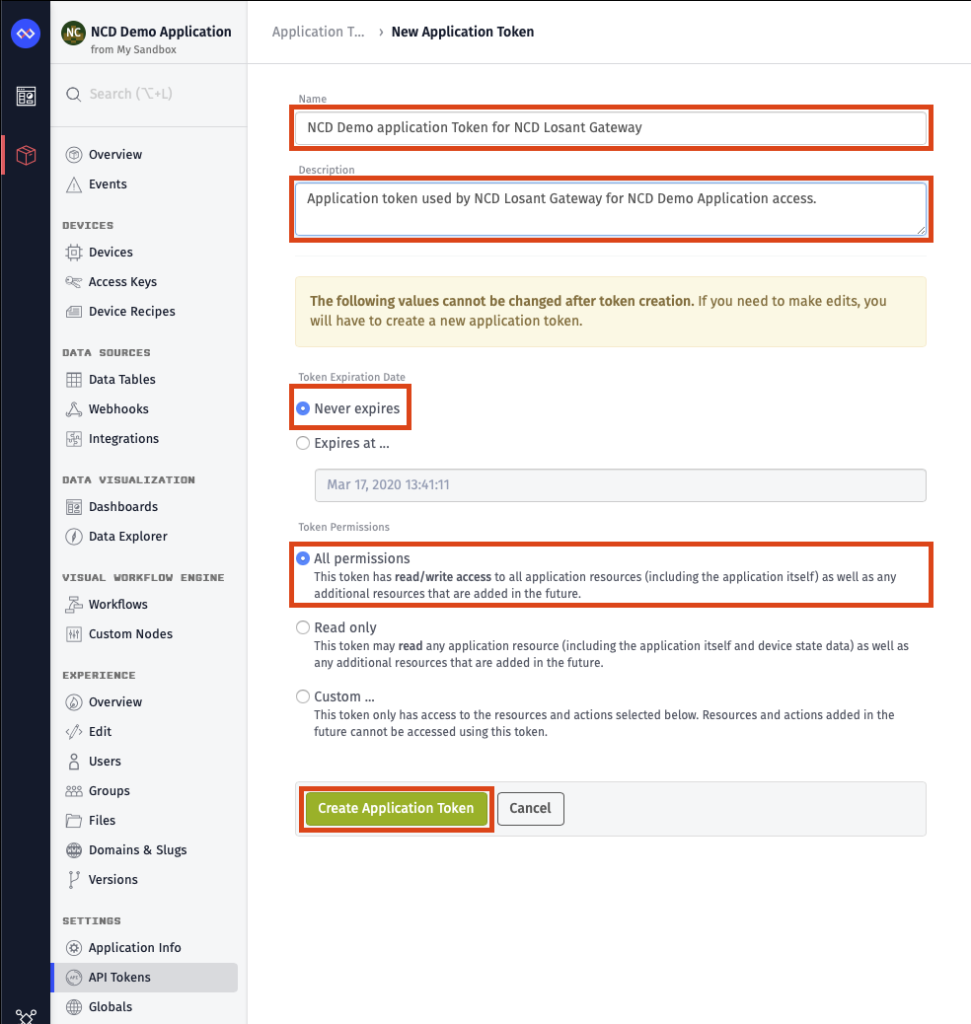
After creating the new Application Token you will be given the New Access Token. Copy the Application Token to a text editor, you will need this when setting up the NCD Losant Gateway. Once it’s copied close the pop up window and you will now see the new Application Token listed in the Application Tokens dashboard. Click on the newly created Token.
Now back to the Newly created Application Dashboard. Select Overview from the left menu. Now the Application ID will appear in the upper right corner. You will need to copy this Application ID down to your text editor as it will be needed for the NCD Losant Gateway Setup.
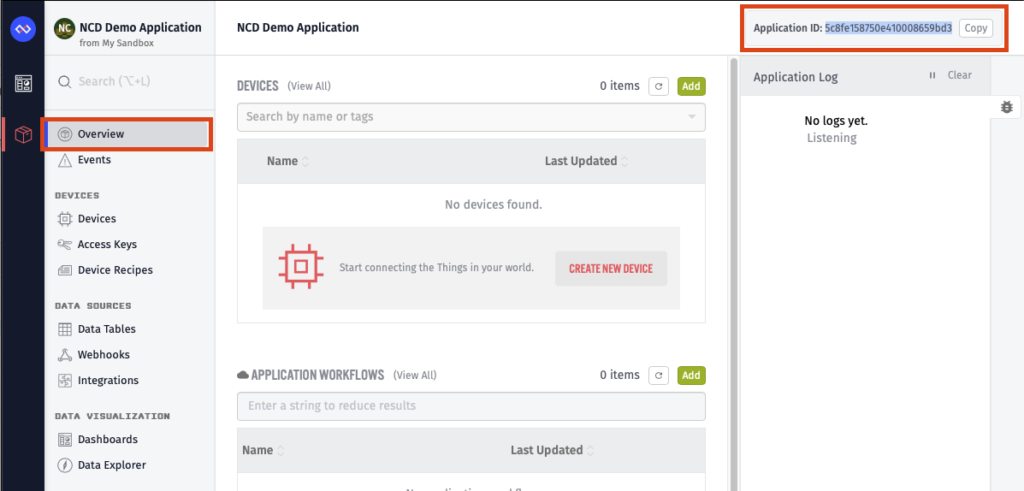
It is now time to setup the NCD Losant Gateway.
Gateway Setup and Installation
Remove the NCD WiFi Micro Gateway from the packaging and carefully install the antenna. The antenna screws onto the side of the gateway. Please DO NOT OVER-TIGHTEN or damage will result.
Plug the WiFi Micro Gateway into any available outlet to power it up using the included power supply. The Internal LED should be flashing blue. If the Internal LED is not flashing blue, follow these steps (Otherwise, Skip to Step 3):
a. Open the Gateway enclosure to expose the RED configuration button. Hold button down until the internal LED flashes blue.
b. Press and release the exposed configuration button and secure the top cover the WiFi Micro Gateway.
With the internal LED flashing blue, use a SmartPhone or Laptop Computer to change your WiFi Connection Settings. A new network will appear called “WiFi_Micro_Gateway”. Associate your mobile device with this new WiFi Network.
The LED should be solid green once WiFi connection is established and the gateway is connected to Losant.
The LED will slowly flash between a dim white color and red if there was a problem associating the NCD WiFi Micro Gateway to your network. If you were unable to associate the gateway, make sure you have entered the correct WiFi password and Losant connection string.
Sensor Setup and Installation
Now that the Gateway is communicating to Losant, it’s time to power-up your remote sensors. Follow the steps shown below to enable NCD Sensors:
Remove the NCD Sensor from product packaging and carefully install the antenna. The antenna screws onto the side of the sensor. Please DO NOT OVER-TIGHTEN or damage will result.
Remove the top lid of your first sensor.
Re-Install the lid and secure the screws. For best results, install the sensor in a high location, preferably greater than 3 meters from the floor. Make sure the antenna of the sensor is high enough to avoid shelving or other obstacles.
Initial Testing
At this point you should have a solid Green LED on the NCD Losant Gateway indicating it has a valid connection with Losant. If so then proceed through Initial Testing in this section.
Select Overview from the newly created Application Dashboard menu. This Overview dashboard will list the devices associated with your Losant account. There should be one for your gateway and possibly more if you have sensors powered up in the area as the NCD Losant Gateway will automatically propagate discovered sensors onto the Losant application.
From here you can also view the Application Log which will post information when a new packet of information is sent to Losant.
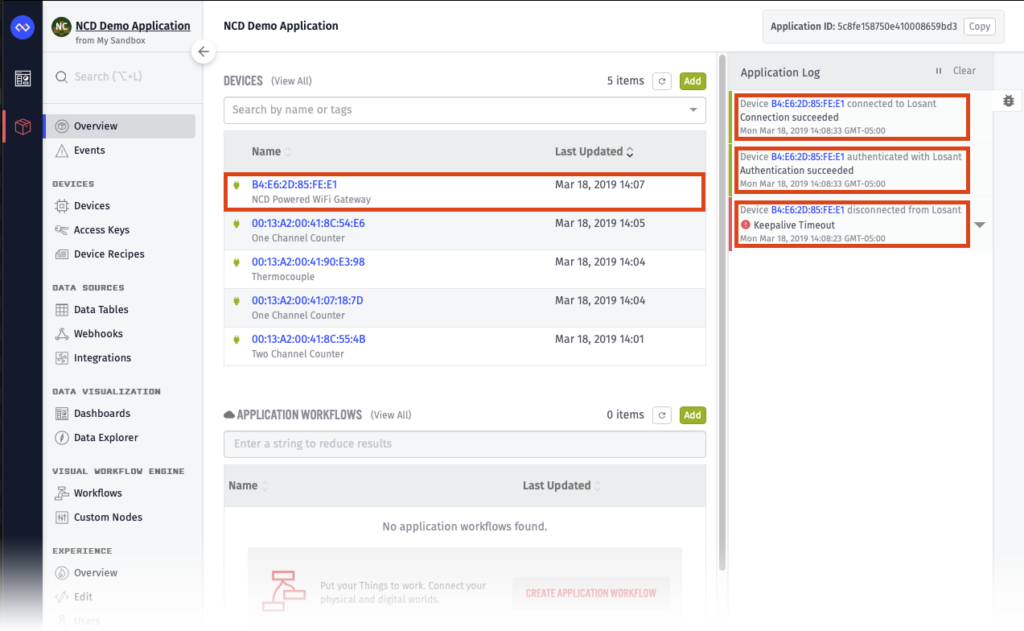
While watching the Application Log power-cycle your Gateway. This should result in Logs that the device disconnected, authenticated, and then connected. If so, then everything is working correctly.
You may also click on the listed Devices to view more information about them. The Gateway will, for instance, have information about its Network settings and the Wireless module configuration listed under Device Tags.
NOTES
NOTE: Sensors transmit in broadcast mode meaning any gateway will receive transmissions from any sensor. For this reason, it is possible for multiple gateways to report data arriving from a single sensor. NCD has made provisions to build wireless groups that do not interfere with one another. Please contact us if you foresee a need for multiple networks within close proximity.
NOTE: These sensors are secured using the default NCD 128-Bit AES encryption key. This is the same Key used by ALL NCD Wireless Sensors at the time of shipping. Please contact us if you would like a custom Key Assigned to your company. We have also made provisions for customers to change the Encryption Key using additional hardware.


