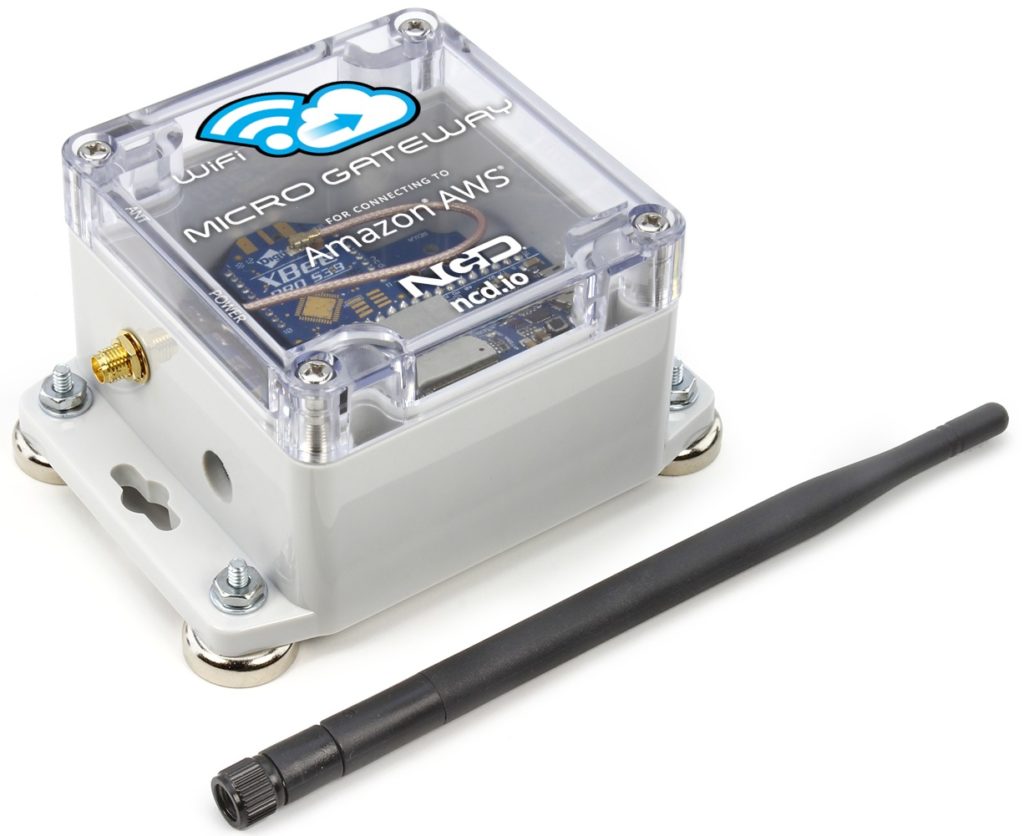
The NCD WiFi Micro Gateway allows the complete line of NCD sensors to communicate over the internet to AWS using a WiFi connection. The NCD Micro Gateway is very easy to use, as it only requires network connection credentials and AWS security credentials. All sensors are fully encrypted using 128-bit AES encryption. WiFi communications is also fully encrypted for your security. To get started using the WiFi Micro Gateway, follow the steps outlined below.
AWS Account Setup
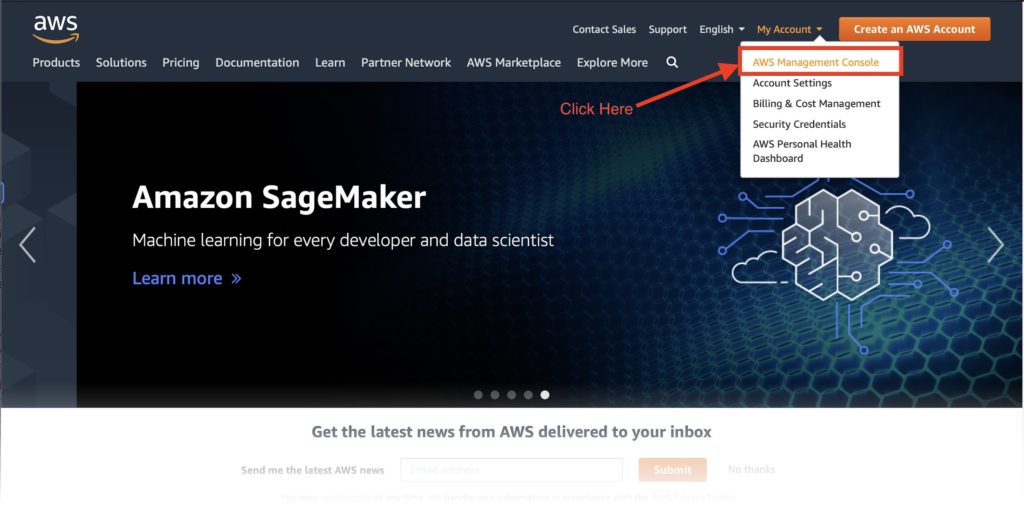
The first thing to do is to create an AWS account. If you do not already have one, you can do this at https://aws.amazon.com Once you have created your AWS you may proceed through the rest of this section.
To make setup and use of the NCD AWS IoT Gateway as fast and pain free as possible we use IAM credentials which allows the Gateway to create itself on AWS IoT.
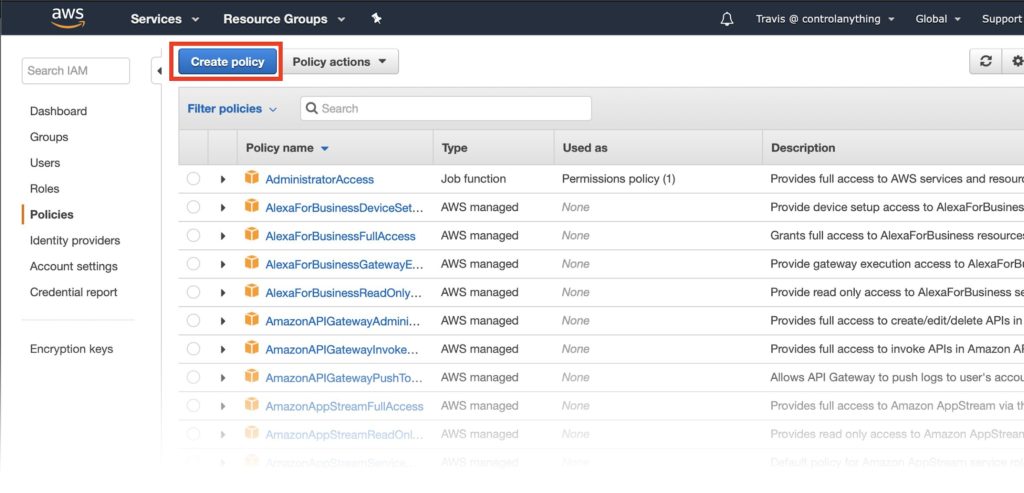
In the IAM console we need to first create a new Policy which the NCD AWS IoT Gateway will use to provision itself on AWS IoT.
To do this select Policies in the left menu. The Policies Dashboard will list many default policies but we will be creating a new one so click the Create Policy button.
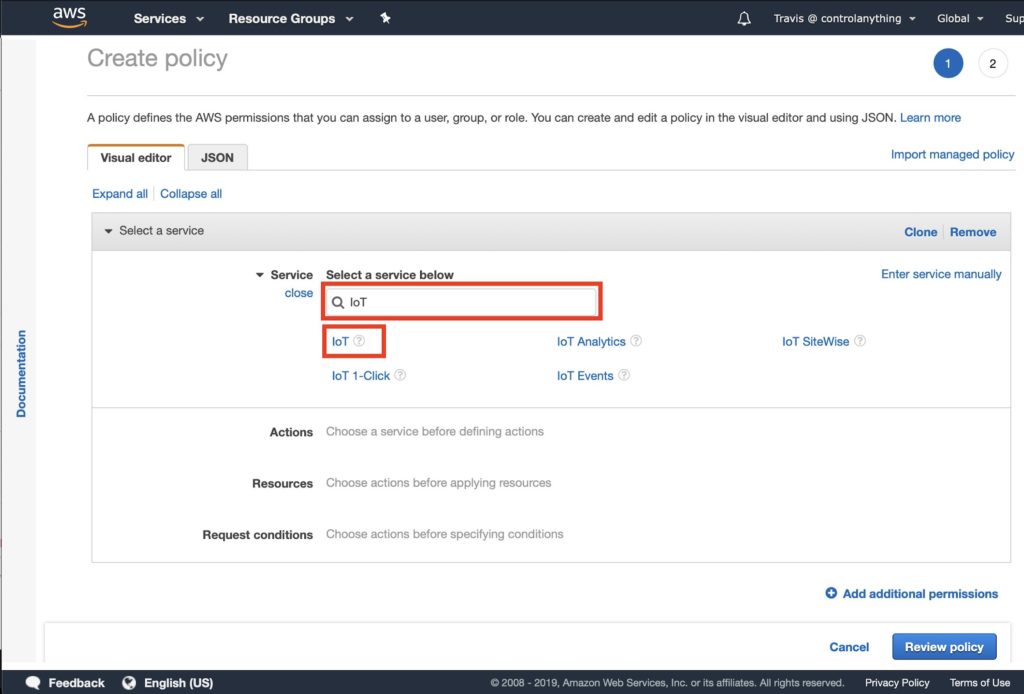
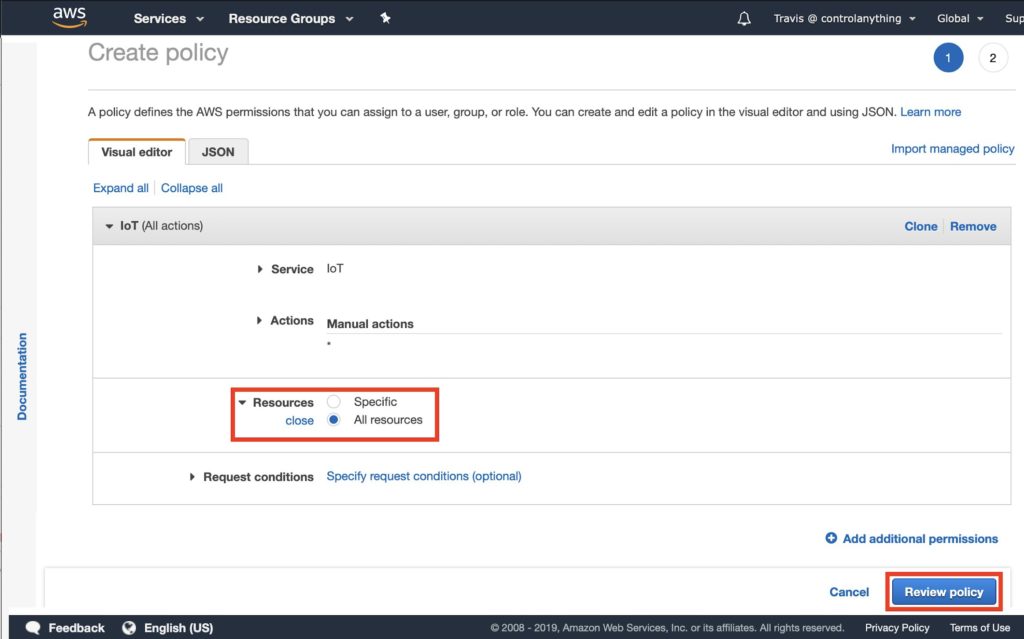
Now we can select the actions this Policy will allow access to. For simplicity’s sake select All IoT Actions(iot:*). If you are experienced with AWS please feel free to be more explicit as to the Actions allowed on the Policy.
Under Resources select All Resources. Once again if you are experienced with policy creation feel free to be more explicit. Finally click Review Policy.
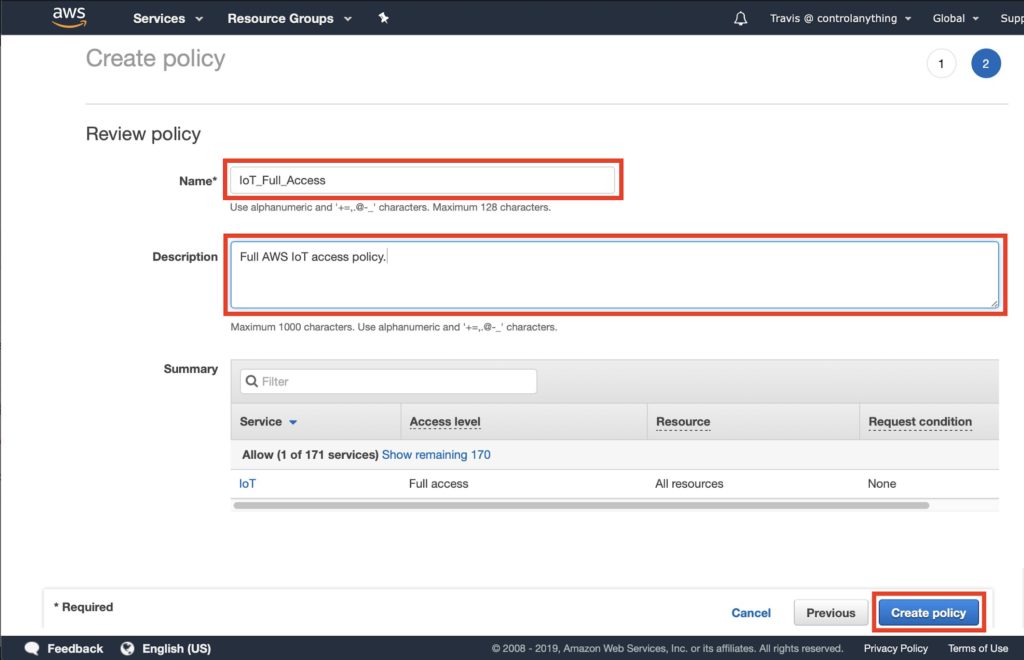
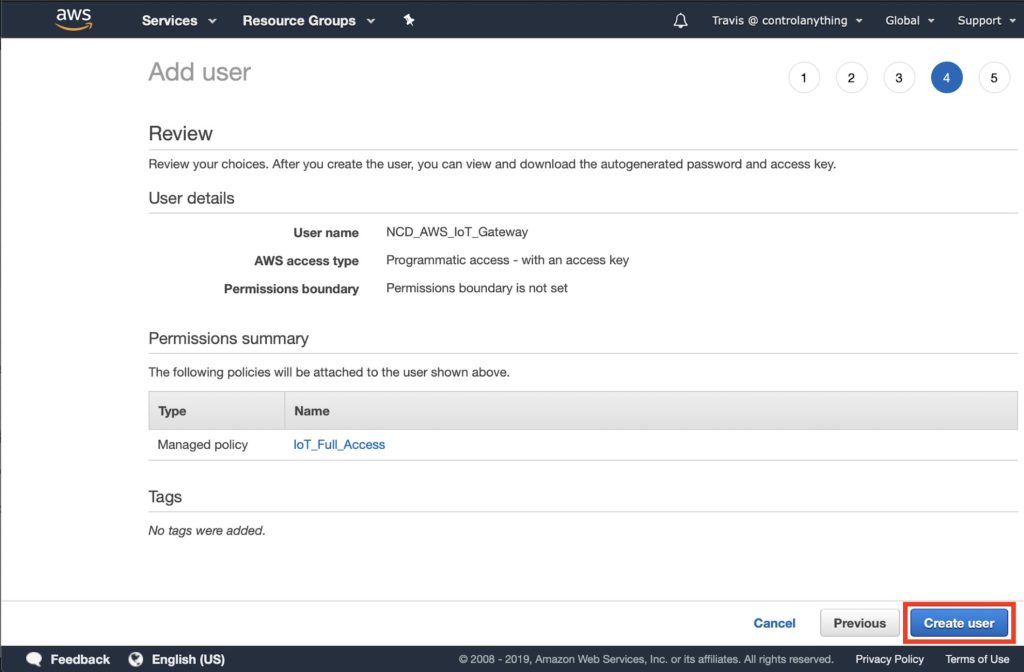
In the Review Policy Window you can enter a name for your Policy, a description and review the summary. If you followed the instructions above it should look similar to this (except for the name and description, which would be the information you entered). Be sure to take note of the Name you enter here as we will need to reference that later.
After clicking Create Policy you will be taken back to the IAM Management console. Click Users on the left to create a new IAM user.
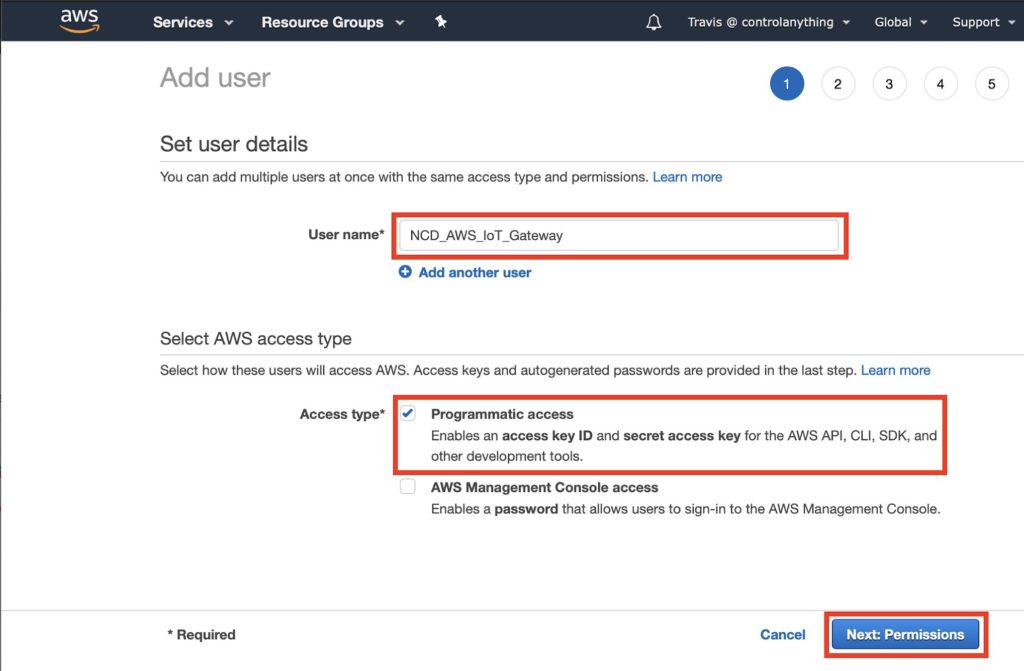
This will start the “wizard” for creating an IAM User. Enter a name for this IAM user and select Programmatic access under Access Type, then click the Next:Permissions button.
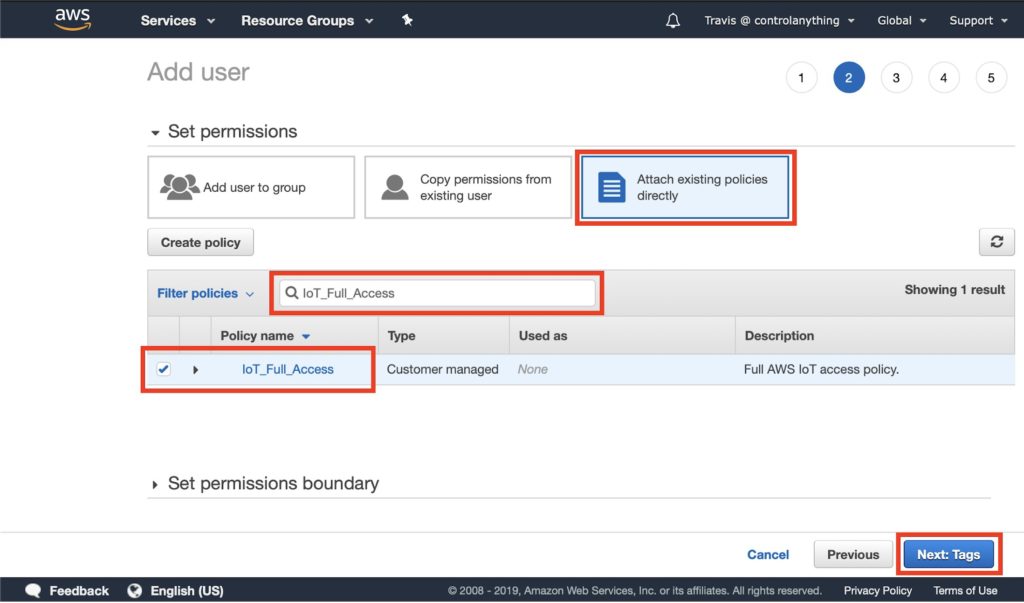
Now we will attach the Policy just created to this IAM User. Click the Attach existing Policies directly box at the top, then in the filter policies search box type in the name you entered for the Policy. Once it appears click the checkbox to select it, then click the Next: Tags button.
On the final page we see the user credentials. It’s very important to understand that once you leave this page you will never be able to get the IAM Secret Access Key again. You absolutely must copy it down in a text editor or it will be gone forever and you’ll need to create the IAM User again. Once it’s copied click the Show link under Secret access key and copy the key that appears as well. We will need these credentials to setup the Gateway. Once you are sure you have secured those credentials click the close button.
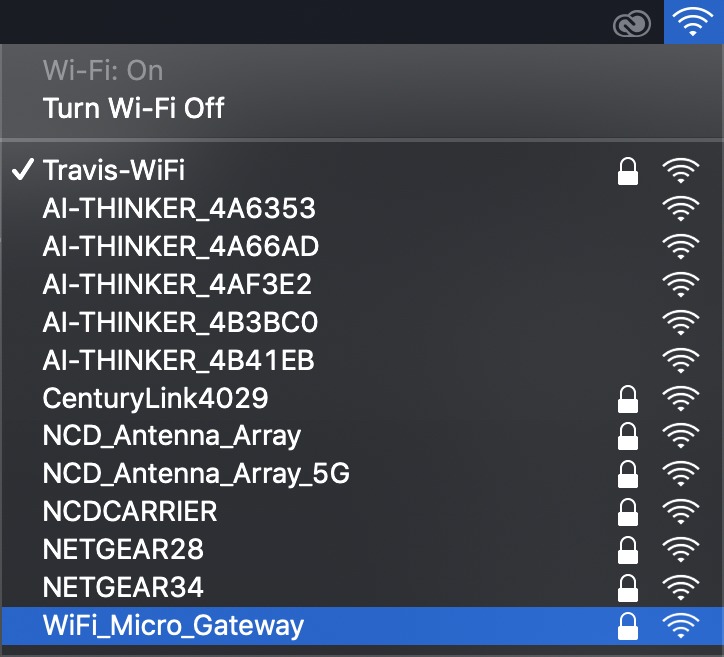
Make sure your NCD AWS IoT Gateway is in setup mode which is indicated by a flashing blue LED. Once it is in setup mode open the WiFi network preferences on your computer and scan for WiFi networks. The Gateway should show up in the WiFi network scan as WiFi Micro Gateway. Select WiFi_Micro_Gateway.
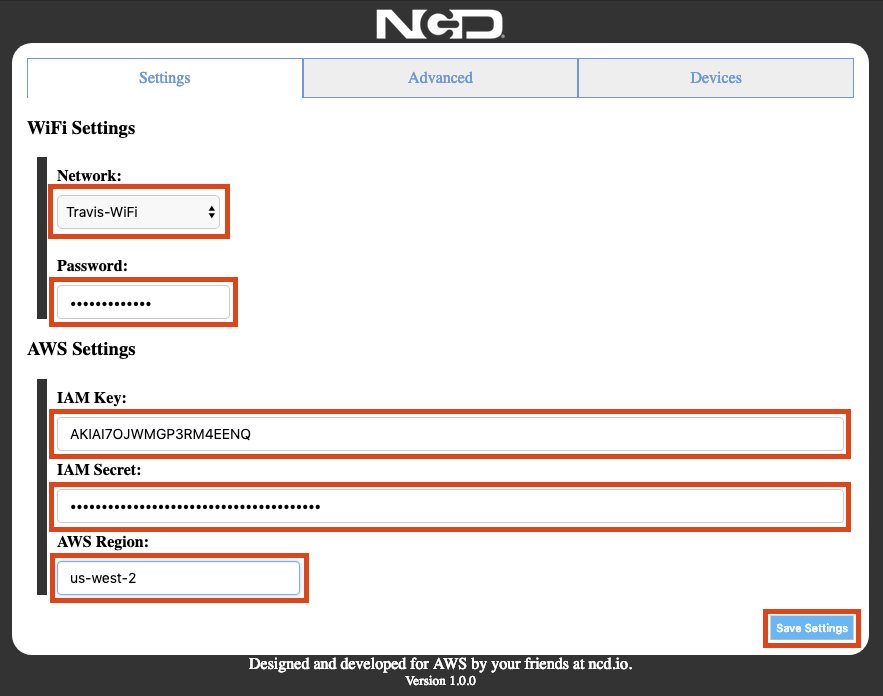
When prompted for a password enter: NCDBeast
Once connected to the Gateway a browser window will appear on your screen. If for some reason this browser window does not appear open your browser and enter the IP address 172.217.28.1 then press enter. This browser interface tells the Gateway which WiFi network to connect to for internet access, the network’s password, and the AWS IAM credentials for provisioning itself to AWS IoT and the AWS region. Enter this information into the browser interface and click the Save Settings button.
After saving the settings the Gateway will store the information you entered into memory and will reset. When it powers back up the LED will turn Yellow and flash indicating it is booting. Do not be alarmed if the LED changes to a solid Yellow or turns off as the Gateway is busy communicating with AWS. After a brief time the LED will turn solid Green indicating the gateway has successfully provisioned itself on AWS IoT and has connected to it via MQTT.
Testing
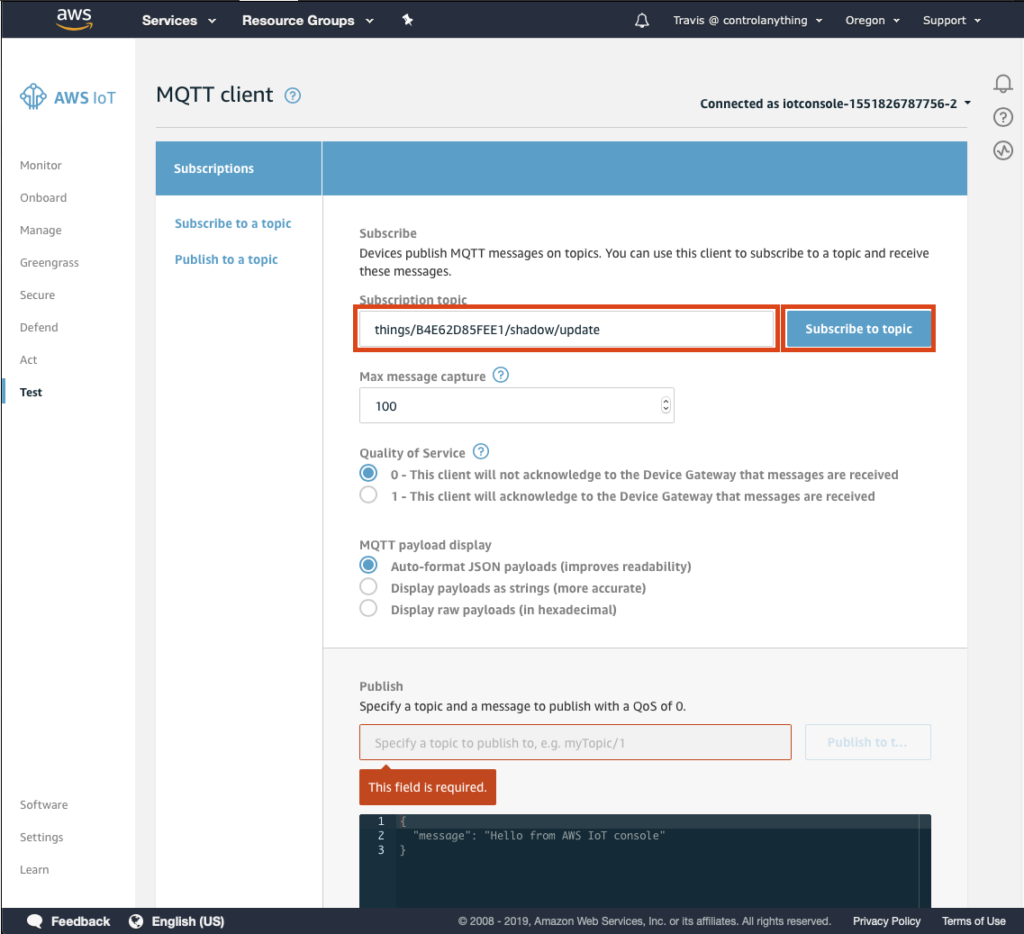
The best way to make sure the setup was performed correctly is to visualize some information on AWS IoT. If you closed your AWS browser earlier then you’ll need to open it again.
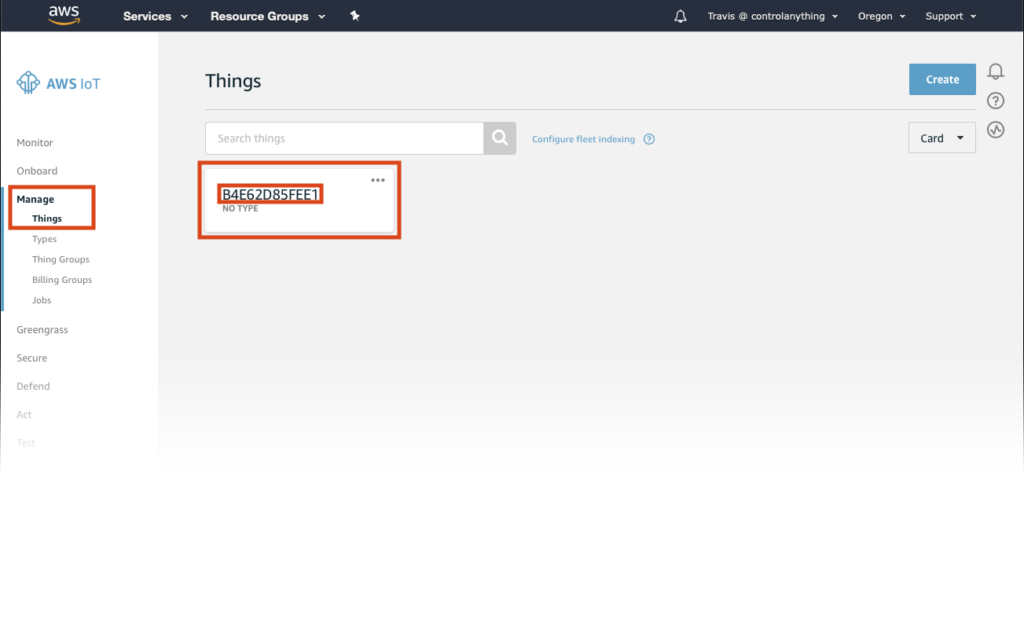
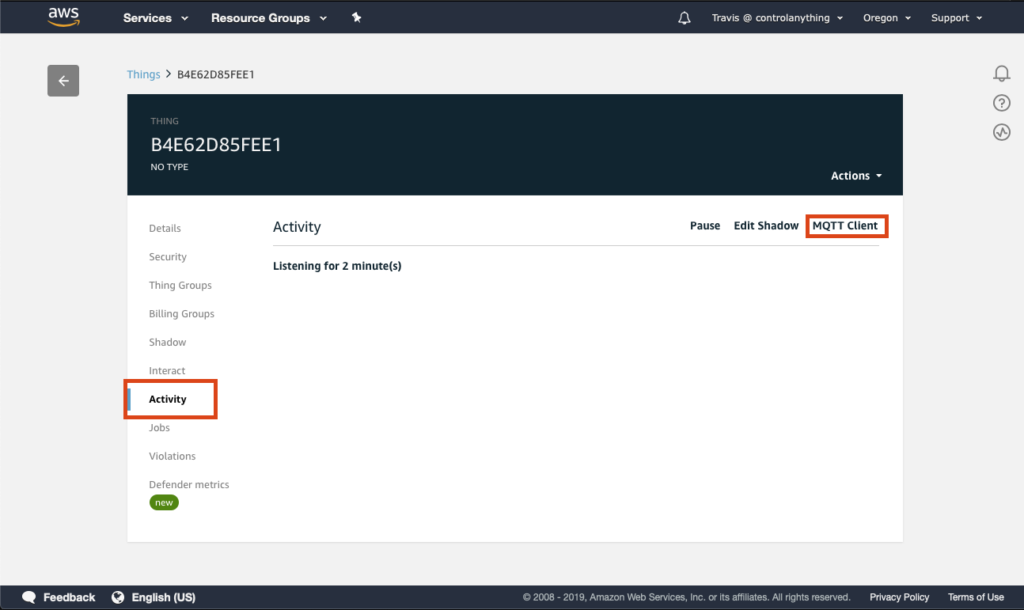
From the IoT Core Dashboard click Manage on the left, then select Things. If completed correctly you will see a device listed here which is your new NCD AWS IoT Gateway. Note the name of the device (Thing) in the panel, you will need this in a future step so write it down. In the screenshot my Thing’s name, as AWS calls it, is: B4E62D85FEE1.
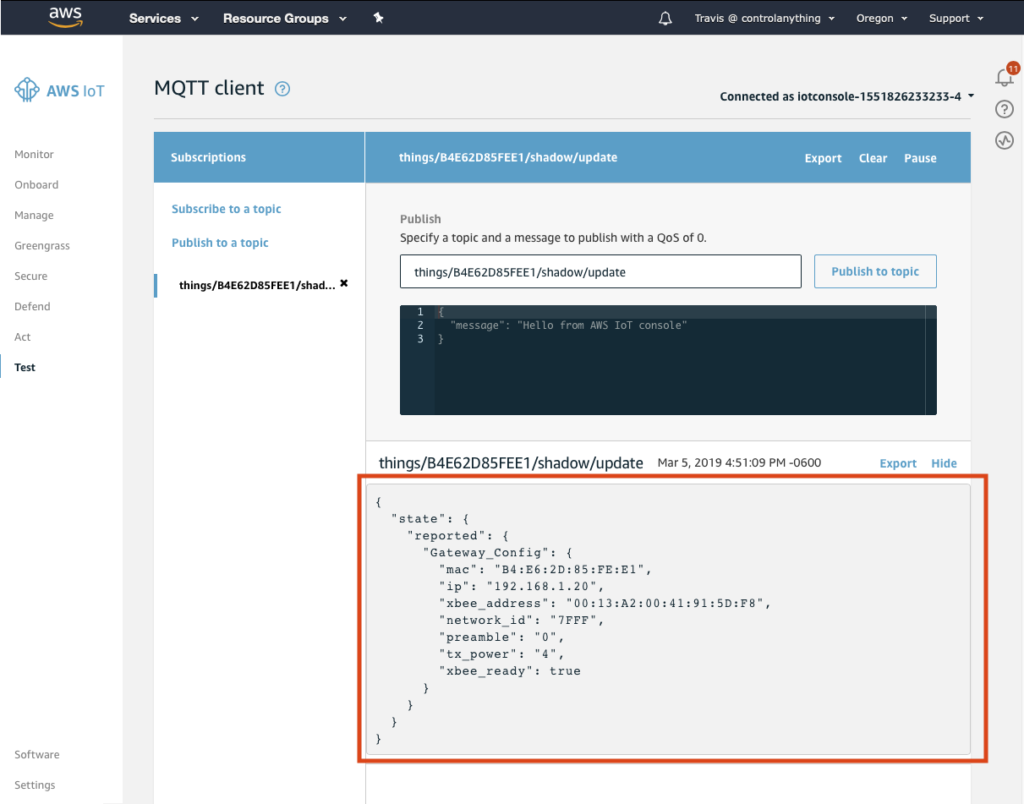
This will open the monitoring console which will show a stream of information coming in from the NCD AWS IoT Gateway. To simplify this, power cycle your gateway and it will send a packet of data to AWS about itself. You will then see this appear on the console.
When this happens then setup of the gateway and AWS is complete. You can now power up sensors and other NCD devices to use through AWS.
Sensor Setup and Installation
Now that the Gateway is communicating to AWS, it’s time to power-up your remote sensors. Follow the steps shown below to enable NCD Sensors:
Remove the NCD Sensor from product packaging and carefully install the antenna. The antenna screws onto the side of the sensor. Please DO NOT OVER-TIGHTEN or damage will result.
Re-Install the lid and secure the screws. For best results, install the sensor in a high location, preferably greater than 3 meters from the floor. Make sure the antenna of the sensor is high enough to avoid shelving or other obstacles.
NOTES
NOTE: Sensors transmit in broadcast mode meaning any gateway will receive transmissions from any sensor. For this reason, it is possible for multiple gateways to report data arriving from a single sensor. NCD has made provisions to build wireless groups that do not interfere with one another. Please contact us if you foresee a need for multiple networks within close proximity.
NOTE: These sensors are secured using the default NCD 128-Bit AES encryption key. This is the same Key used by ALL NCD Wireless Sensors at the time of shipping. Please contact us if you would like a custom Key Assigned to your company. We have also made provisions for customers to change the Encryption Key using additional hardware.