The NCD IoT WiFi Sensor for AWS® was developed for industrial applications where WiFi is available. Great care was taken to ensure this device is easy to configure and use so even IoT beginners can set it up. This guide will thoroughly explain the setup and initial use of the entire line of WiFi Sensors for use with AWS®.
1. AWS® Account Setup
The first thing to do is to create an AWS® account. An AWS® account can be created at https://aws.amazon.com. Once an account has been created on AWS®, proceed through the rest of this section.
To make setup and use of the NCD IoT WiFi Sensors as fast and pain free as possible this product uses IAM credentials which allows a Sensor to provision itself on AWS® IoT.
In the IAM console first create a new Policy that which the NCD Sensor for AWS will use to provision itself on AWS IoT.
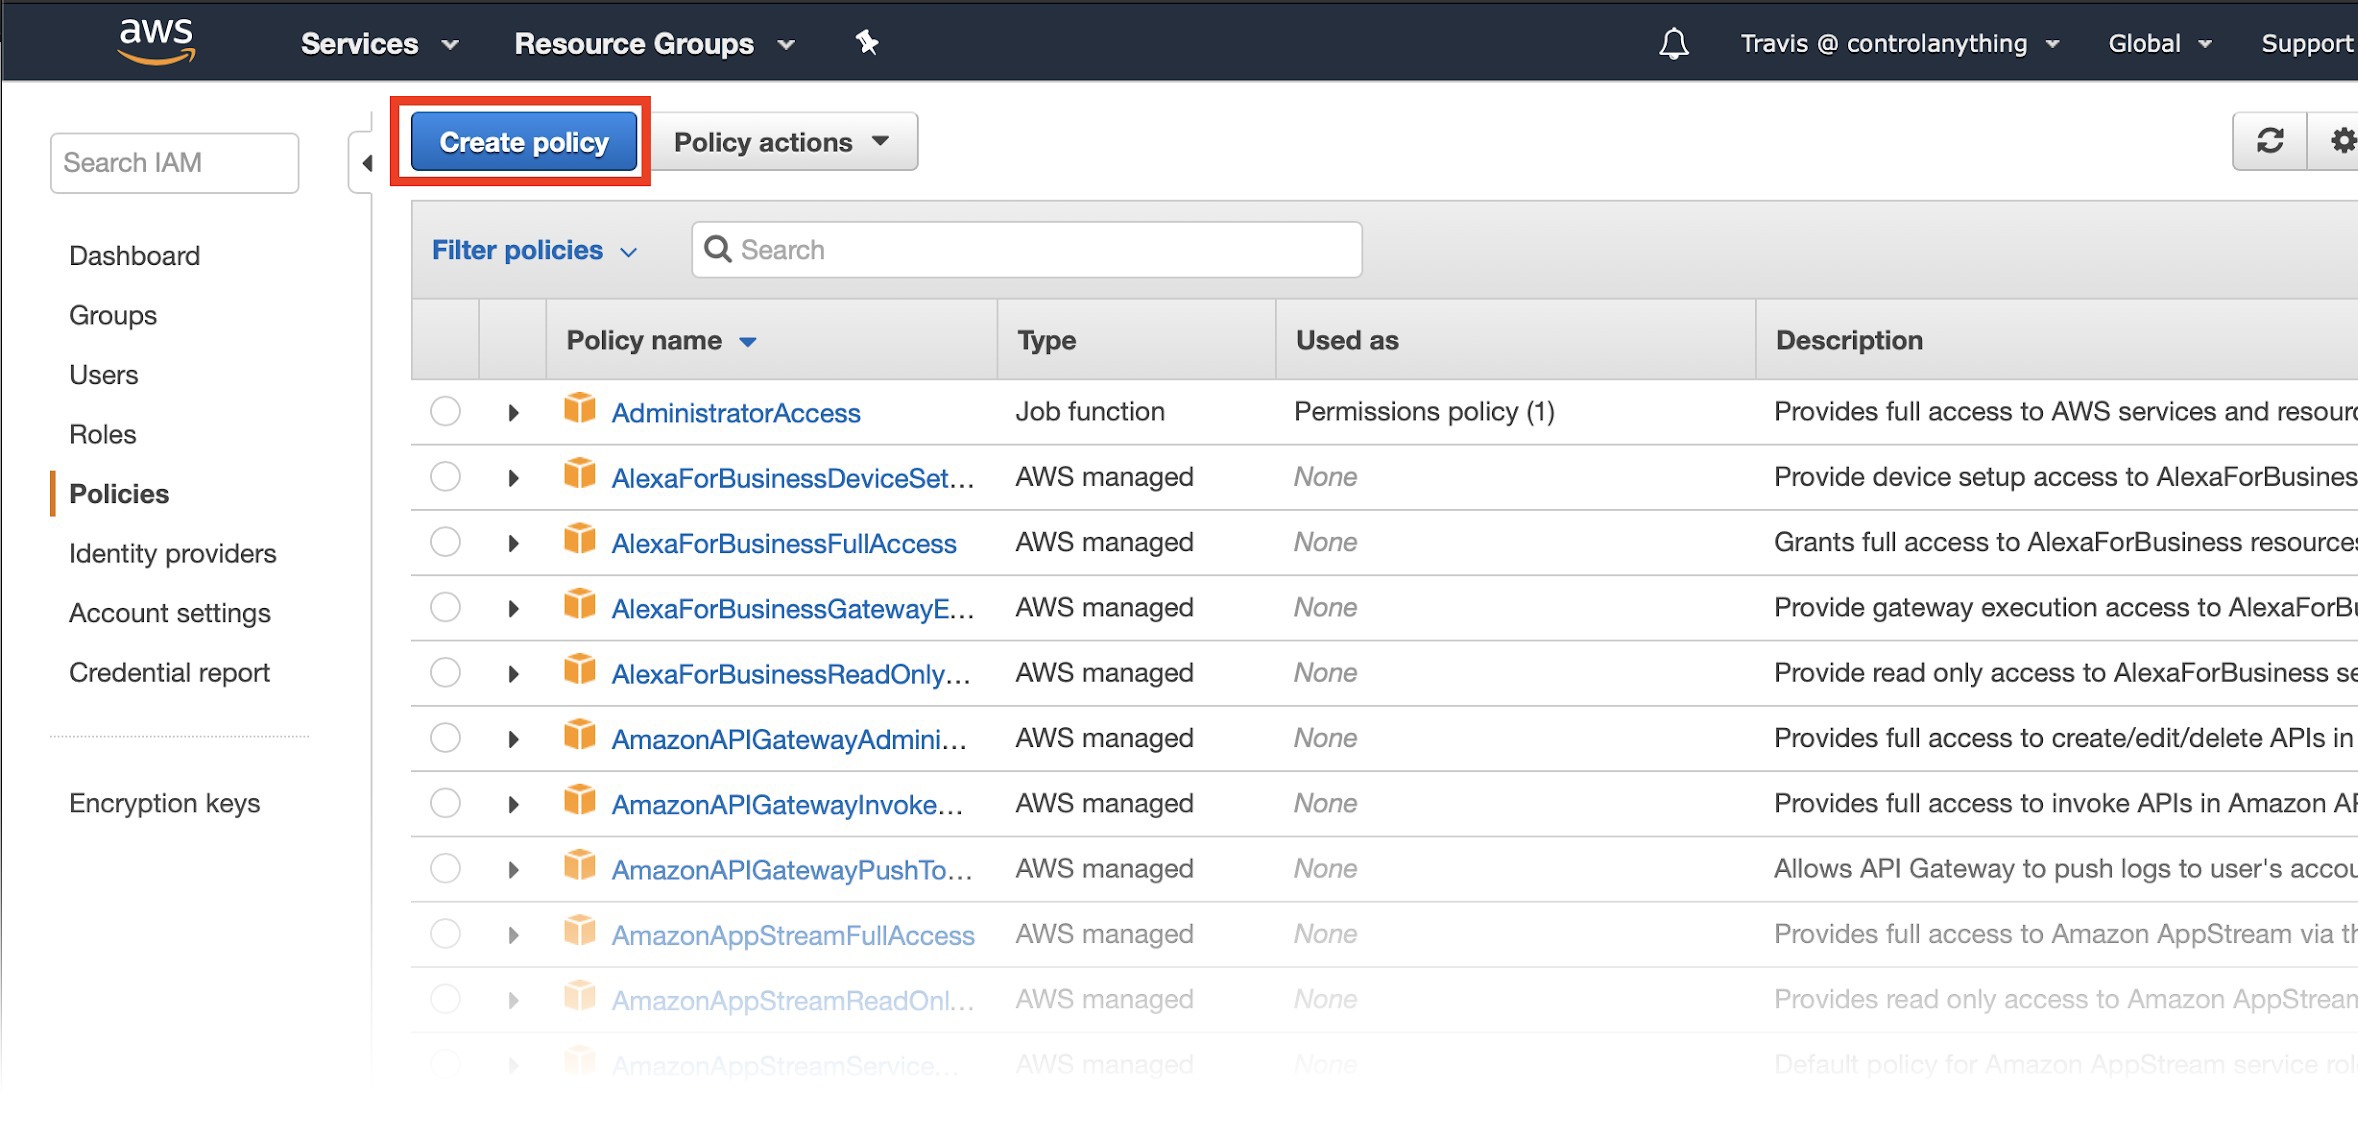
To do this, select Policies in the left menu. The Policies Dashboard will list many default policies. To create a new one, click the Create Policy button.
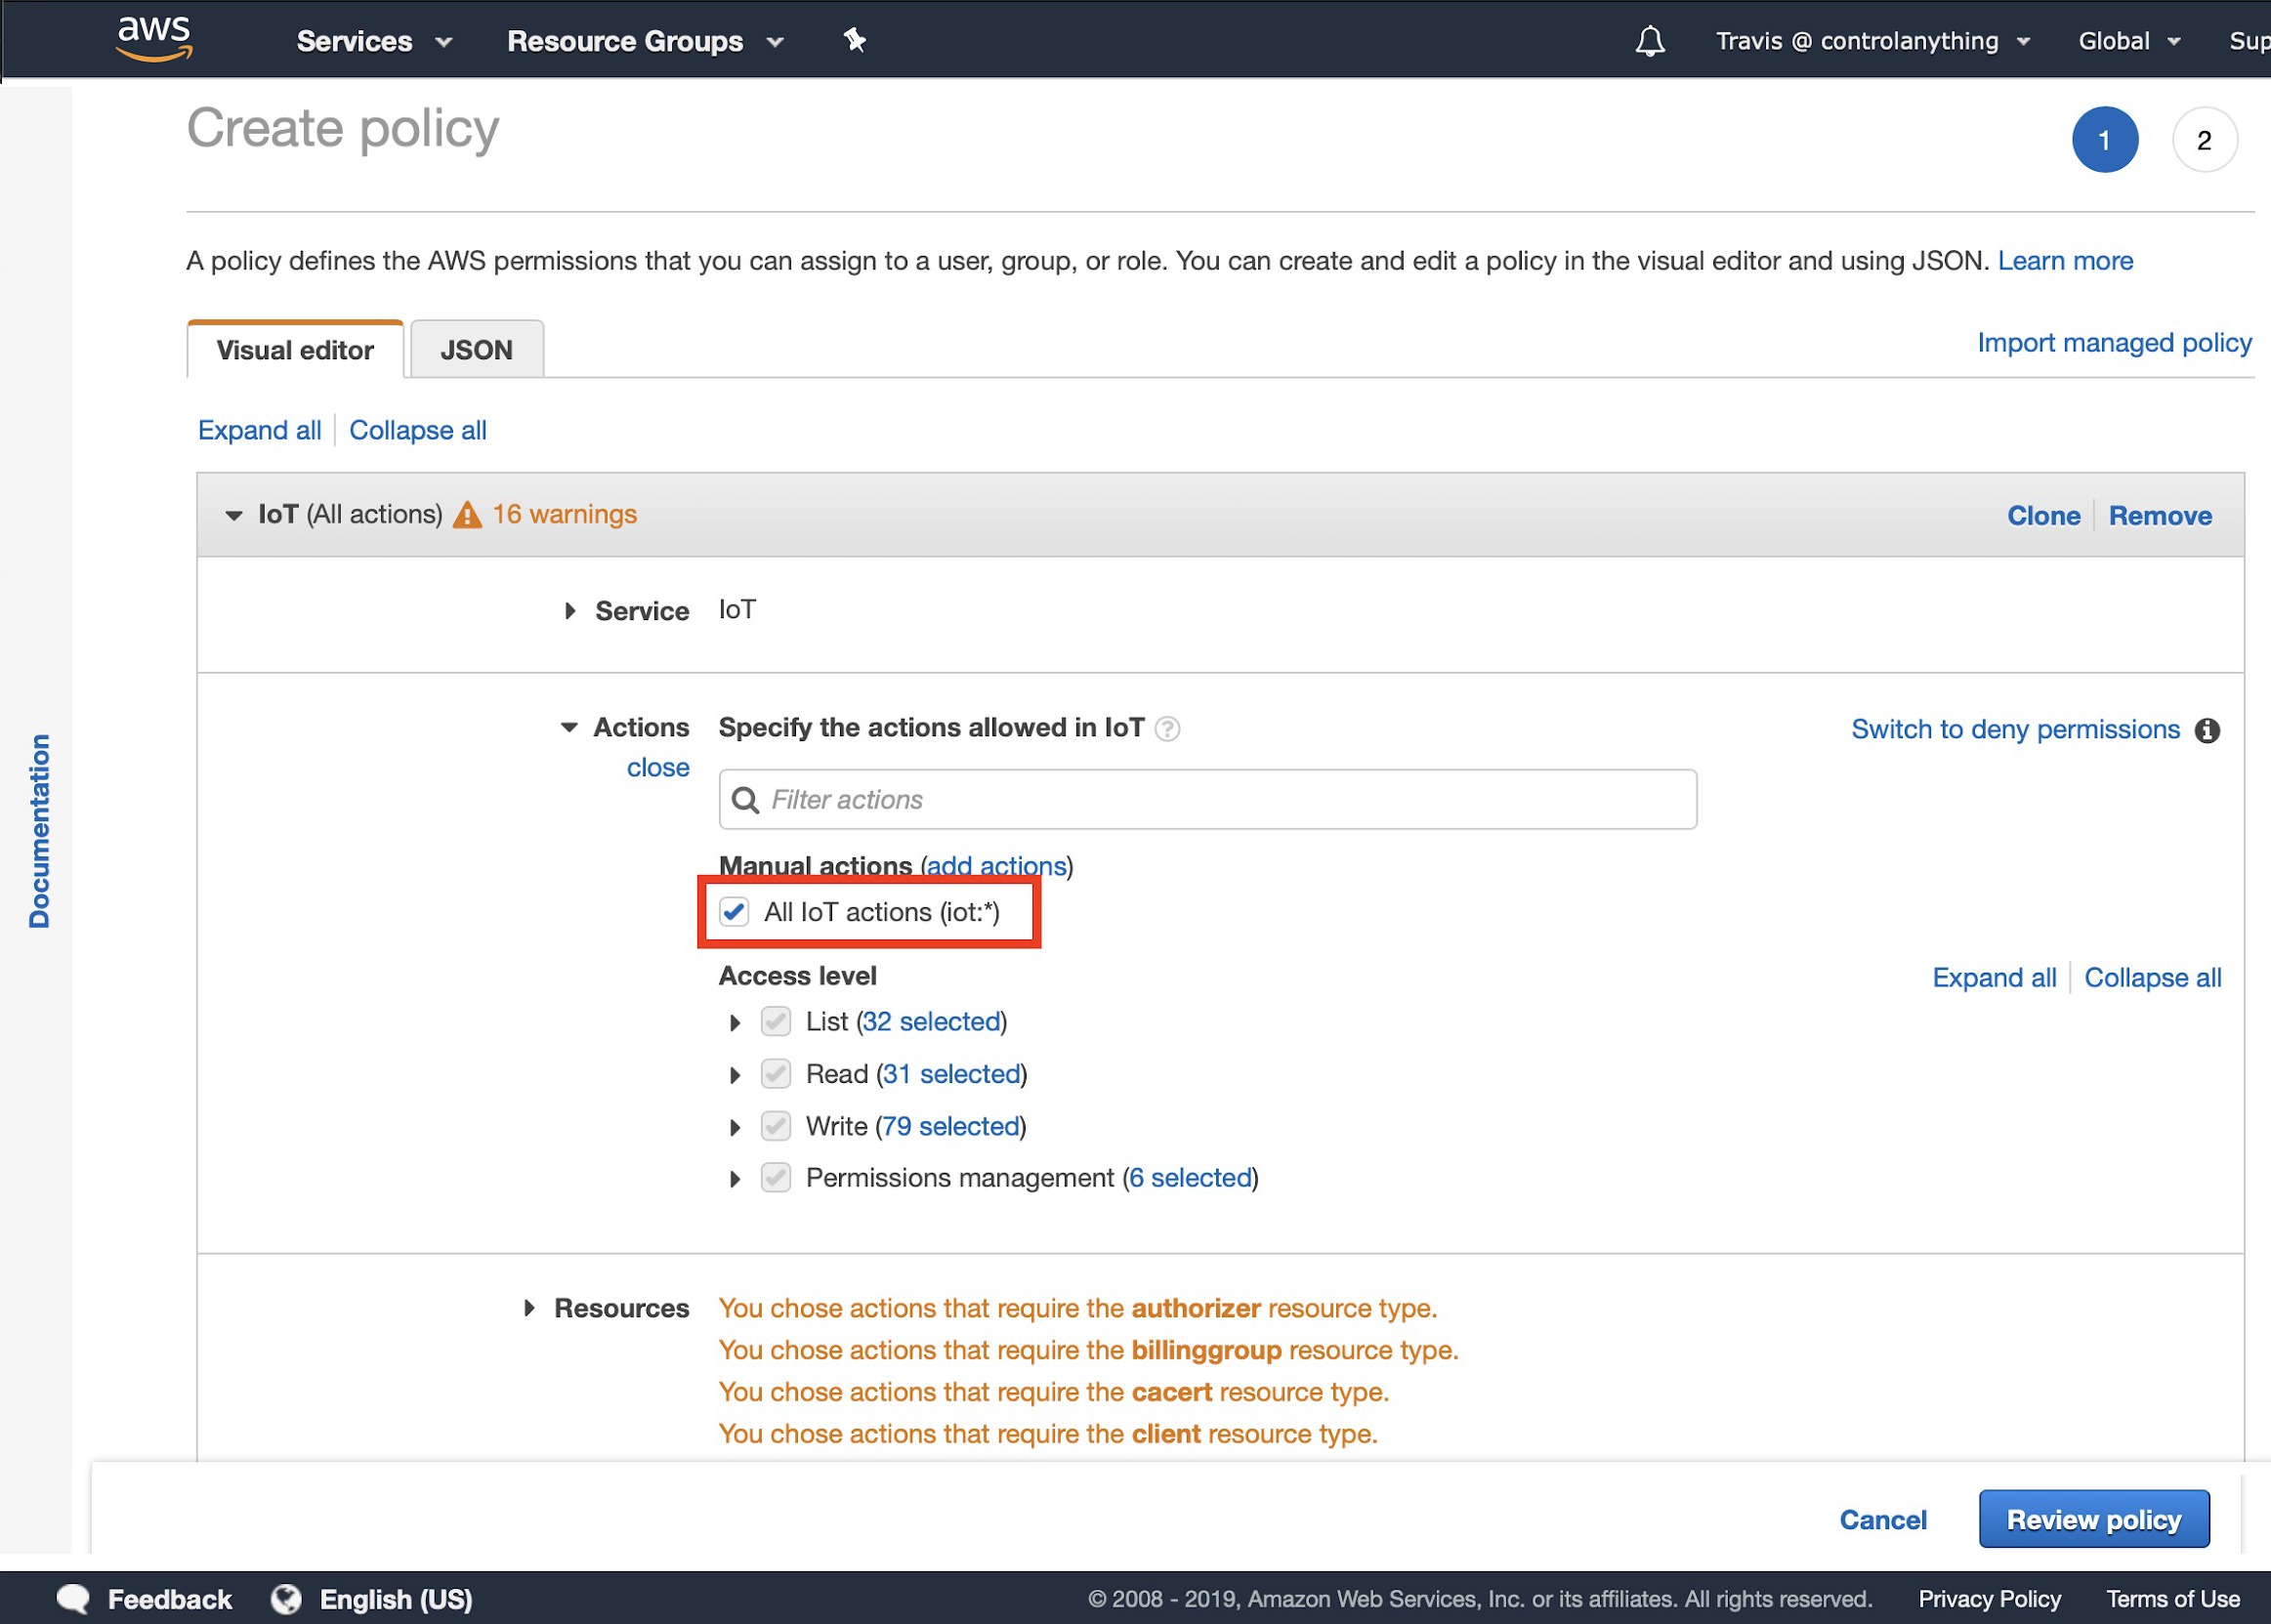
Now select the actions this Policy will allow access to. For simplicity’s sake select All IoT Actions(iot:*). If experienced with AWS, feel free to be more explicit as to the Actions allowed on the Policy.
Under Resources select All Resources. Once again if you are experienced with policy creation feel free to be more explicit. Finally click Review Policy.
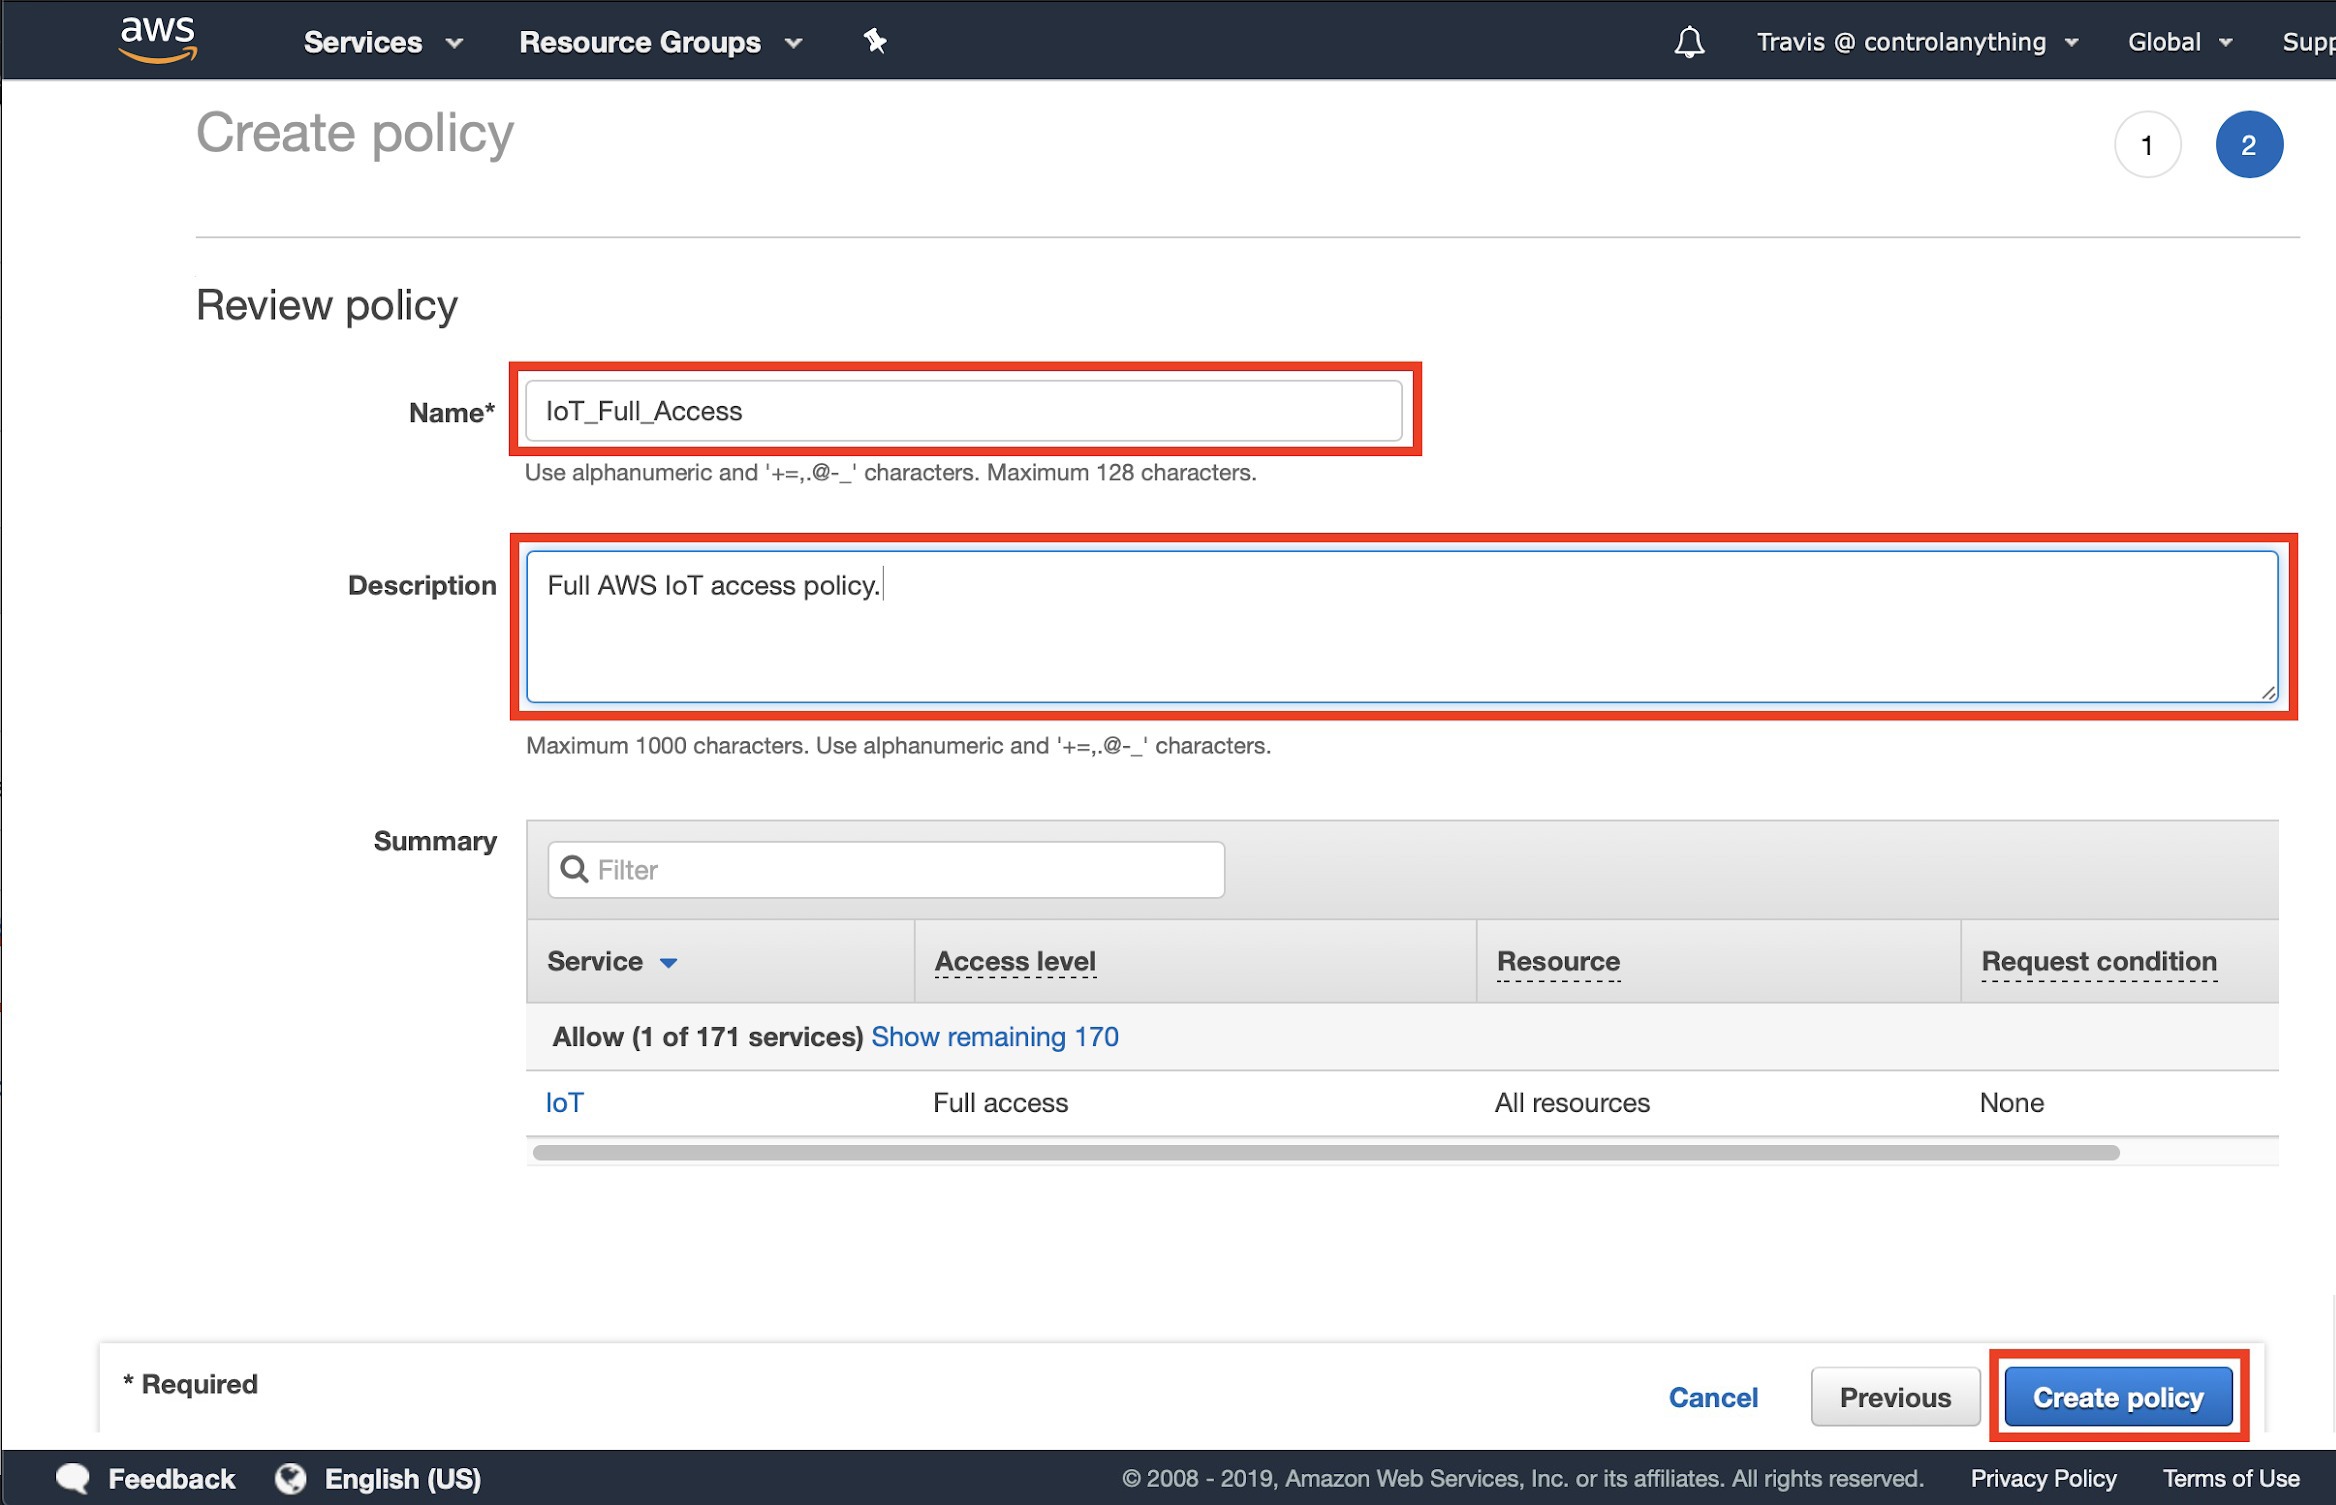
In the Review Policy Window enter a name for the Policy, a description and review the summary. After following the instructions above, it should look similar to this (except for the name and description, which would be unique information). Be sure to take note of the Name entered here as we will need to reference that later.
After clicking Create Policy, the IAM Management console will be opened. Click Users on the left to create a new IAM user.
This will start the “wizard” for creating an IAM User. Enter a name for this IAM user and select Programmatic access under Access Type, then click the Next:Permissions button.
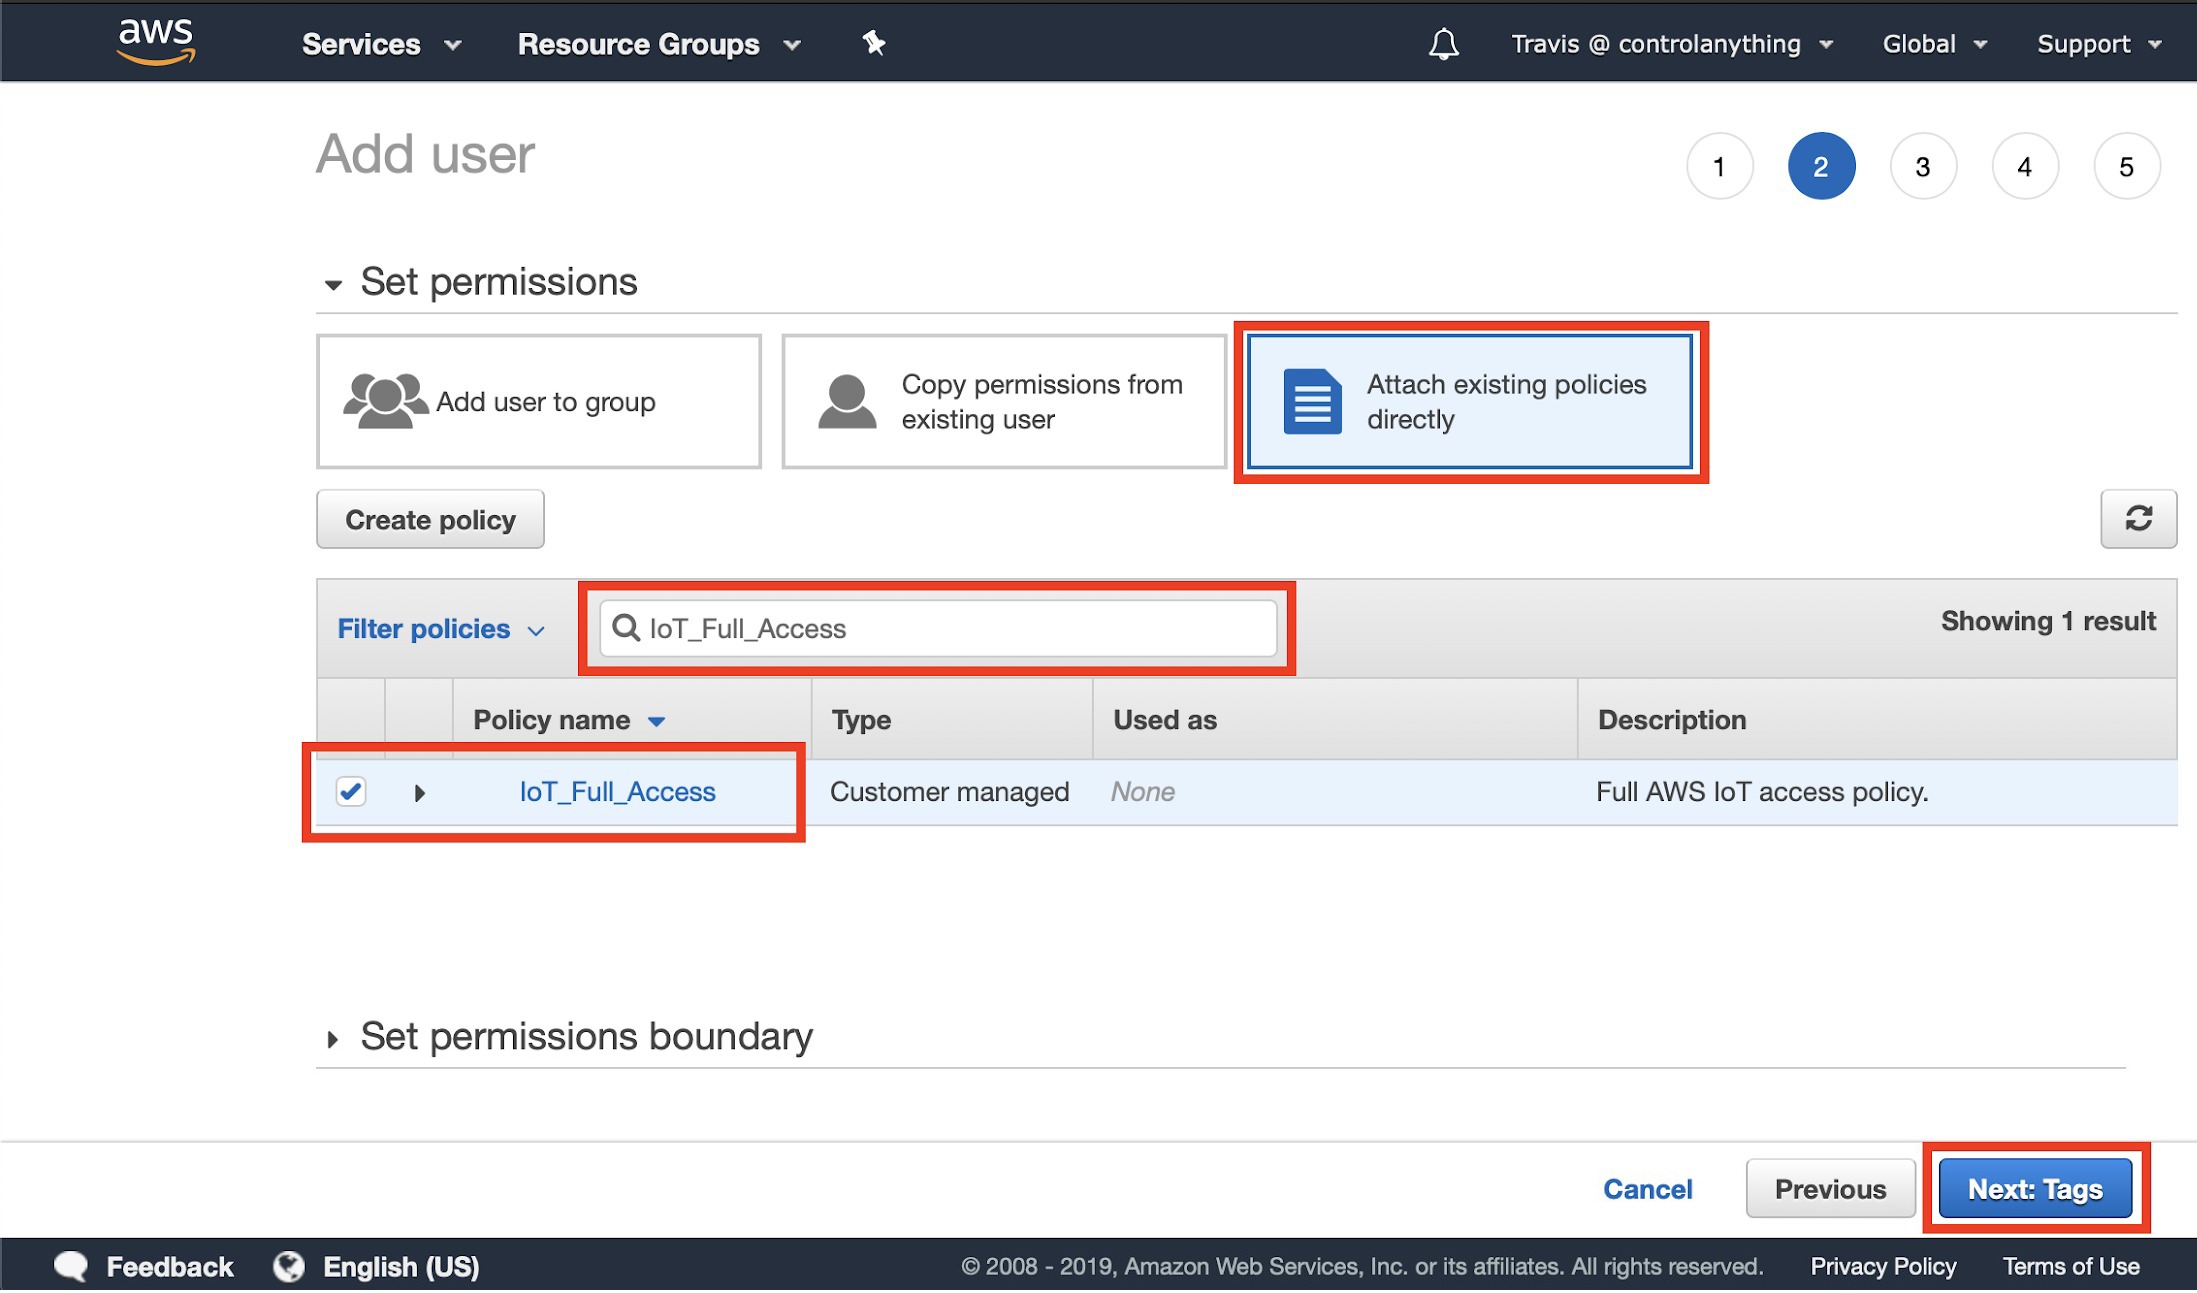
Now attach the Policy just created to this IAM User. Click the Attach existing Policies directly box at the top, then in the filter policies search box type in the Policy name. Once it appears click the checkbox to select it, then click the Next: Tags button.
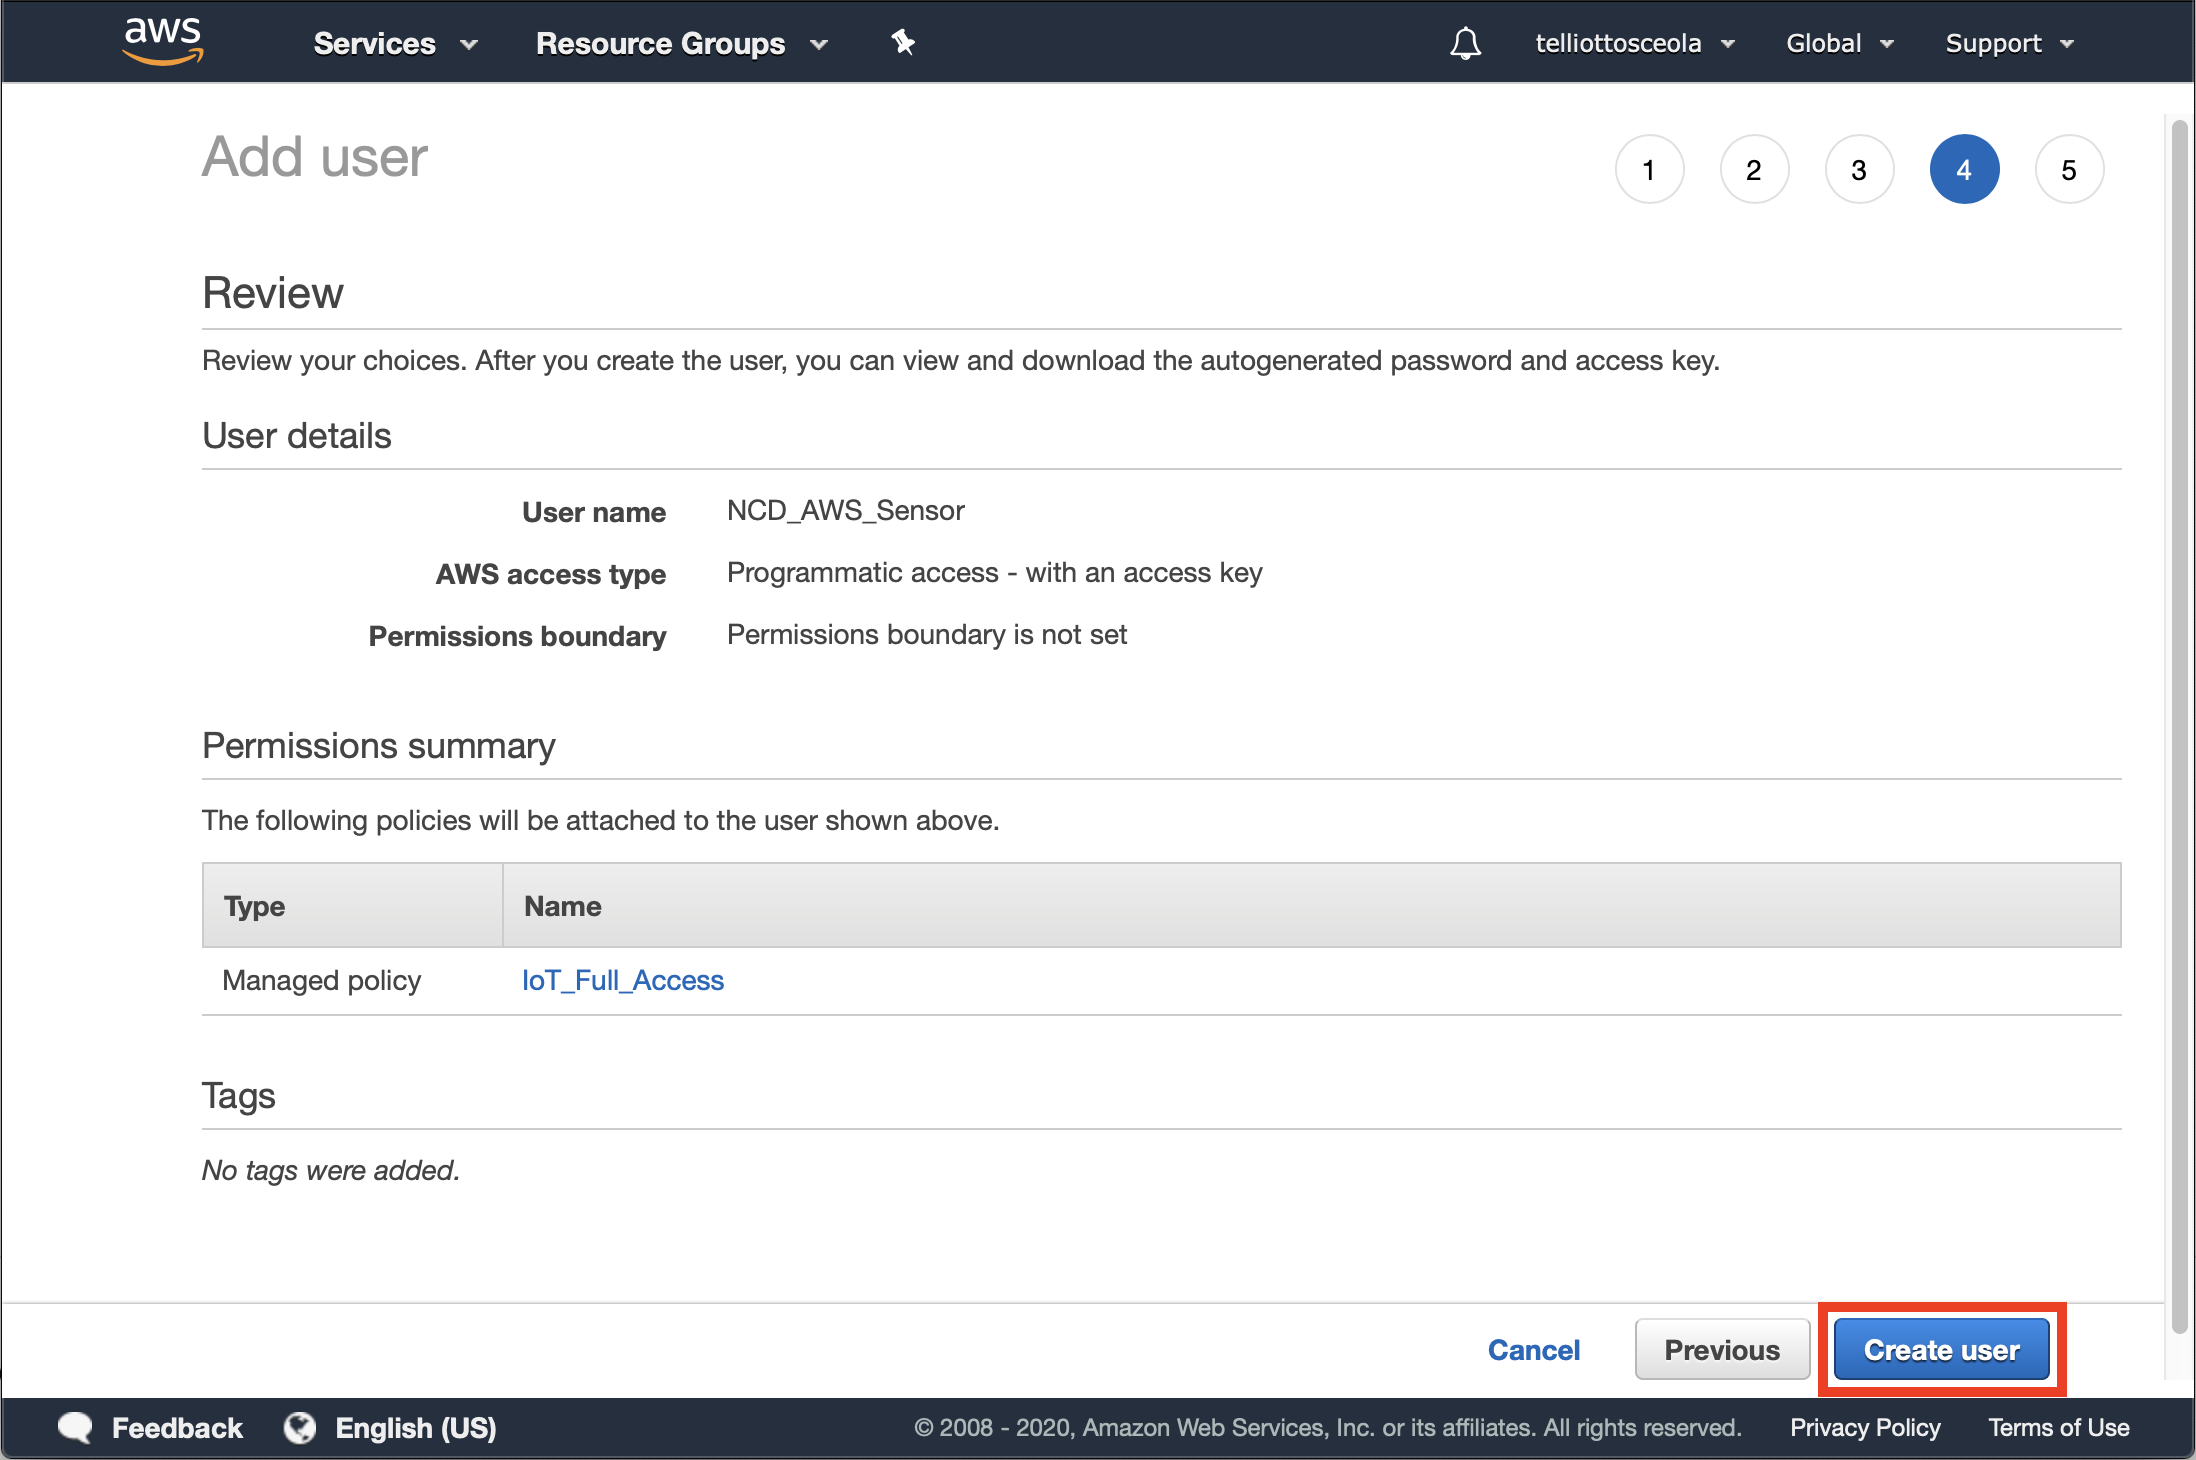
On the final page, see the user credentials. It’s very important to understand that once this page is closed, the IAM Secret Access Key will never be accessible again. It absolutely must be coped down in a text editor or it will be gone forever and a new IAM User will need to be created.
These credentials will be needed to setup the Sensor. Once these credentials have been secured, click the close button.
Make sure the NCD IoT Sensor for AWS is in setup mode which is indicated by a flashing blue LED. If not in Setup Mode, press and hold the C button on the module inside the enclosure until the LED turns blue.
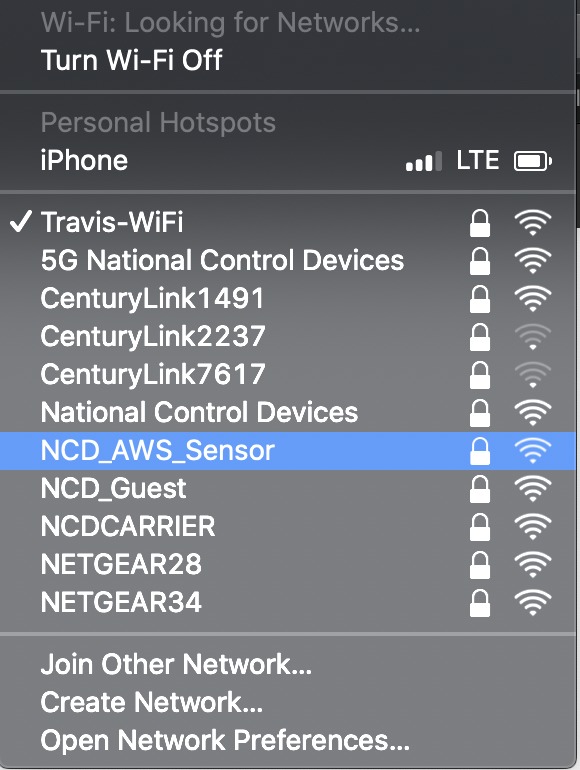
Once it is in setup mode, open the WiFi network preferences and scan for WiFi networks. The Sensor should show up in the WiFi network scan as NCD_AWS_Sensor. Select NCD_AWS_Sensor.
Once connected to the Sensor a browser window will appear on screen. If for some reason this browser window does not appear open a browser and enter the IP address 172.217.28.1 then press enter. This Browser interface is where the sensor can be configured.
Click WiFi. Enter information about the WiFi Network that the sensor should connect to upon booting up. Note that this network will need to have internet connectivity. If the WiFi Network does not broadcast it’s IP address then enter it’s SSID into the Hidden Network field. DHCP or Static IP is optional.
Click Soft AP. Here the user can optionally change the Soft AP SSID and Password for the sensor. This is not required but some users may find it useful.
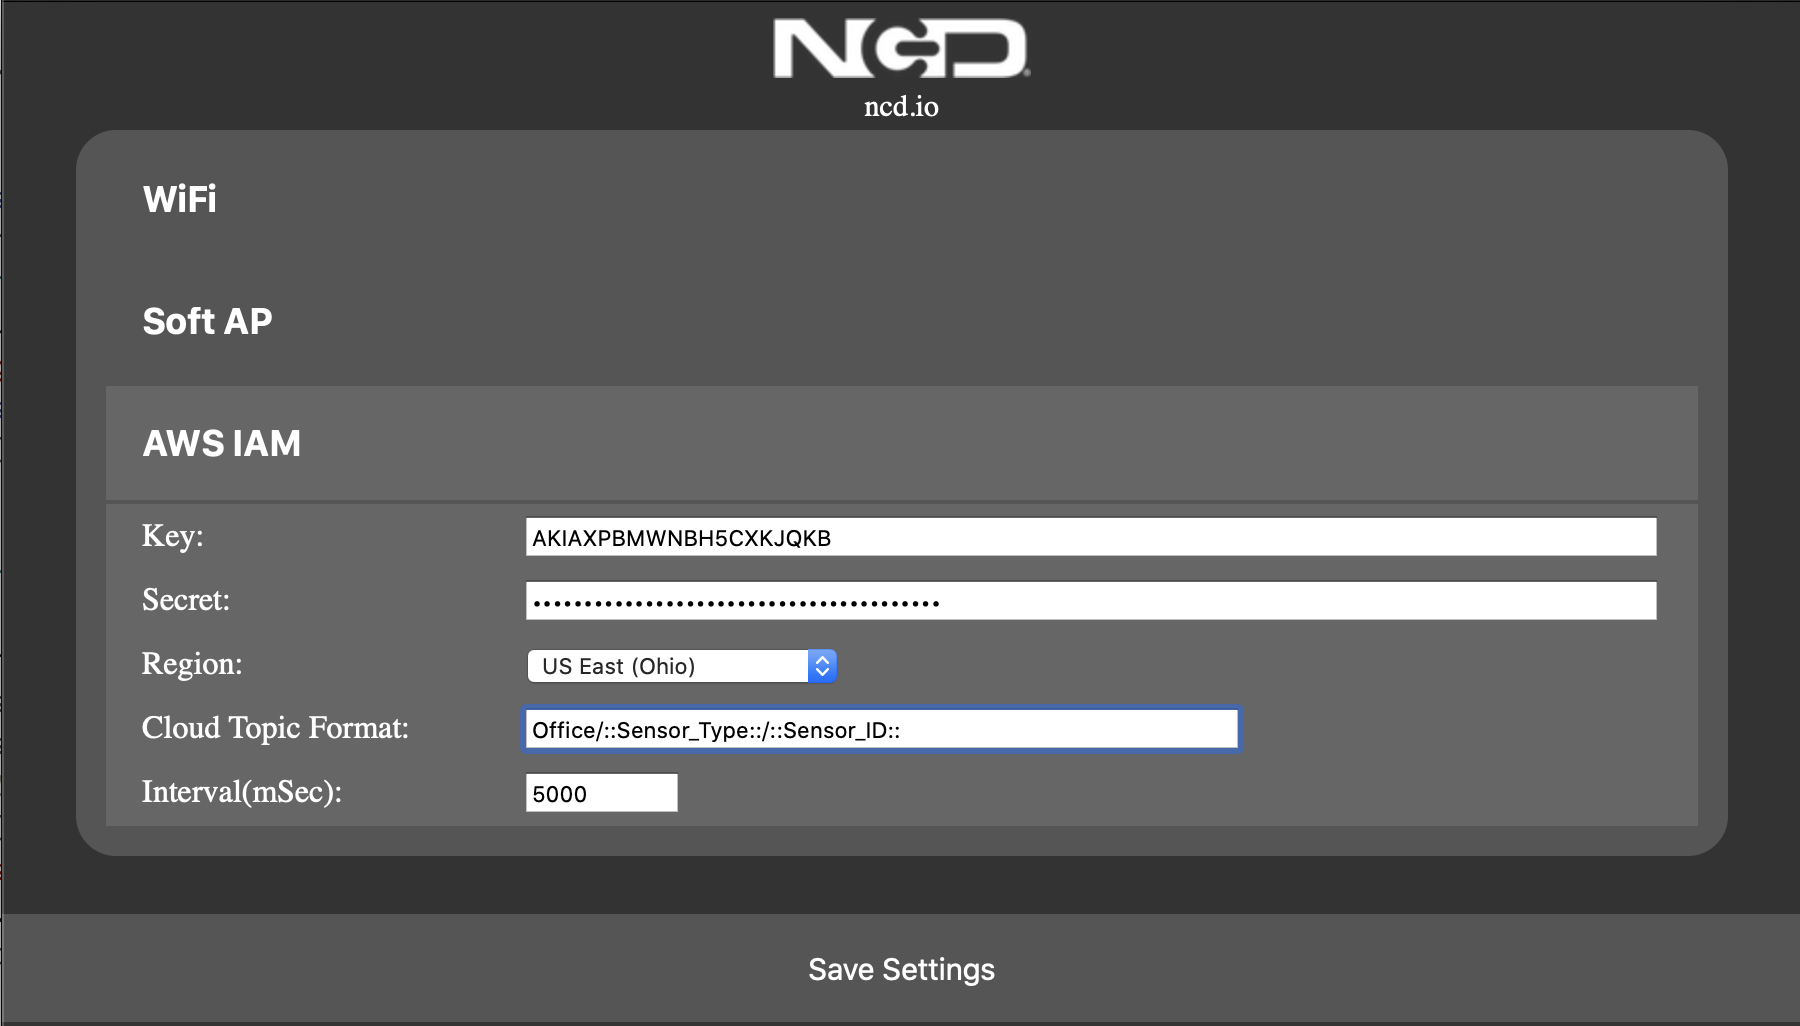
Enter the Key and Secret obtained in step 12 above.
Select the Region your AWS Account is hosted in.
It is possible to customize the Topic the sensor reports sensor telemetry data to. This is entered in the Cloud Topic Format Field. Token replacement is implemented for ::Sensor_Type:: and ::Sensor_ID:: Sensor_Type is a number representing the type of sensor. Sensor_ID will be the MAC address of the sensor. Leave this field blank to report data only to the Thing Shadow.
Interval is the Interval in milliseconds that the sensor reports it’s telemetry data to AWS.
Click Save Settings. The Sensor will now save the settings and reboot. The LED will begin flashing Yellow after reboot. If the sensor is able to connect to AWS successfully the LED will begin flashing Green. If the LED flashes Red then check all of the settings entered in the Sensor. If the LED flashes Yellow for more than 1 minute it indicates it is unable to connect to the WiFi network.
3. Testing
The best way to make sure the setup was performed correctly is to visualize some information on AWS IoT.
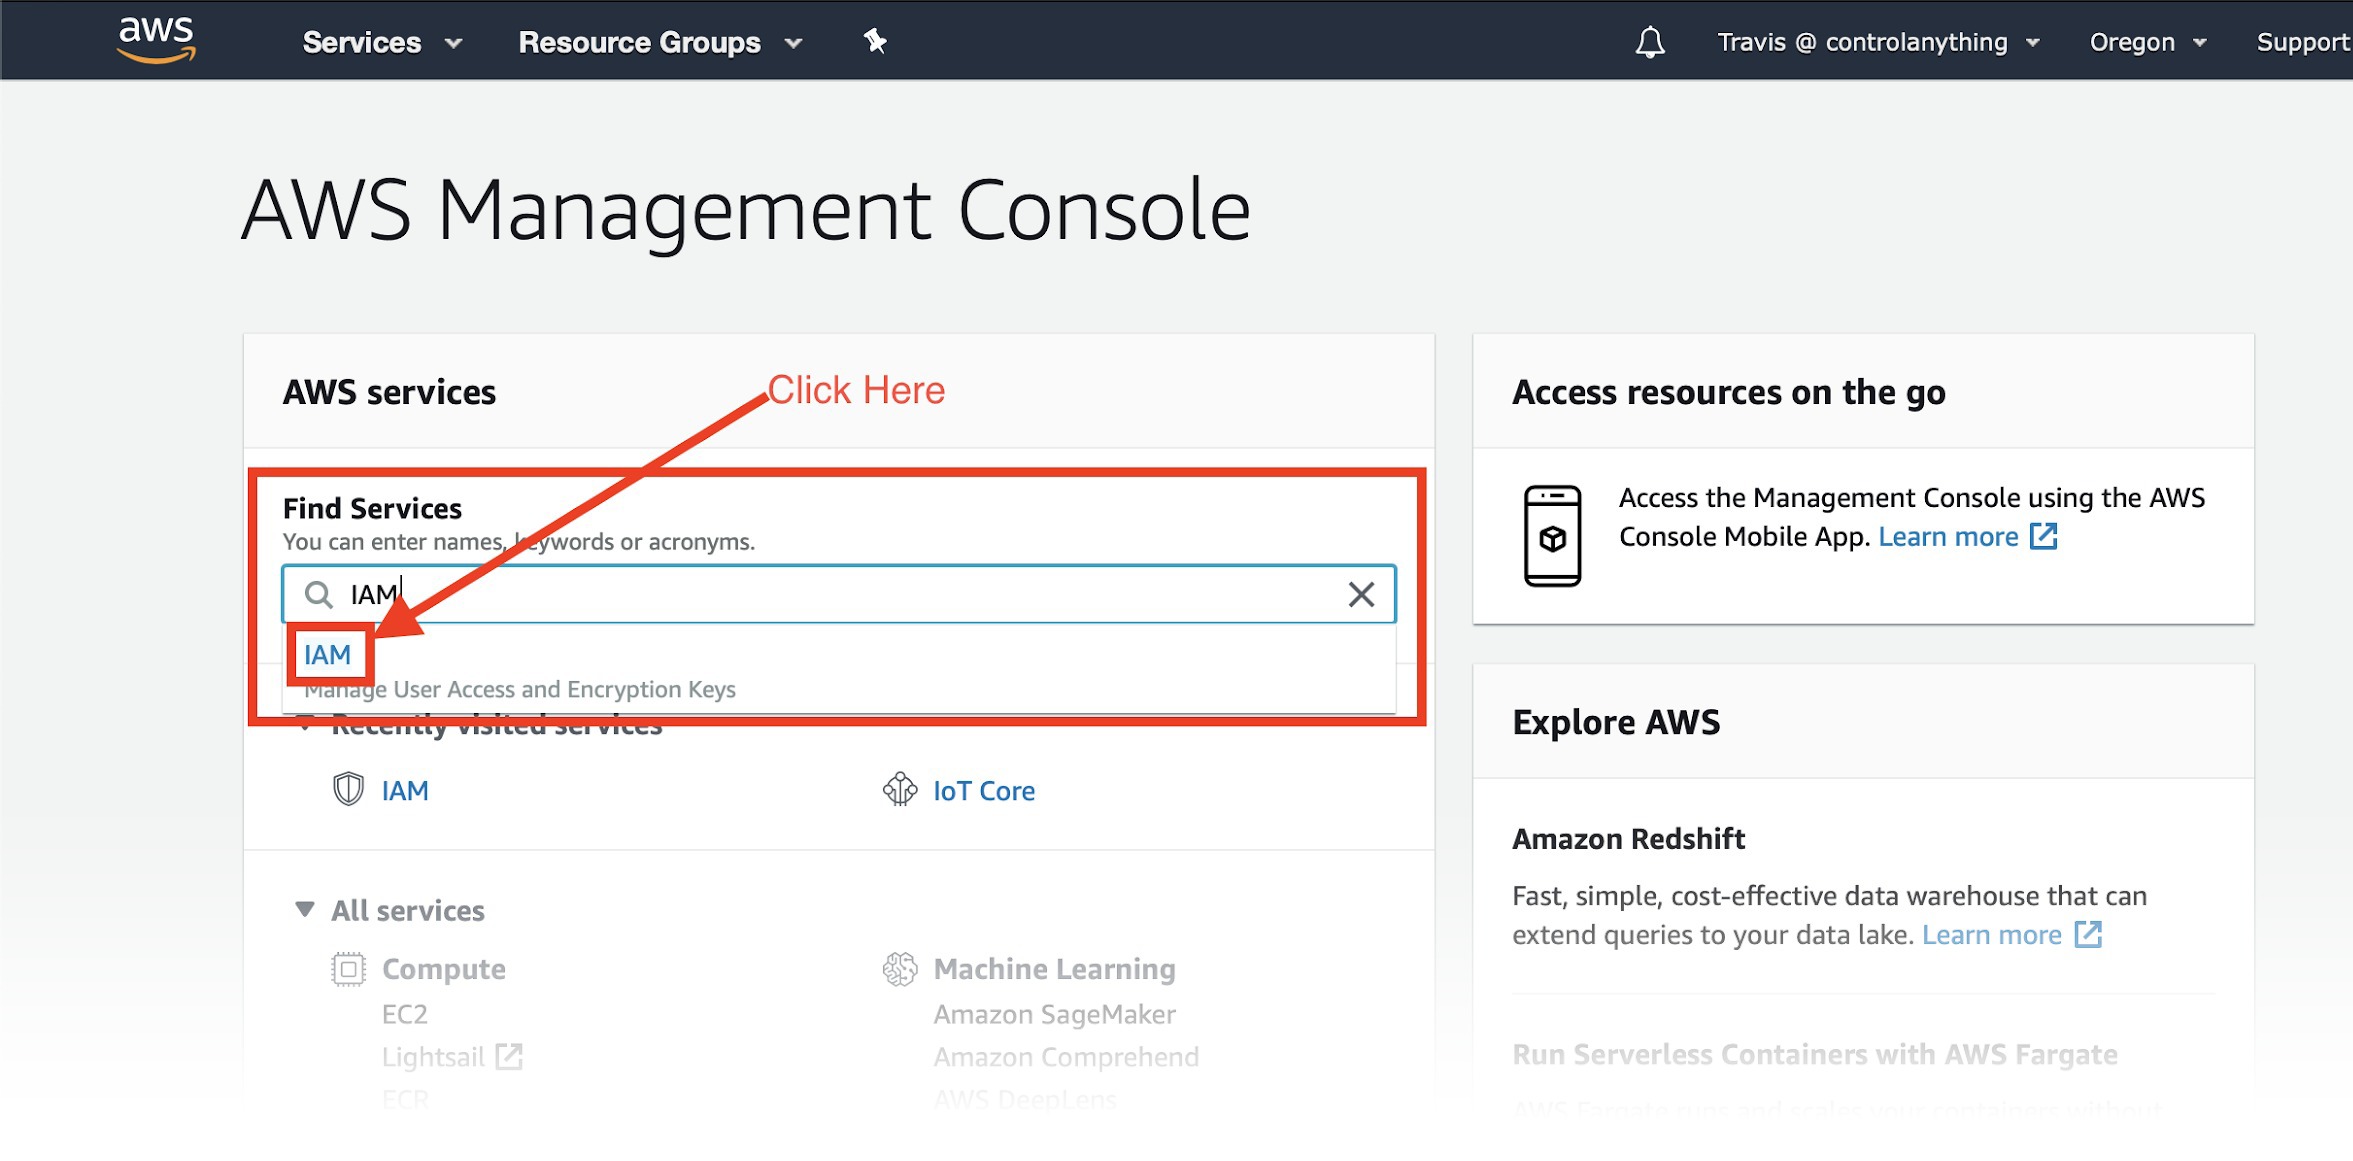
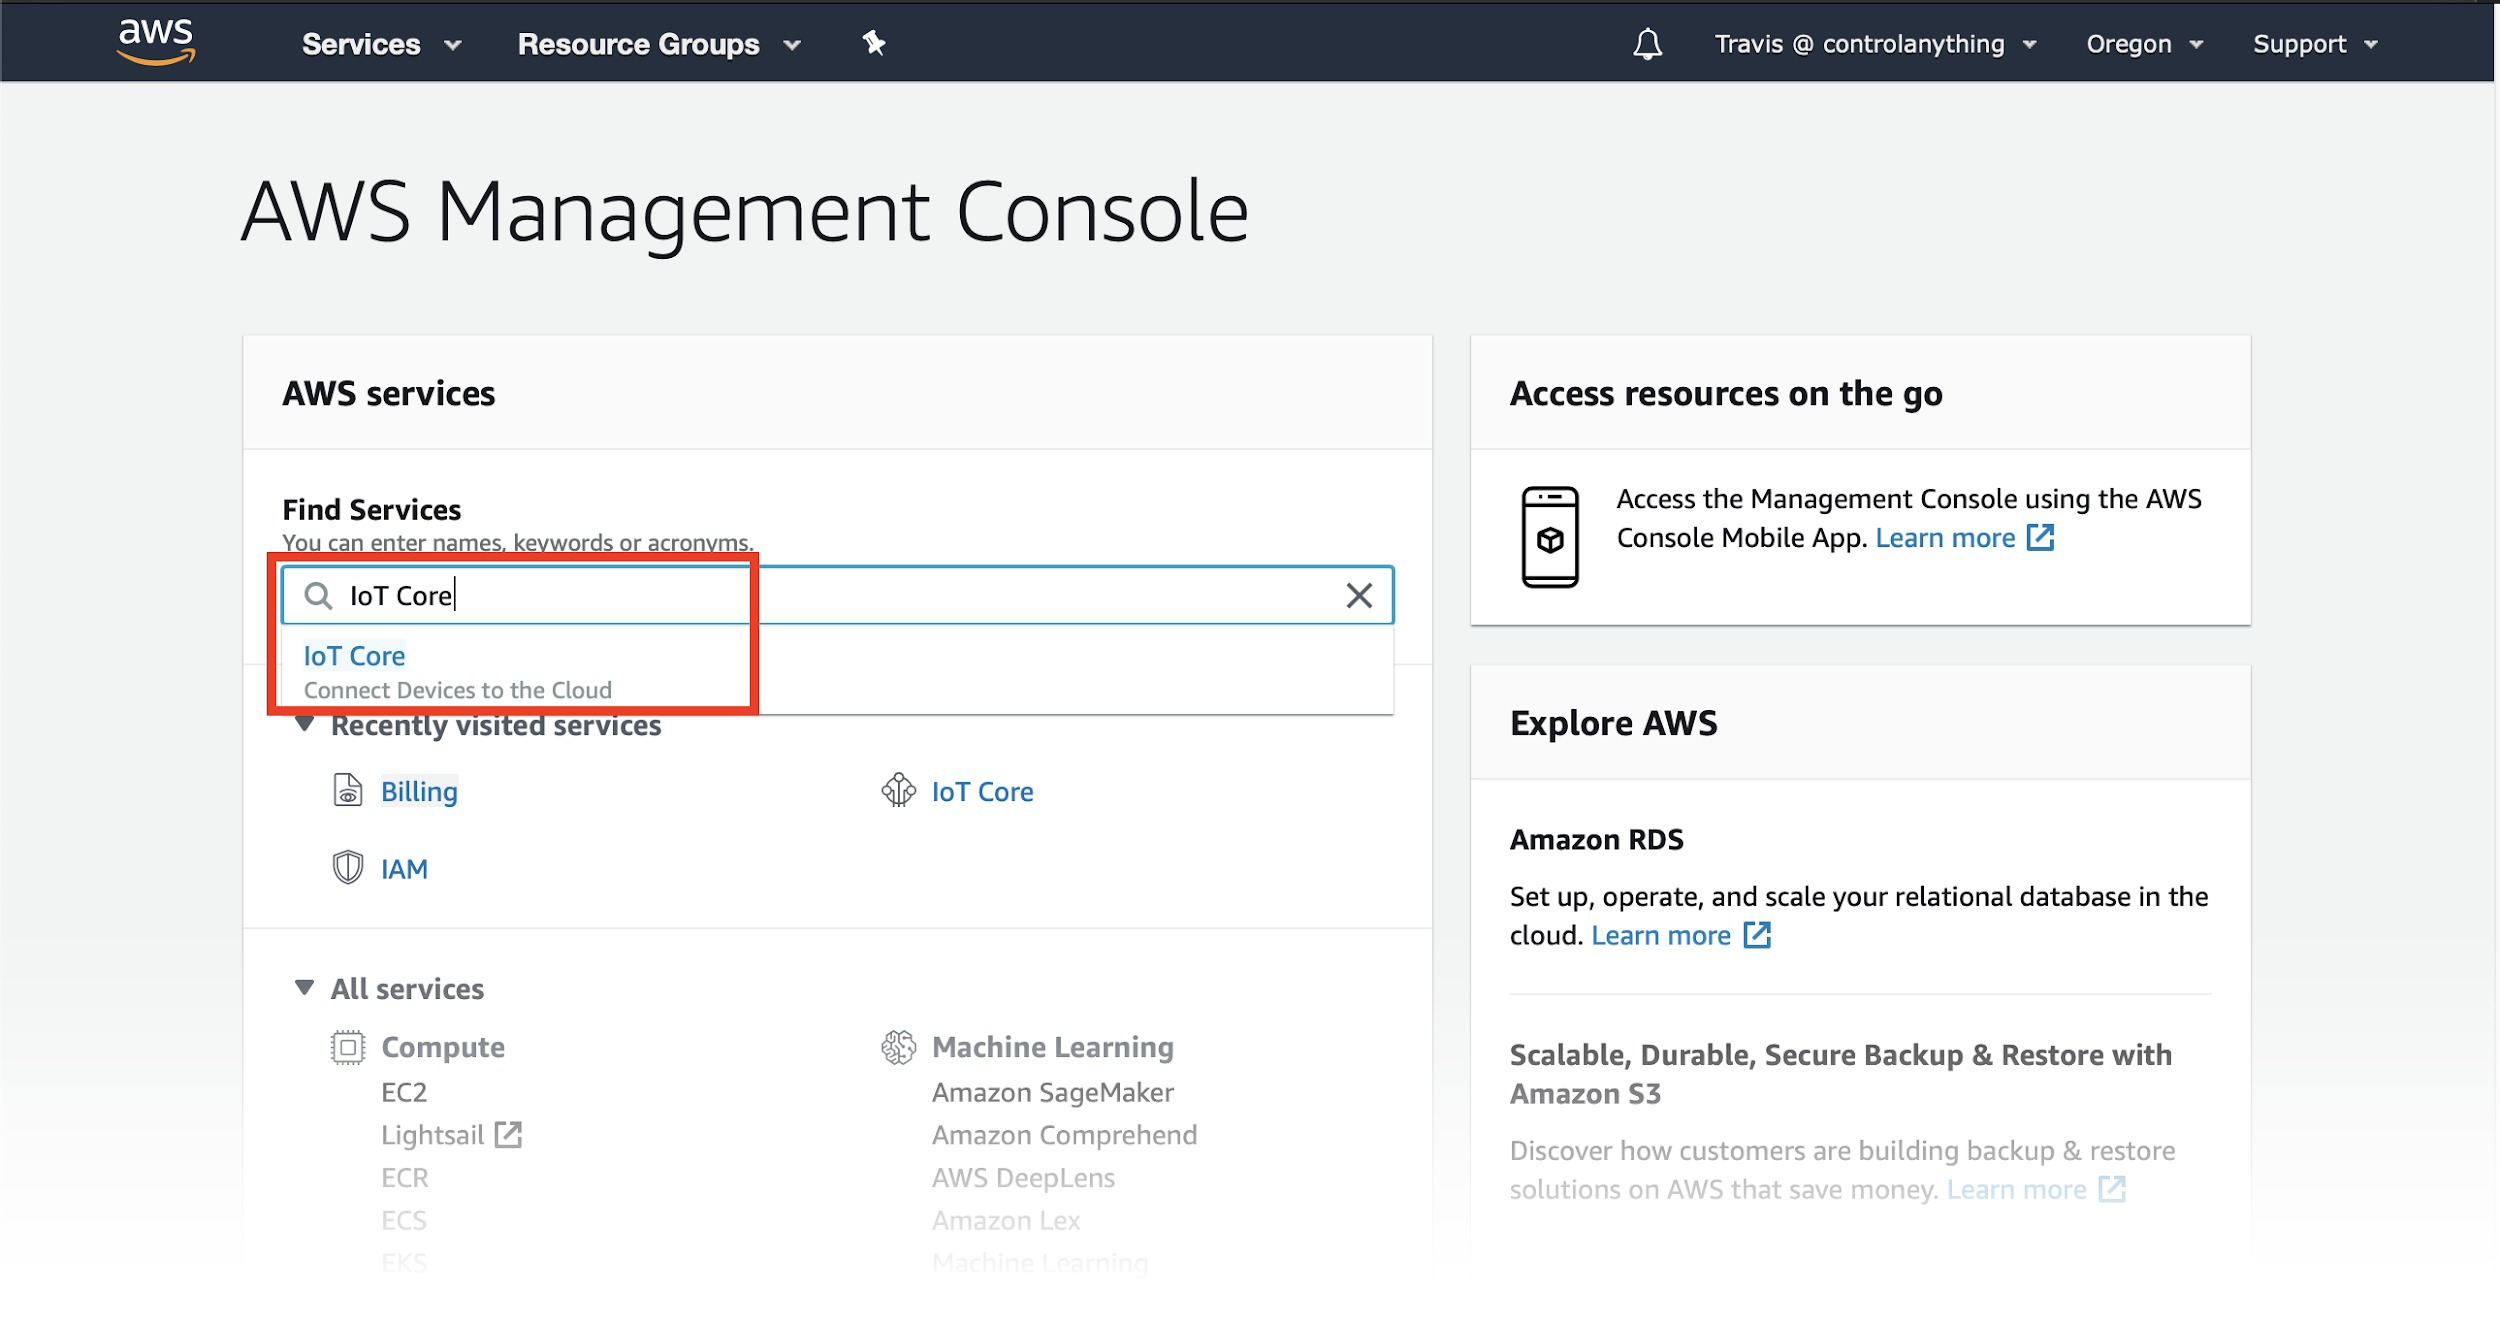
Reopen your AWS Management Console and search services for IoT Core, then select it. Or simply click the Services drop down box at the top and search IoT Core.
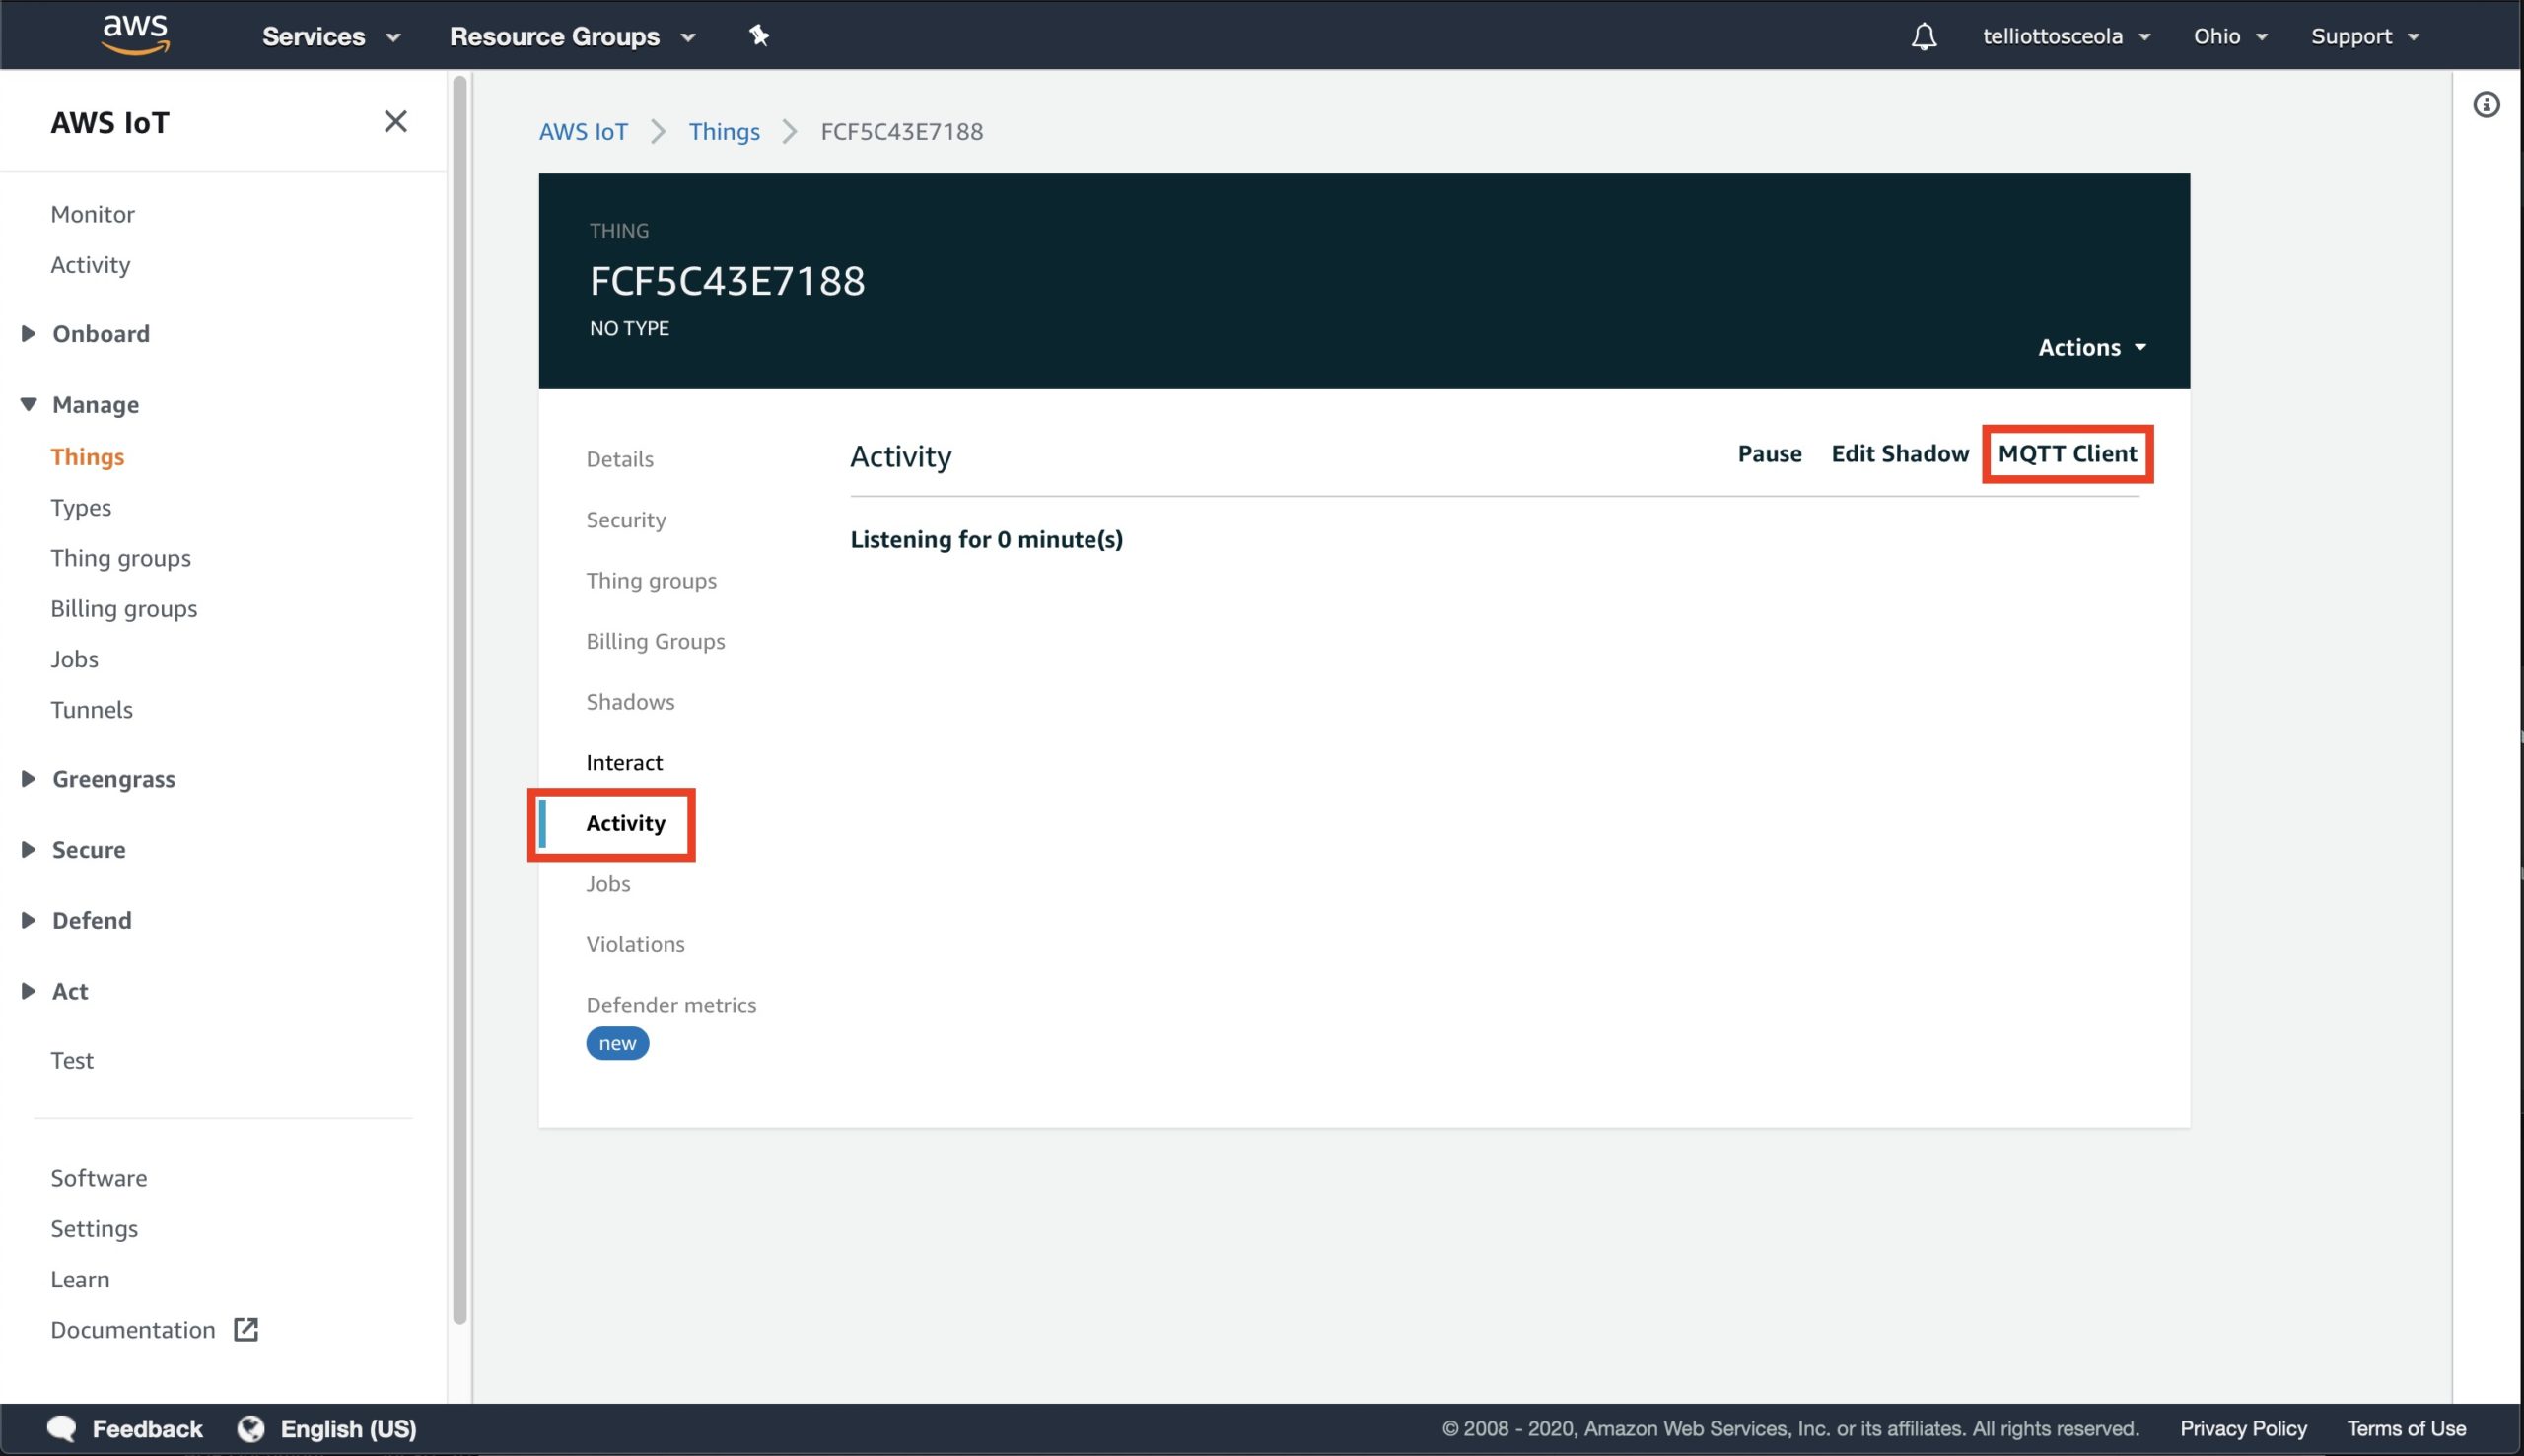
From the IoT Core Dashboard click Manage on the left, then select Things. If completed correctly a device will be listed here which is the new NCD IoT Sensor for AWS.
Note the name of the device (Thing) in the panel. This is needed in a future step so write it down. In the visual to the right, the Thing’s name, as AWS calls it, is: FCF5C43E7188.
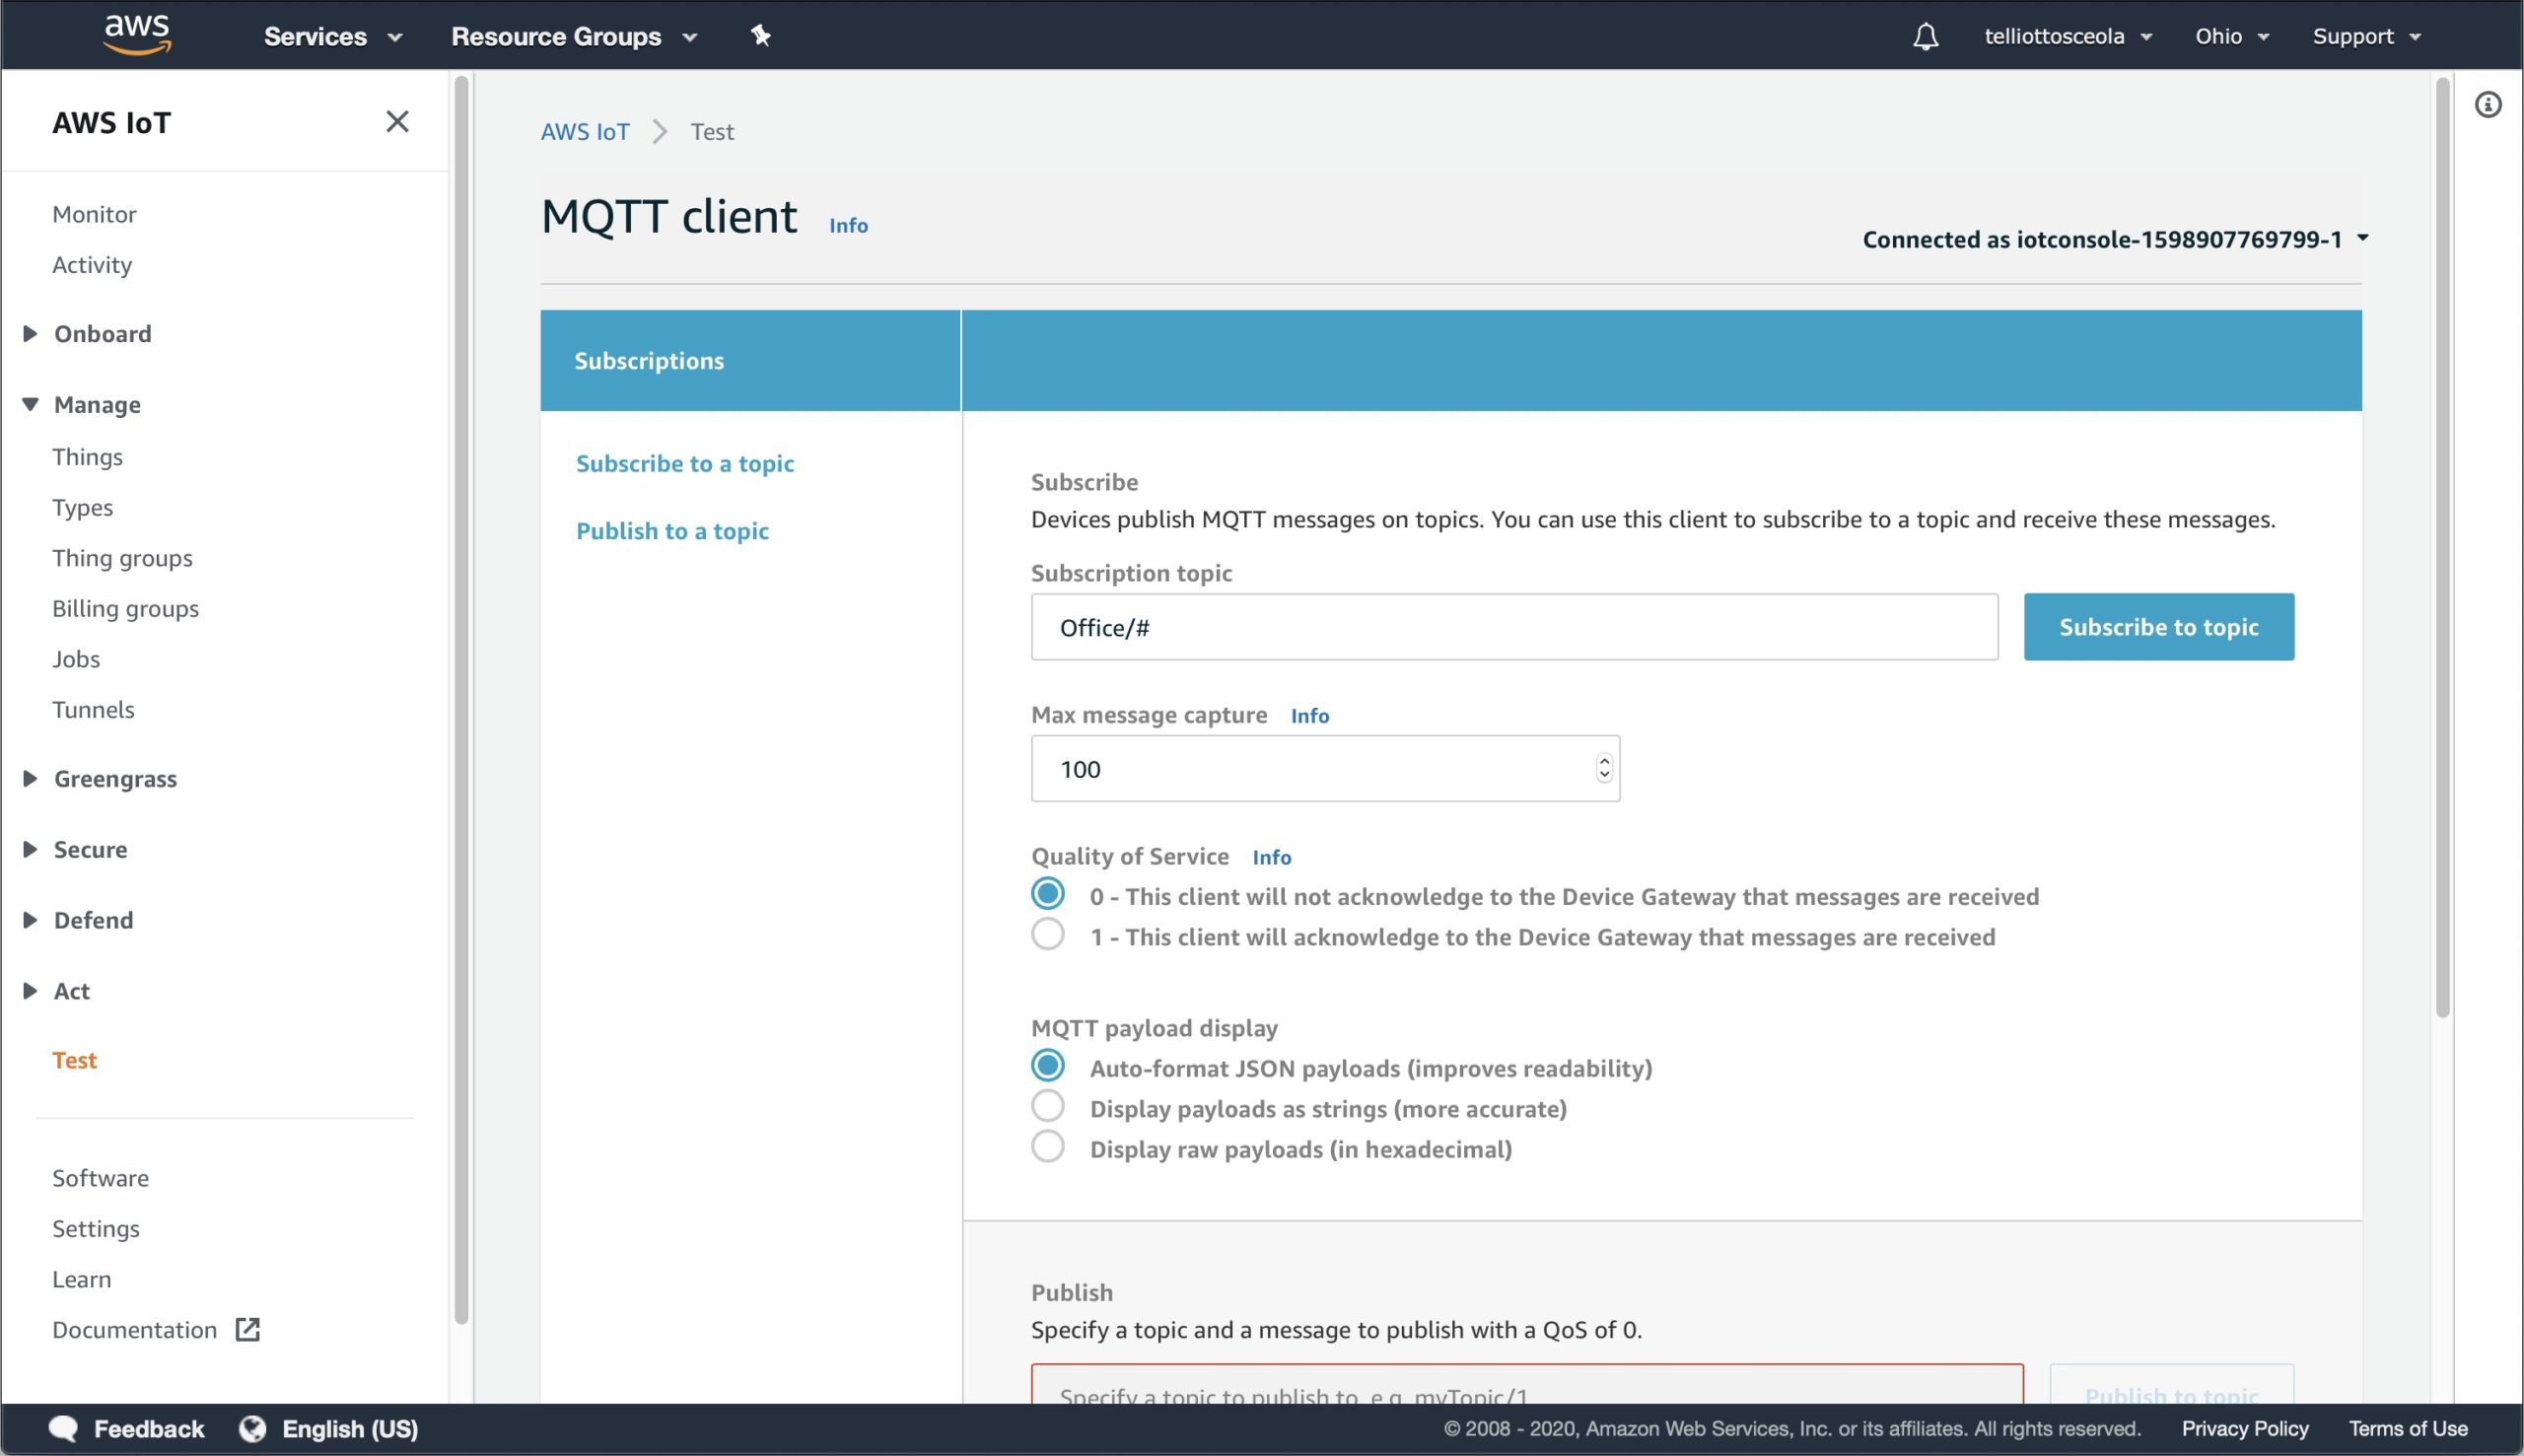
Here Office/# is entered into the Subscription Topic Field to listen to any devices that publish to a topic that begins with Office. This is because earlier on step 18 /Office/::Sensor_Type::/::Sensor_ID:: was entered into the Cloud Topic Format field.
That which should be entered here will depend on what was entered in Step 18 for the Cloud Topic Format. NCD recommends reviewing AWS Documentation Here for more info on Topics. Once the Subscription topic is entered, click Subscribe to Topic.
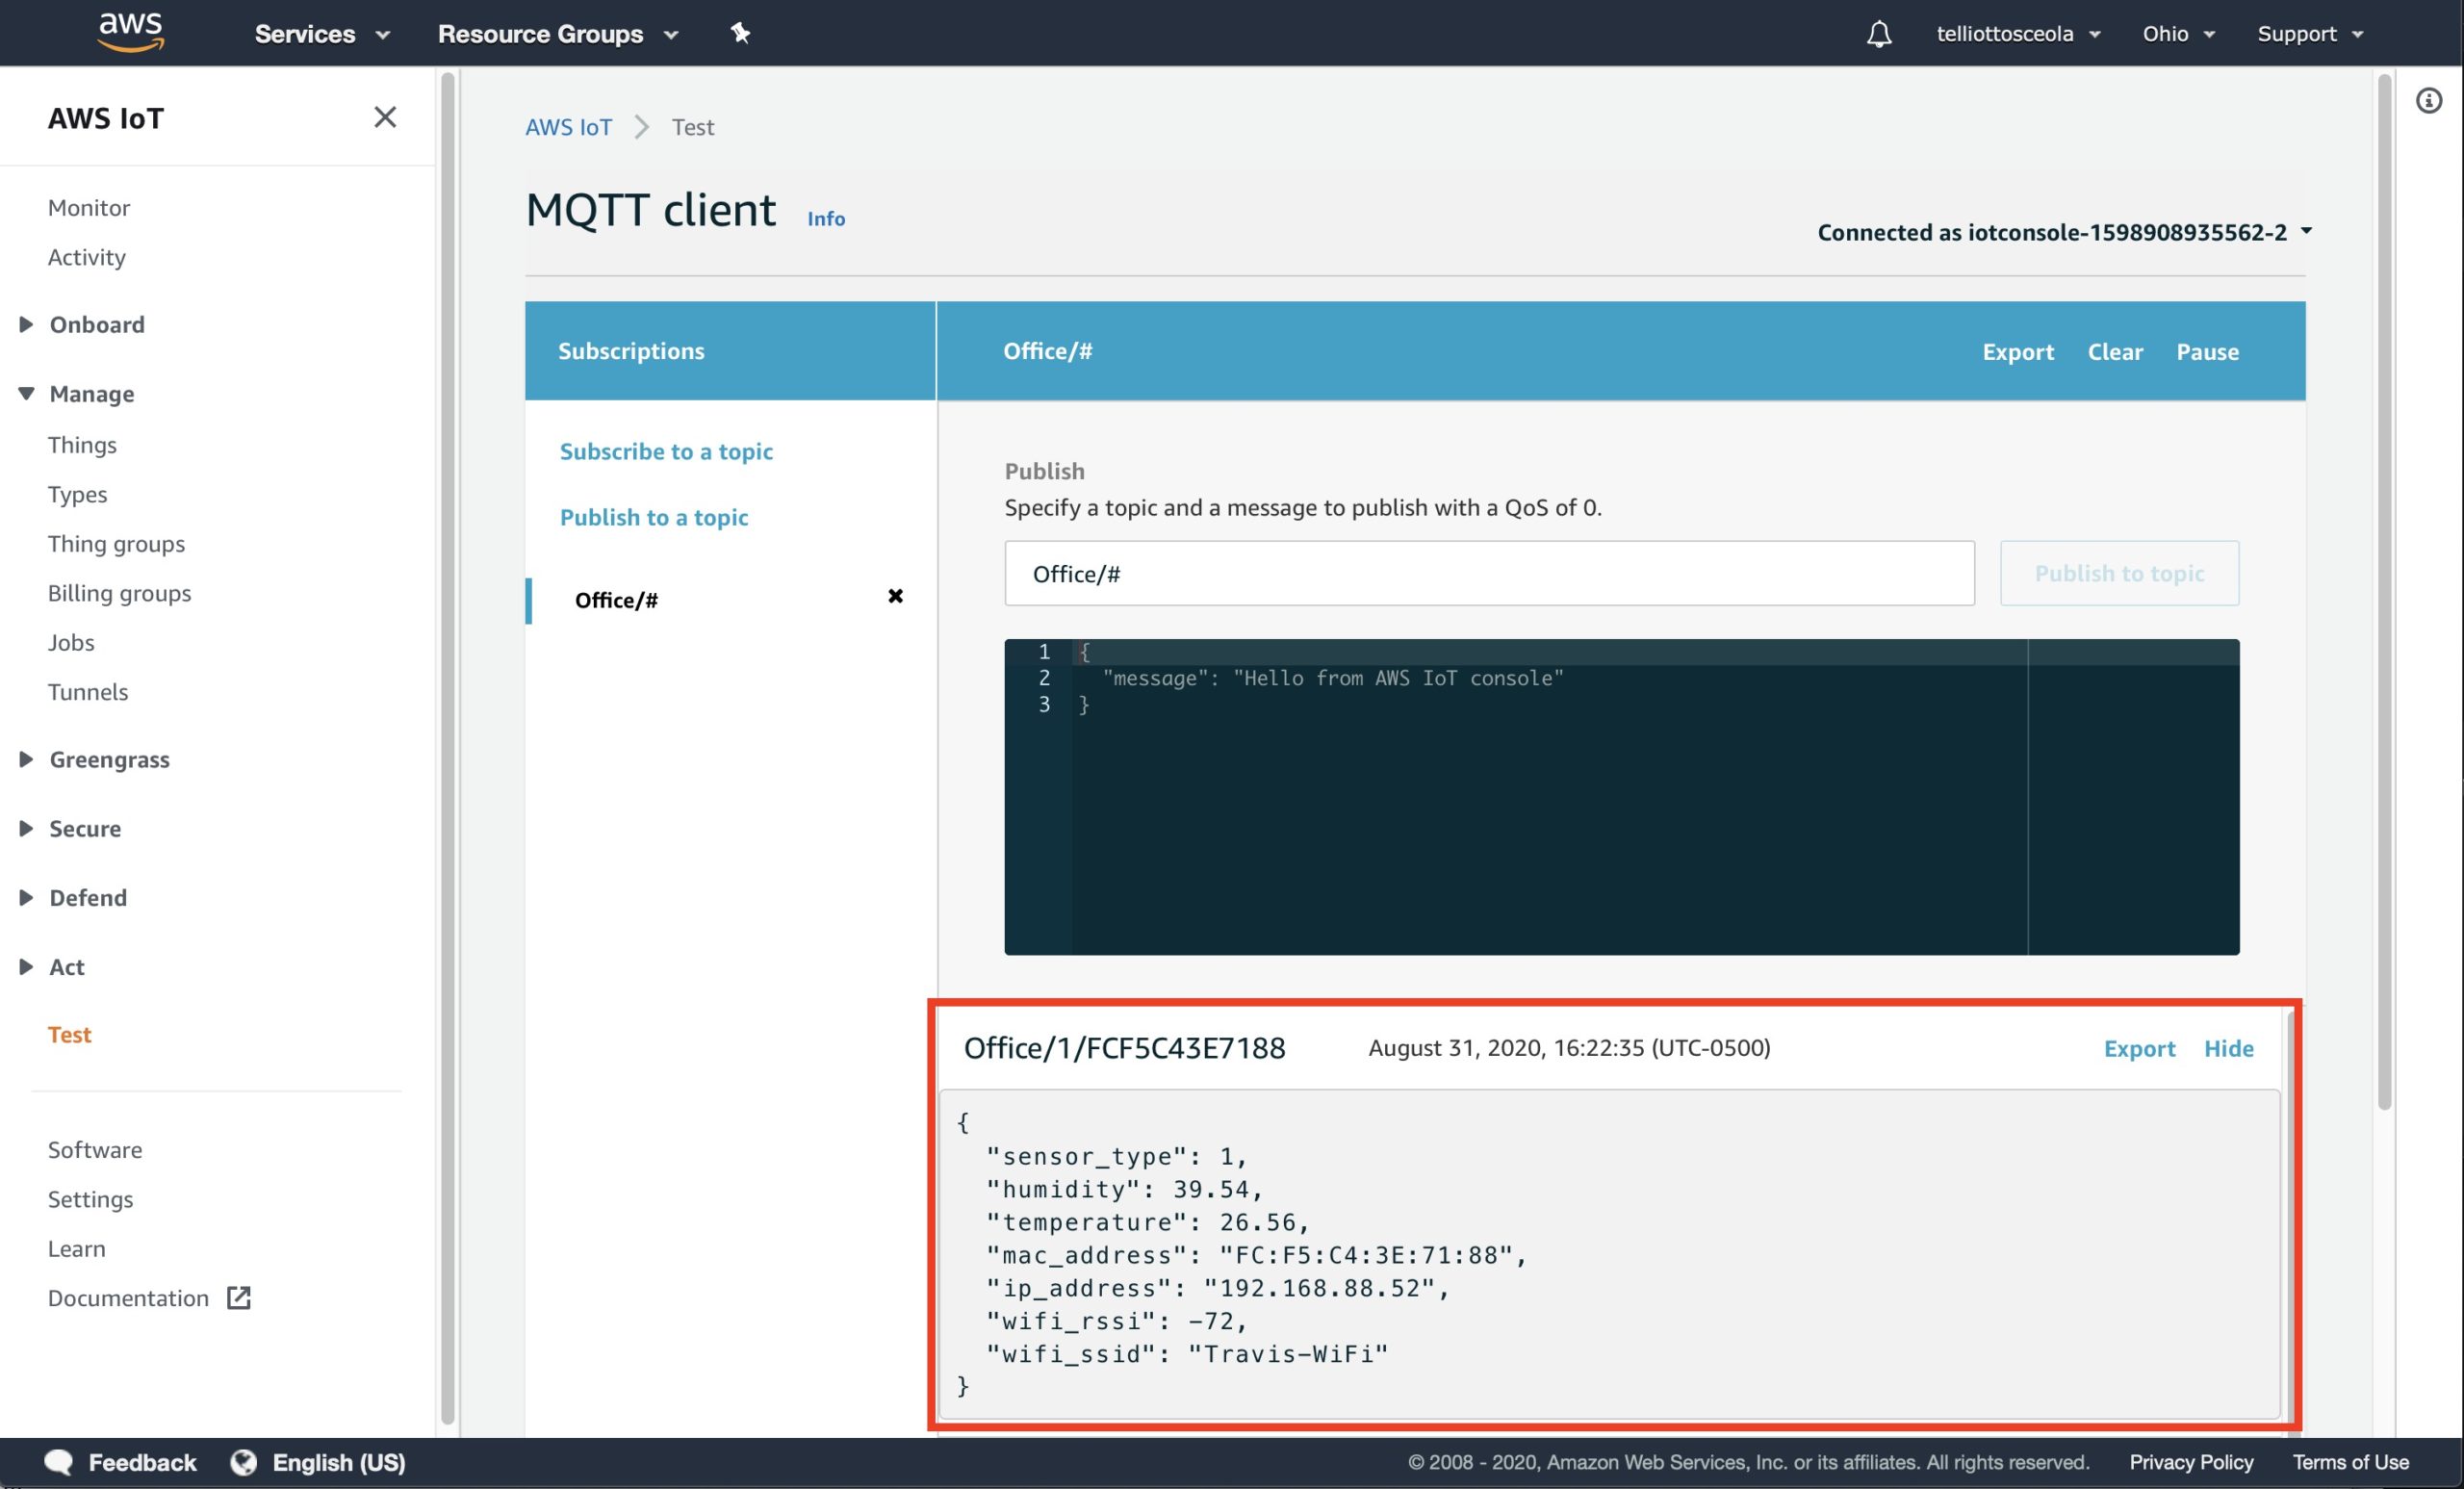
This will open the monitoring console which will show a stream of information coming in from the NCD IoT WiFi Sensor for AWS.
When Data appears here, setup of the sensor and AWS is complete.
Keep in mind that the data appearing in the visual can differ depending on the sensor being used. Each sensor is used for different data such as temperature, AC current, or push notification dry contact closure sensors.
4. Configuration through AWS IoT Thing Shadow
It’s possible to configure most of the Sensor’s settings through the AWS IoT Thing Shadow. This allows the user to configure settings remotely through the Cloud. This feature is covered in this section.
From the IoT Core Dashboard click Manage on the left, then select Things. If completed correctly a device will be listed here as the new NCD IoT Sensor for AWS. Note the name of the device (Thing) in the panel, you will need this in a future step so write it down. In the screenshot the Thing’s name, as AWS calls it, is: FCF5C43E7188.
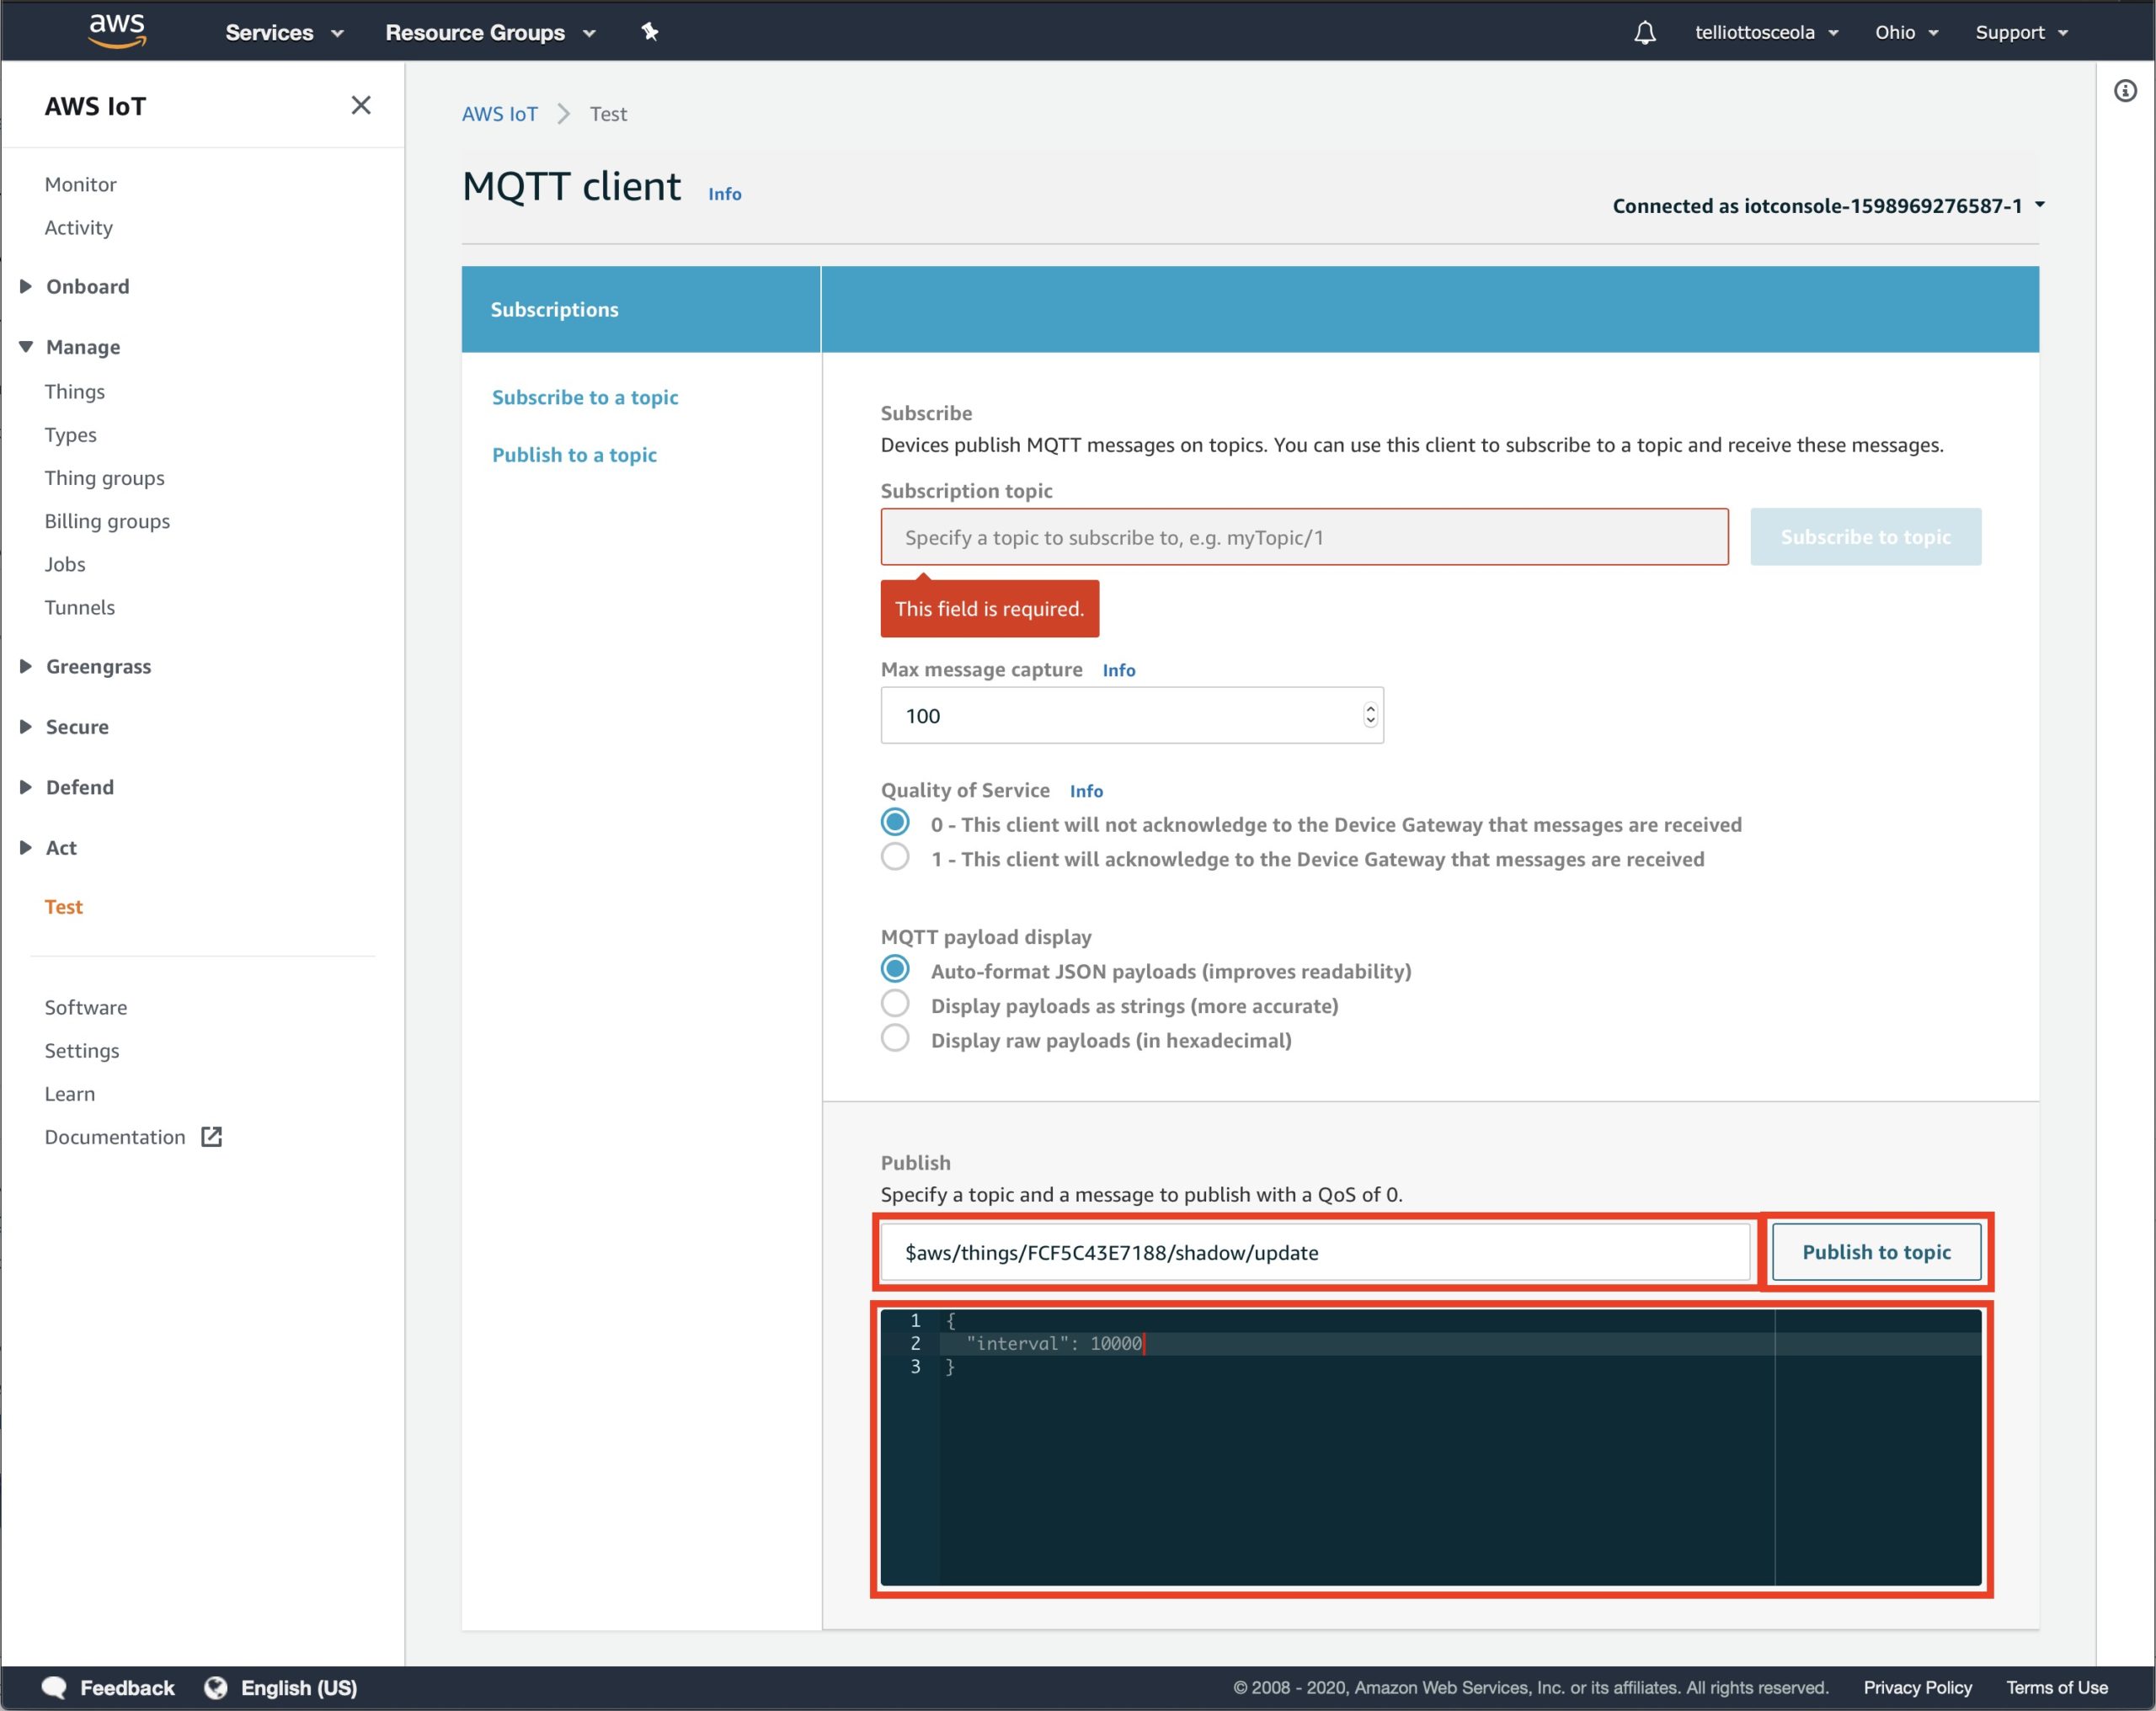
Scroll down to the Publish section of the MQTT client interface. There are two fields here, the Topic field which is a single line with the Publish to Topic Button to the right and a message payload field which is the large Blue box below the Topic field.
In the Topic field enter the device’s Shadow Topic which will be in the format $aws/things/thing_name/shadow/update where thing_name would be replaced with the device’s Thing name. The Thing’s name is FCF5C43E7188 in this example so the shadow topic is $aws/things/FCF5C43E7188/shadow/update.
In the message payload field, enter the settings that need to be altered in JSON format. In this example for instance, the report interval of the sensor was changed to 10 seconds(10000 milliseconds). Finally click Publish to topic to write those settings to the sensor.
Configurable Settings
The following settings may be configured through the thing shadow in JSON format:
interval
variable type: number
description: the interval at which the sensor will publish it’s telemetry to AWS IoT Core.
example: {“interval”:10000}
ssid
variable type: string
description: the SSID of the WiFi network which the sensor should associate with on boot.
description: setting ignored if dhcp variable set to 1. The default gateway to use when associating with the WiFi Network configured by the ssid setting
description: the AWS IAM credential key used to provision itself to AWS IoT Core. If this variable is altered old TLS credentials will be discarded and the device will retrovision itself using the IAM credentials provided.
description: the AWS IAM credential secret used to provision itself to AWS IoT Core. If this variable is altered old TLS credentials will be discarded and the device will retrovision itself using the IAM credentials provided.
description: The topic format utilized to publish telemetry data to AWS IoT. If this field is left blank then the sensor will only publish telemetry data to the shadow topic. This field supports token replacement. ::Sensor_ID:: will be replaced with the sensor’s Mac address. ::Sensor_Type:: will be replaced with the sensor’s type which is a number.
To Factory reset the sensor to default settings first put the sensor into Setup Mode(LED flashing blue) then simply press and hold the C button inside the enclosure adjacent to the USB Micro connection for 4 seconds until the on board LED begins flashing random colors. Factory default settings will be applied and the sensor will reboot in setup mode.
On board RGB LED indicator
Flashing Green: Indicates the Sensor is powered up, connect to WiFi, and has a valid connection to AWS IoT.
Flashing Yellow: Indicates the Sensor is booting up.
Flashing Blue: Indicates the sensor is in setup mode.
Flashing Random Colors: Indicates the sensor is applying factory default settings.
Flashing Red: Indicates an error. The LED will flash a sequence which indicates the type of error as follows:
Repeated two red flashes indicates the sensor is unable to associate with the WiFi Network. Try moving the Sensor closer to the WiFi access point and ensure settings stored in sensor are correct.
Repeated three red flashes indicates the sensor is unable to connect with AWS IoT. Ensure the WiFi network has internet connectivity and AWS IAM credentials are correct.