How To install node red on Windows Machine
“Node-RED is a visual flow builder that was developed with IoT in mind, you can think of it as a way to build a program without actually writing any code”
We’ll need to follow the below mentioned steps to set up Node-Red Locally on your Windows-10 platform.
Install node.js
To run Node-Red we need Node.js installed in our system, we can install Node.js by issuing a simple command on the command prompt.
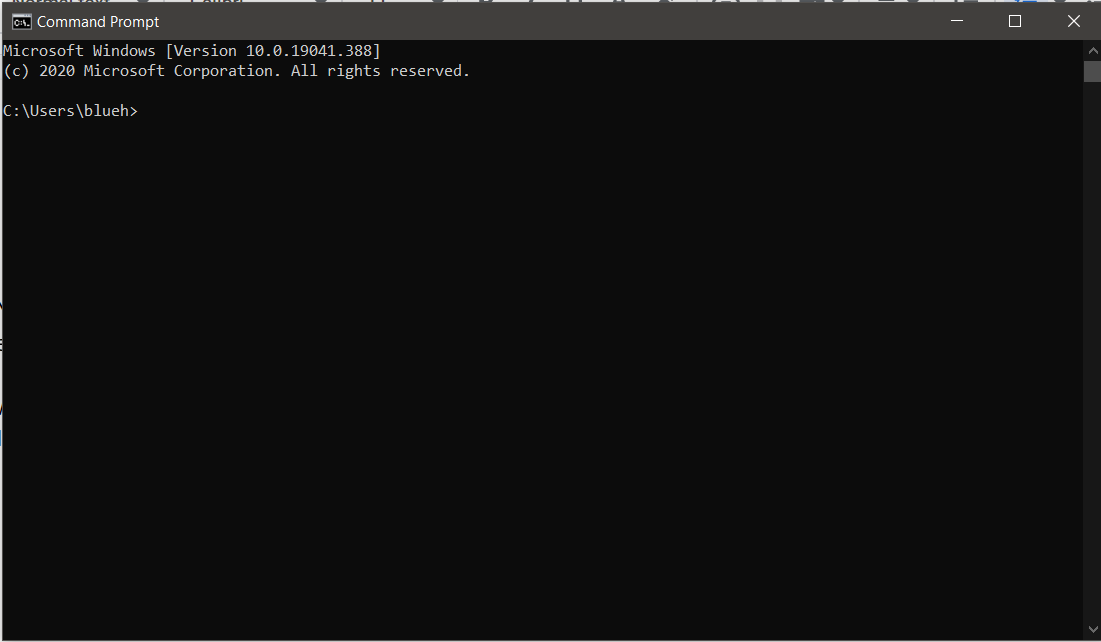
1. In Windows Search, type “cmd”
2. This will open up a terminal, like this one –
3. Right now it exposes the directory (file) in which the terminal has opened up, in the example shown above, we are inside C drive -> Users folder -> blueh folder (which is the default administrator’s folder in the system)
4. The path of directories mentioned here in the example depends on the number of administrators present on the windows machine and whichever admin session is active, the ‘blueh’ will be replaced by that admin’s default name. \C\Users\ will remain the same.
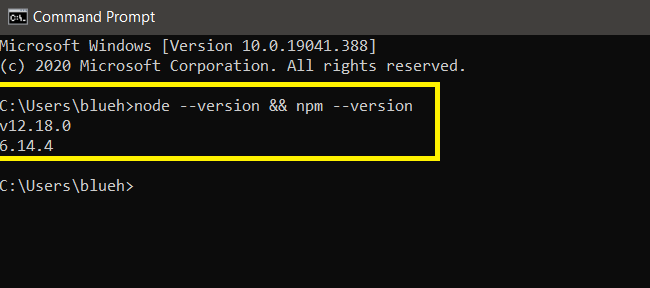
5. Now you may or may not have been using Node.js and npm package manager, to check this on the command prompt issue the command
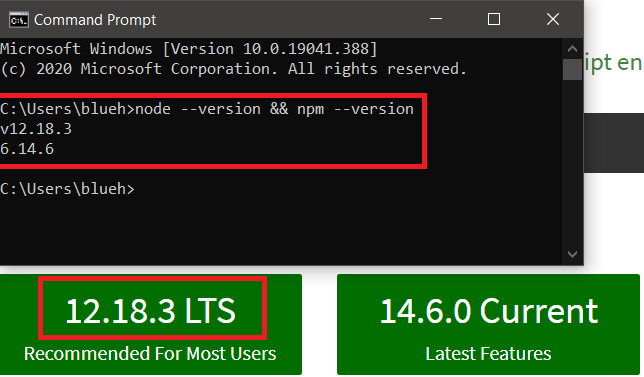
node –version && npm –version
6. If the output is similar to the attached image below, you do not need to install Node.js on your System.
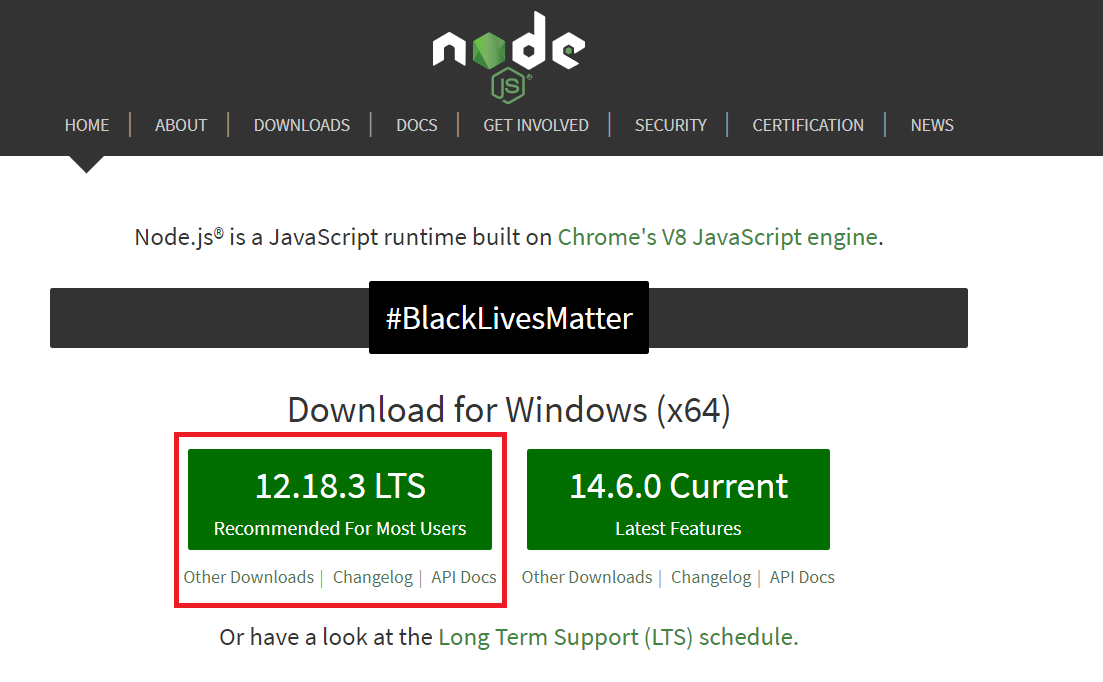
7. If it isn’t as shown above, go to this website – https://nodejs.org/en/
8. Click on the highlighted version, LTS means Long term support here, that means the guys who are developing and maintaining the Node.js packages will be fixing bugs and developing new features for a long time for this version.
The latest version may be buggy and we will avoid using that for now.
9. After downloading you can execute (double click) the installed .msi file.
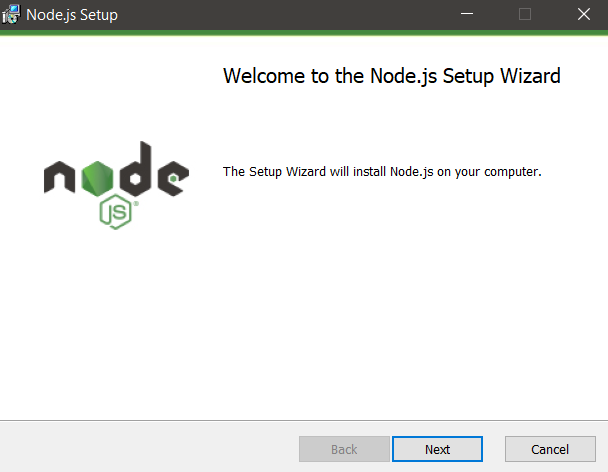
10. It will first compute the space requirements on your PC and then flash a prompt that should look like this
Click on ‘NEXT’.
11. Read and accept the license agreement if it seems okay to you.
12. Select the folder where you’d like to install the Node packages. In my case, I have installed it inside the Z drive -> SOFTWARES folder.
Click ‘NEXT’ after doing this.
13. Now in the next window you can manually once check if your machine has the required space to instal Node.js or not.
Click on ‘Disk Usage’, In the below image my disks meet the minimum criteria for installing the packages, verify the same for your system
Click ‘OK’ if it’s good to you. Then click ‘NEXT’
14. Click on the check-box, this will automatically install a lot of extra stuff for you saving you a lot of time.
15. Click on ‘Install’.
16. After installation completes, close any open command prompts and re-open to ensure new environment variables are picked up.
17. Now open up a fresh terminal and re-enter the commands we issued before to check the availability of Node and NPM packages.
You can match the versions, you have now installed the Latest LTS version of Node.js on your windows PC.
Install node redNow you have to install Node-RED as a global module which adds the command node-red to your system path. Execute the following at the command prompt
npm install -g –unsafe-perm node-red


Now you can execute the node-red command and launch node-red.
You will see some Node-red logs, which aren’t super important for now, and also
NOTE – keep the terminal open in order to keep Node-RED running.
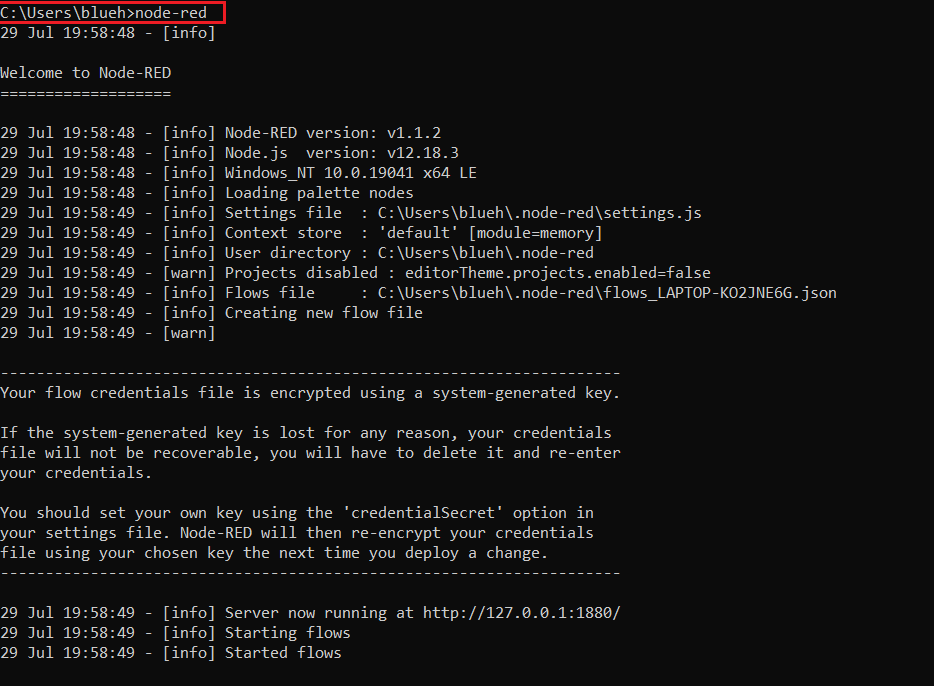
Now we have successfully installed Node-Red locally on our PC. Whilst keeping the Command prompt running, we can access the Node-Red editor on our localhost.
http://localhost:1880.Make sure you have the Command Prompt ON with the node-red command running before you open the editor on your local host.
You will see this editor when you open the aforementioned link.
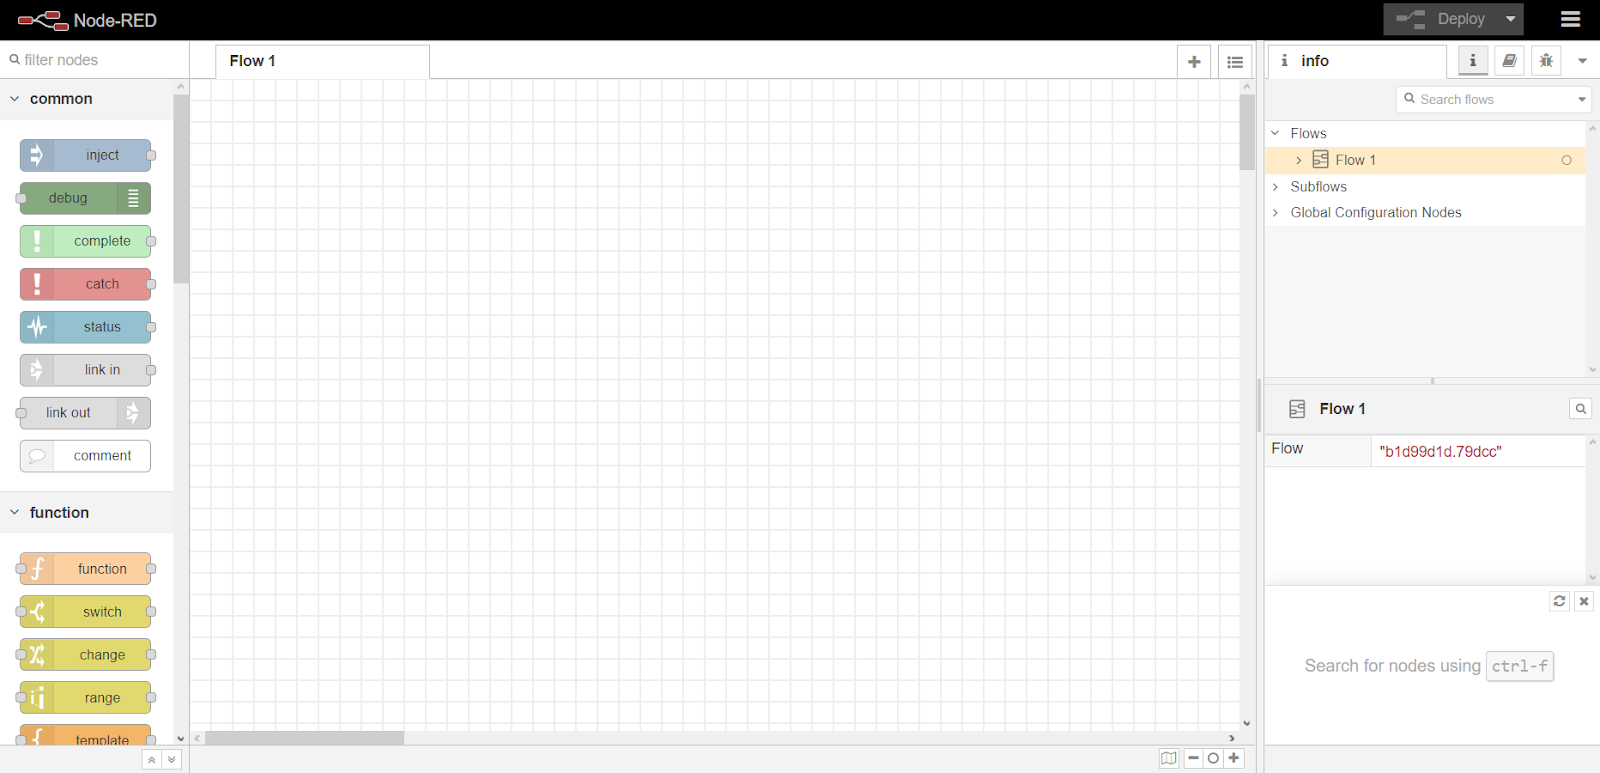
Congrats! You have successfully installed the required packages and Node-red on your machine.
Now comes the easy part of installing the packages for NCD wireless sensors.
Now I am assuming you still have a node-red interface running on your PC.
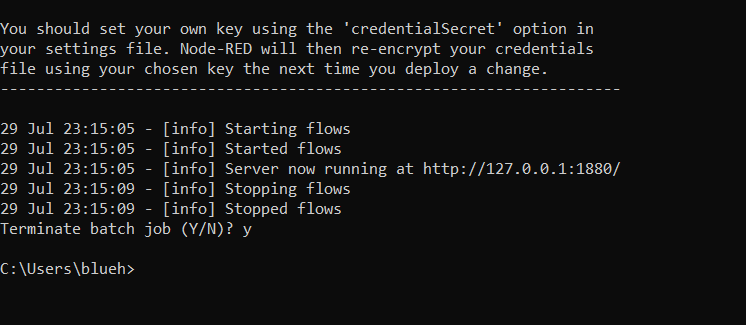
You can go to the command prompt and press -> CTRL + C.
This will ask you – “Terminate batch job (Y/N)?”
For this you need to respond with a ‘y’. It can be smaller case or upper case – doesn’t matter.
What matters is, you entered a y or Y and pressed the return key (Enter) to exit the current node-red session because we have to install some ncd packages now.
Installing NCD packages from the command prompt (Method 1) (recommended).
Enter the command on your command prompt
npm i ncd-red-wireless node-red-dashboard
So, npm is a package manager and we use it to install the following mentioned below
ncd-red-wireless
Provides the nodes that manage the serial connection, parse incoming sensor data, filter it by specific parameters, and allow you to configure the wireless sensors.
node-red-dashboard
Provides the ability to create a UI using the flow builder, provides charts, graphs, and a number of other visual elements we can use to display data, along with nodes to trigger a flow using user input. We will use some of these nodes to display the telemetry from your wireless sensors.
This will install the necessary packages to get our NCD devices up and running.

NOTE – The logs shown on your PC might differ from the logs shown on my PC, this would not affect the usability of the package at all.
Setting up the Nodes
The packages you installed provide a few different pieces of functionality, as detailed here, but you can learn more about each by clicking on one of the nodes it provides and viewing its info tab.
Assuming at this point you’ve started up node-red, you should be able to open a browser and navigate to http://localhost:1880, this will open up the flow builder that is the heart of the Node-RED experience. At this point you’ll be viewing a large blank flow with a long list of nodes on the left hand side, this sidebar is called the palette.
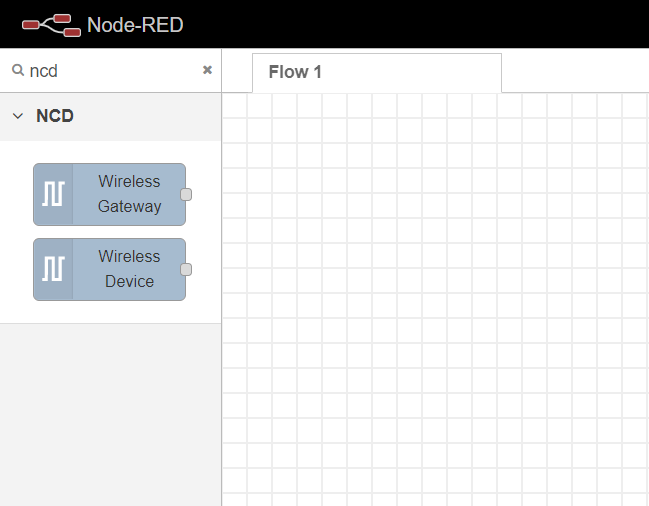
At the top of the palette is a search box, if you type “ncd”, the nodes available will be filtered down to those we provided through the ncd-red-wireless package. Go ahead and drag a Wireless Gateway node over to your flow canvas to get started.
Installing the NCD packages from the node-red window (Method 2)
For some reason if issuing the npm i ncd-red-wireless node-red-dashboard command chalks out a lot of ERROR messages in the logs, chances are the packages have not been installed yet due to some technical difficulties. We can still install the packages from the node-red window itself without issuing commands over the command prompt. Follow the below mentioned steps to get the packages up and running.
Go the command prompt and begin your node-red session by issuing the command
node-redNow go to the address http://localhost:1880 in your browser.
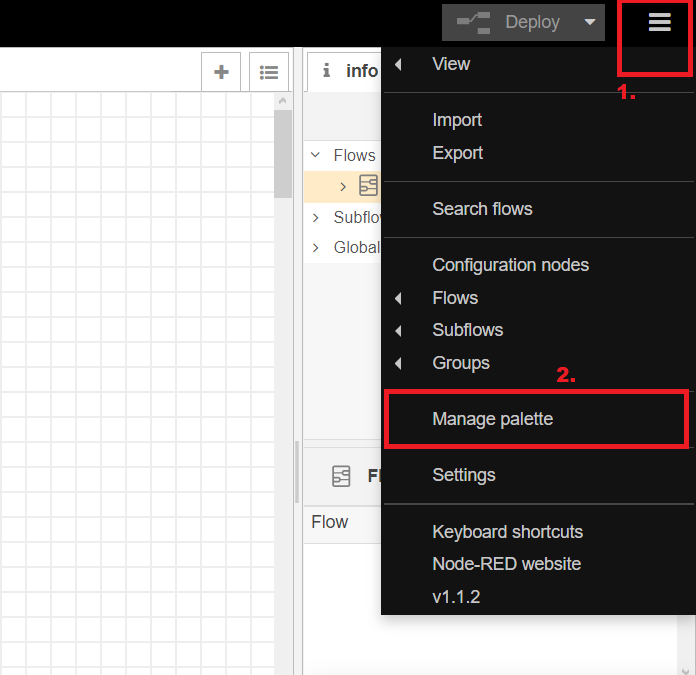
Now follow along the highlighted boxes in the attached images.
1.
2.
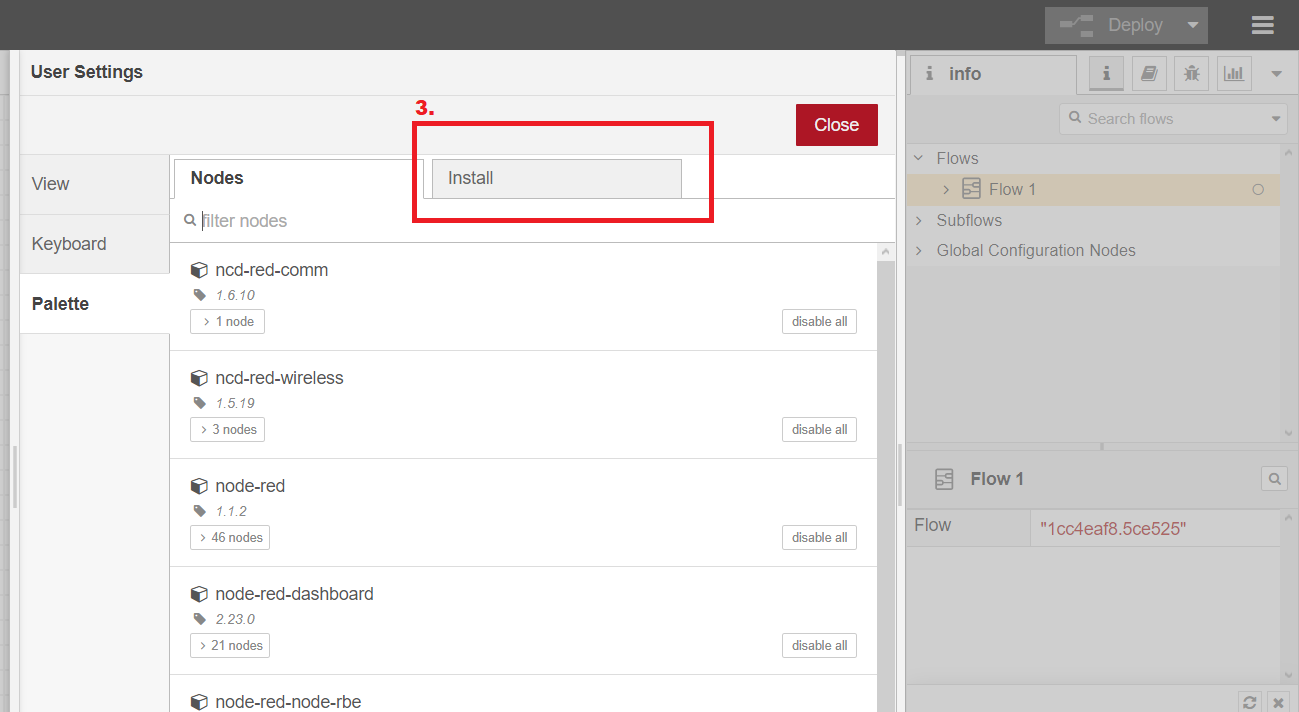
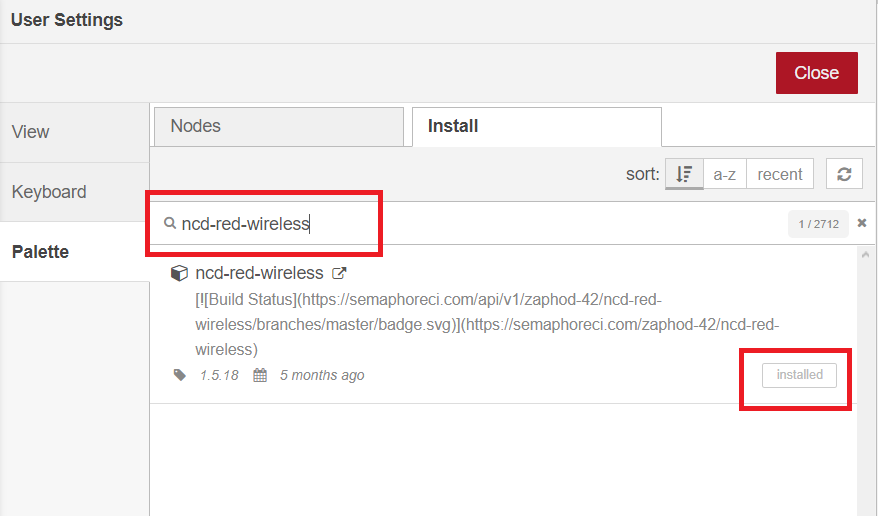
3. In the install tab you have to type and install the package names individually
If it isn’t showing installed in your case press ‘install’.
4. Similarly
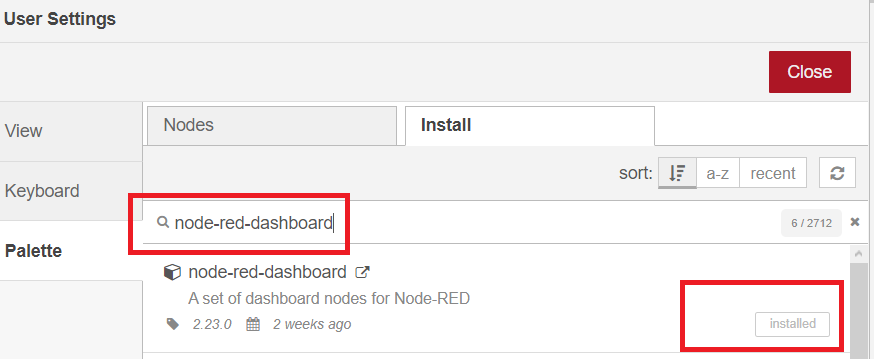
Now you have successfully installed the packages, you can double check if they are installed or not by typing ncd on the top-left search bar
——————————————————————————————————————————–
Finding your wireless sensors
Drag and drop the wireless gateway node to the editor from the left panel.
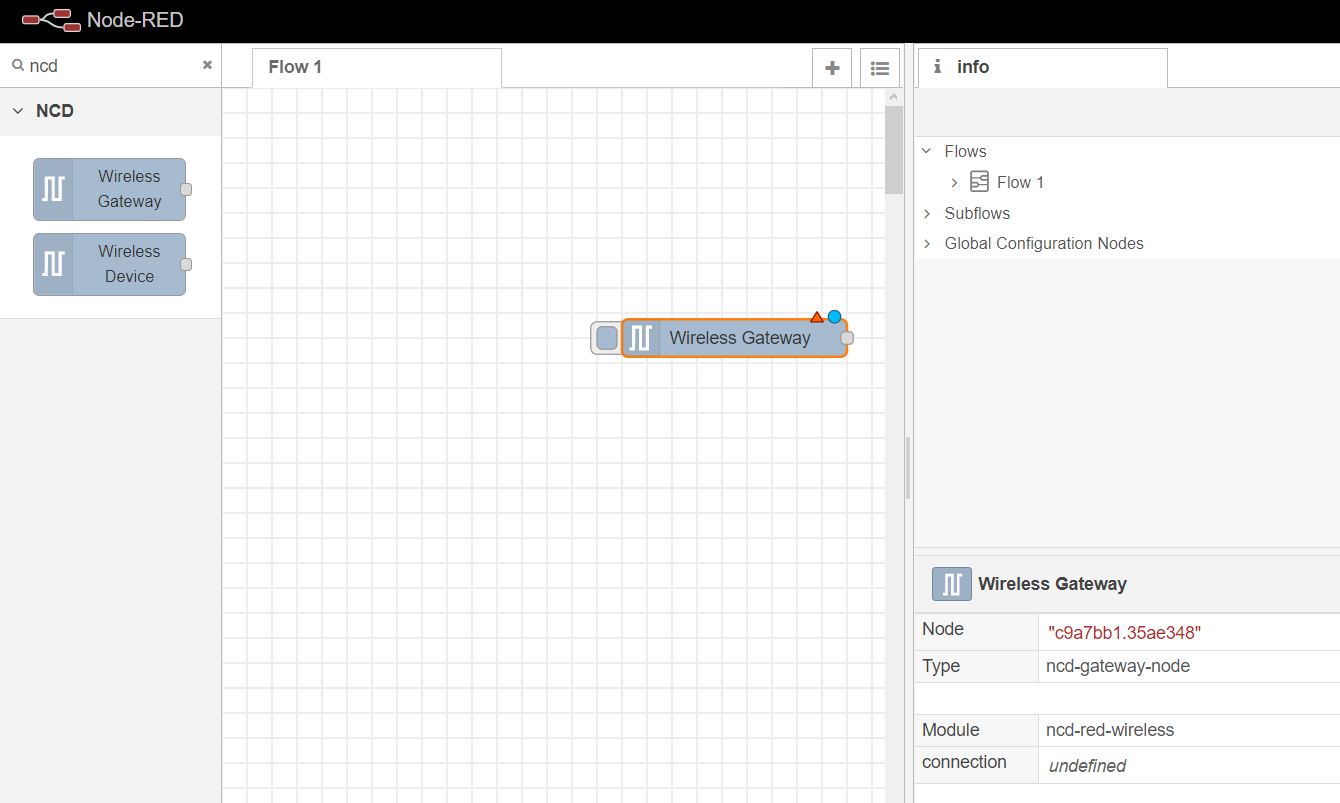
Once you’ve added the node, you’ll be able to view the info tab, which contains information about the node’s functionality, this tab is well populated for most node-red packages I have used, and contains valuable information, many times you will not need to view any other documentation outside of the info tab, so keep it in mind while you are building your flows if you have a question about how a node works.
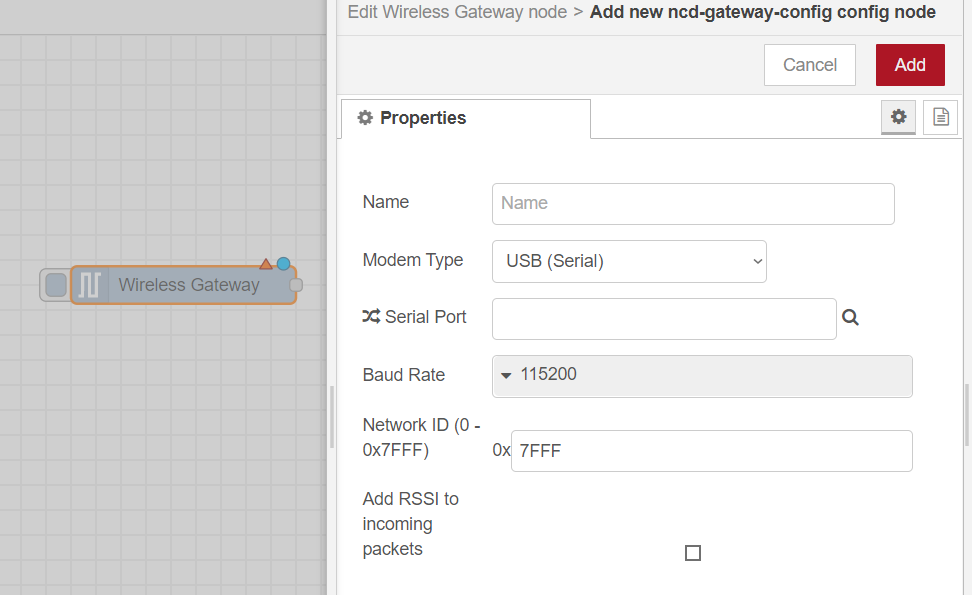
The next thing we need to do is configure the node, when you first add it you’ll notice that there is a small triangle on the top right corner next to a blue dot, the triangle indicates that the node needs additional configuration, the blue dot indicates that the node has not yet been deployed as part of the flow (or has changed since the last deployment).
Double click on the node to open up the configuration options.
Click on the pencil icon next to the Serial Device field to configure your USB router, this will open a second configuration panel that only has a few options.
Click on the magnifying glass next to the Serial Port field and select the port that corresponds with your router, then click the “Add” button on top.
The Serial Device field will now be populated based on that selection, and you can click “Done”, you now have direct access to your wireless sensors! To view the data coming in, go back to your palette and type “debug” into the search field at the top, grab one of these nodes and drag it to the right of your Wireless Gateway, double click on it and change “msg.” to “complete msg object”, click done, and draw a line between the two nodes, and click “Deploy” on the top right of the window..