This is intended as a companion to our Node-RED tutorials and examples. In it we will define some of the terms and functionality we frequently use, and delve a little deeper into what some of the nodes are capable of. If we’ve used a term, or a node, in an article you would like more information on, let us know on our forum, we usually answer quickly, and I will get the answer added here so everyone else can benefit!
If you are currently using one of our packages, and have discovered an issue related to its functionality, posting it on github in the appropriate repository is the most helpful way to report it. If you need help building a flow, or planning a project, we also encourage you to post of the forum, our staff is happy to help, and we have some amazing community members who are always ready to share their expertise.
Installation
Requirements
Windows, Mac, or Linux machine (Including the Raspberry Pi and Beaglebone).
Depending on which of our packages you are using, an available USB or I2C port.
If you are planning to use the native I2C capabilities of a Raspberry Pi or similar, you may need to enable the I2C Bus. The dependency we use for I2C communication has some information on their github page.
Serial Connection (USB)
Most users will not need to do anything to use their USB devices. For advanced users on less standard systems, our packages rely on the Node Serialport package, which has advanced installation instructions for most use cases we’ve found.
Packages
Node-RED allows you to add packages through the UI, or through the more traditional use of NPM. To help keep the Node-RED library clean, we frequently release packages without adding them to the Node-RED library while we allow our community to try them out. Once we are satisfied that they are thoroughly documented and stable, they will be added to the Node-RED library which will enable installation through the UI. For simplicity sake we’re only going to explain how to install packages from the command line here.
To install a package on any platform you’ll need to navigate in the command line (Power shell for Windows users), to the Node-RED installation directory. This is usually ~/.node-red, but if you are unsure, you can start Node-RED (just type node-red) and you will see a line printed that looks something like this:
25 Mar 22:51:10 - [info] User Directory : /home/nol/.node-red
This is the location of Node-RED on your machine, once you’ve navigated to it you can install any available package with the npm install command, i.e.
npm install node-red-dashboard
All of the NCD packages are prefixed with ncd-red-. You can browse a list of our current packages here.
Wireless Enterprise Line
All of our WEL products are controllable through a single NodeJS package. This is possible due to the uniform, and simple, API packet structure. To work with any of the supported devices in Node-RED simply install the ncd-red-wireless package.
npm install ncd-red-wireless
NCD I2C Products
Due to the widely varying line of chipsets and sensors used in our I2C products, the packages for these devices are separated into the corresponding sensor or chipset. All of these packages rely on our underlying communication package ncd-red-comm, which will be automatically installed with any package that requires it, provided you are using the LTS release of NodeJS. You can find a list of available I2C libraries here, and install them in the same way as any other package.
npm install ncd-red-mcp23008
Access
For most users, you can launch Node-RED by simply typing node-red in the command line. For advanced setups, or autostart information, check out the Node-RED docs.
When Node-RED starts, you will see a line in the output that reads something like:
25 Mar 22:51:10 - [info] Server now running at http://127.0.0.1:1880/
While we try to explain what these are when we use them in our articles, sometimes it’s easier to have a complete list for browse.
General
These terms are commonly used in Node-RED, and our documentation. It is best to have at least a basic understanding of the principles behind them when building any Node-RED project.
NodeJS
NodeJS is commonly thought of as “back-end javascript”. Built on the Chrome V8 Javascript Engine, the runtime itself uses an event-driven, non-blocking I/O model that makes it efficient and lightweight. You can read more here.
NPM
npm is the package manager for NodeJS, it is used to publish, require, and install packages. You can find out more here.
Package(s)
In the scope of this article, a package is defined as a modular piece of software for use with NodeJS. Packages may have dependencies on other packages, and those dependencies are managed through NPM.
JSON
JSON stands for JavaScript Object Notation and, not surprisingly, it is a way to represent a javascript object using a string that can be parsed. It is frequently used in modern APIs due to its simplicity. You can quickly read what defines a JSON string here.
API
An API, or Application Programming Interface, is easily described as a library of functionality that allows external software to interact with an application. APIs are how we communicate between software like Node-RED and hardware like a serial, or I2C port. APIs are also a large part of the cloud, providing authentication protocols and endpoints to third party services like MS Azure.
Front End (UI)
The front end of Node-RED, often referred to as the “Flow Builder”, is the UI that allows you to build, edit, and deploy your flows. This is where most of your time will be spent.
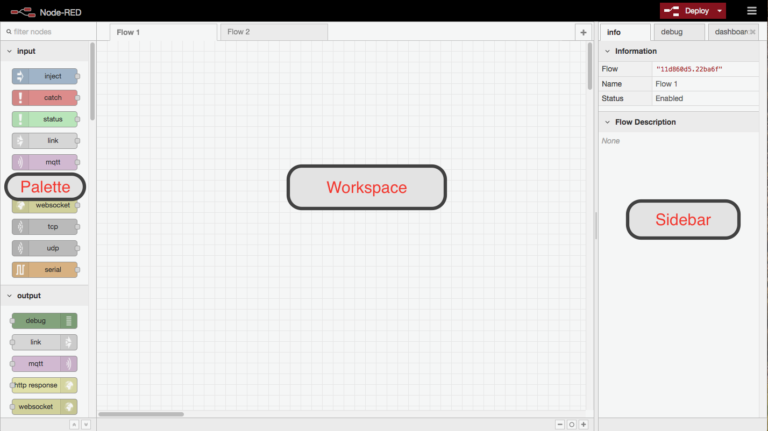
Workspace
The workspace in Node-RED is the section of the UI that contains the visual representation of your flows. Initially it will have a grid on the background, and it is the space you drag new nodes onto when building a flow.
Flow
A flow can easily be thought of as the code running when you click the “deploy” button. It is comprised of Nodes and Wires that interact with Message objects. Individual flows can be accessed through the tabs at the top of the workspace, they can be renamed or deleted by double clicking on the tab, and new flows can be added with the + icon on the top right of the workspace.
Subflow
A subflow is essentially a way to build a flow that acts as an individual node, taking in a message, altering it, and outputting it again. It is represented by a node on a regular flow, and as such can be reused.
Node
A node is a graphical element that represents a piece of functionality in Node-RED, there are several types of node which are grouped by the functionality they provide.
Configuration Node
A configuration node is a node that can not be added to the workspace, config nodes provide a way to share functionality between different nodes, these are frequently used for connections to hardware ports or APIs.
Wire
A wire is the graphical representation of the connection between nodes. It is the path that a message travels during its lifetime.
Message
A message is a JSON object that travels along wires, and is created, altered, or used by nodes.
Palette
The palette is positioned to the left of the workspace, it contains a list of nodes organized by category. You can filter the list by using the search box at the top.
Sidebar
The sidebar is positioned to the right of the workspace. The info tab, debug tab, and a few other panes will be displayed there.
Info Tab
The info tab is where information about a node is displayed. This usually contains a brief description of its functionality, setup, and usage.
Debug Tab
The debug tab is a log-style display of messages. Nodes may output to the debug tab directly during the course of a flow, but the most common usage is in conjunction with the debug node.
Edit Node Panel
When you double click on any node in your flow, a panel is opened on the right hand side of the workspace. This panel contains a form whose information is specific to this instance of the node. (If you add 2 debug nodes, each one is its own instance, containing its own settings and context).
Menu
The menu can be accessed via the “hamburger” icon on the top right of the front end. From the menu you can toggle the sidebar visibility, import, export, and search flows, view configuration nodes, create subflows, and manage installed packages and settings.
Deploy
The deploy button on the top right of the UI is what saves your flow and starts it running. No changes you make in the workspace will be active until you’ve “deployed” your flow.
Nodes
Node-RED comes standard with a large variety of nodes, this section may be incomplete, as we will focus on the nodes that are primarily used in our tutorials. We will work on fleshing out this section with more descriptions as we use them. Most of these descriptions will be brief, more detailed information about any node can be found on its info tab.
Input Nodes
Input nodes are what start the flow working, they output a message object which is then sent over any wires attached to their output.
Inject
The inject node allows you to trigger a flow with the click of button, or at a pre-determined interval.
Link ->
The link node works as a pair with the input link node to send a message between the two without a visible wire, they can function across flows, or on a single flow to keep it clean.
Output Nodes
Output nodes are the final stop (usually) in the lifetime of a message. They are generally used to pass data to another API, or output a message to the user.
Debug
The debug node allows you to output data from the message to the debug tab, or the JS console.
Link -<
The link node works as a pair with the input link node to send a message between the two without a visible wire, they can function across flows, or on a single flow to keep it clean.
Function Nodes
Function nodes alter the message as it passes through them, they can change, add, or remove properties from the message object, as well a control timing or spawn additional messages.
Function
The function node allows you to execute arbitrary Javascript during your flow that can affect the message object on its way through the wires. The Node-RED website has extensive documentation about this node here.
Change
The change node allows you to quickly and easily alter specific part of the message object without the need to write javascript.
Delay
This node allows you to either delay each message that passes through it, or rate limit messages.
Split
The split node allows you to split a single payload into multiple messages based on the type of payload, and some user configurable options.
Switch
The switch node offers basic logic functionality, it can be used as a simple if check, or can be used to route messages to different outputs based on specific rules that they match.
Template
The template node allows you set a property based on a provided template.
Social
These nodes are used to interact with third party social platforms and services
Email
This node connects to an SMTP server to send emails containing the msg.payload.
NCD Nodes
Nodes in the NCD category are used to provide access to a variety of NCD products. We are constantly working to extent this offering, you can see our full catalog here.
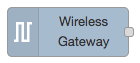
Wireless Gateway
The Wireless Gateway node sends out a message anytime that sensor data is received from any of our Wireless Enterprise Line of sensors. It also allows you to toggle between network IDs, giving you the ability to quickly switch your router from the “listening” network to the “config” network right on your flow.
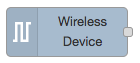
Wireless Device
The Wireless Device node filters incoming sensor data by the sensor type, and optionally the sensors MAC address. It also allows you to configure the sensor by presetting the configuration options, which will be flashed to the sensor next time the connected router determines it has entered config mode.
Dashboard Nodes
Dashboard nodes are provided by the node-red-dashboard package, this package supplies a dynamic UI for viewing and interacting with elements of your flow. You can read more about this package on its github page.
Gauge
This node adds a gauge to the dashboard for displaying a numeric range of data. You can configure the label, the minimum and maximum range, and the colors of the gauge.
Chart
This node adds a chart to the dashboard. The type of chart can be selected, along with the color palette for theming your series. More information on using this node is available here.
Notification
Displays the msg.payload as a popup or dialog message with “ok” and “close” buttons.
Slider
This node adds a slider to the dashboard which the user can interface with to send data to the flow, the value of the slider can also be controlled via a message sent to it.
Switch (toggle)
The switch node adds a toggle switch to the dashboard, the output value for payload is configurable based on the new state of the switch after it is clicked.