XCTU can be downloaded using this link
https://www.digi.com/resources/documentation/digidocs/90001526/tasks/t_download_and_install_xctu.htm
After installing the XCTU open the XCTU application

A. Open the port

B. Select Serial Port

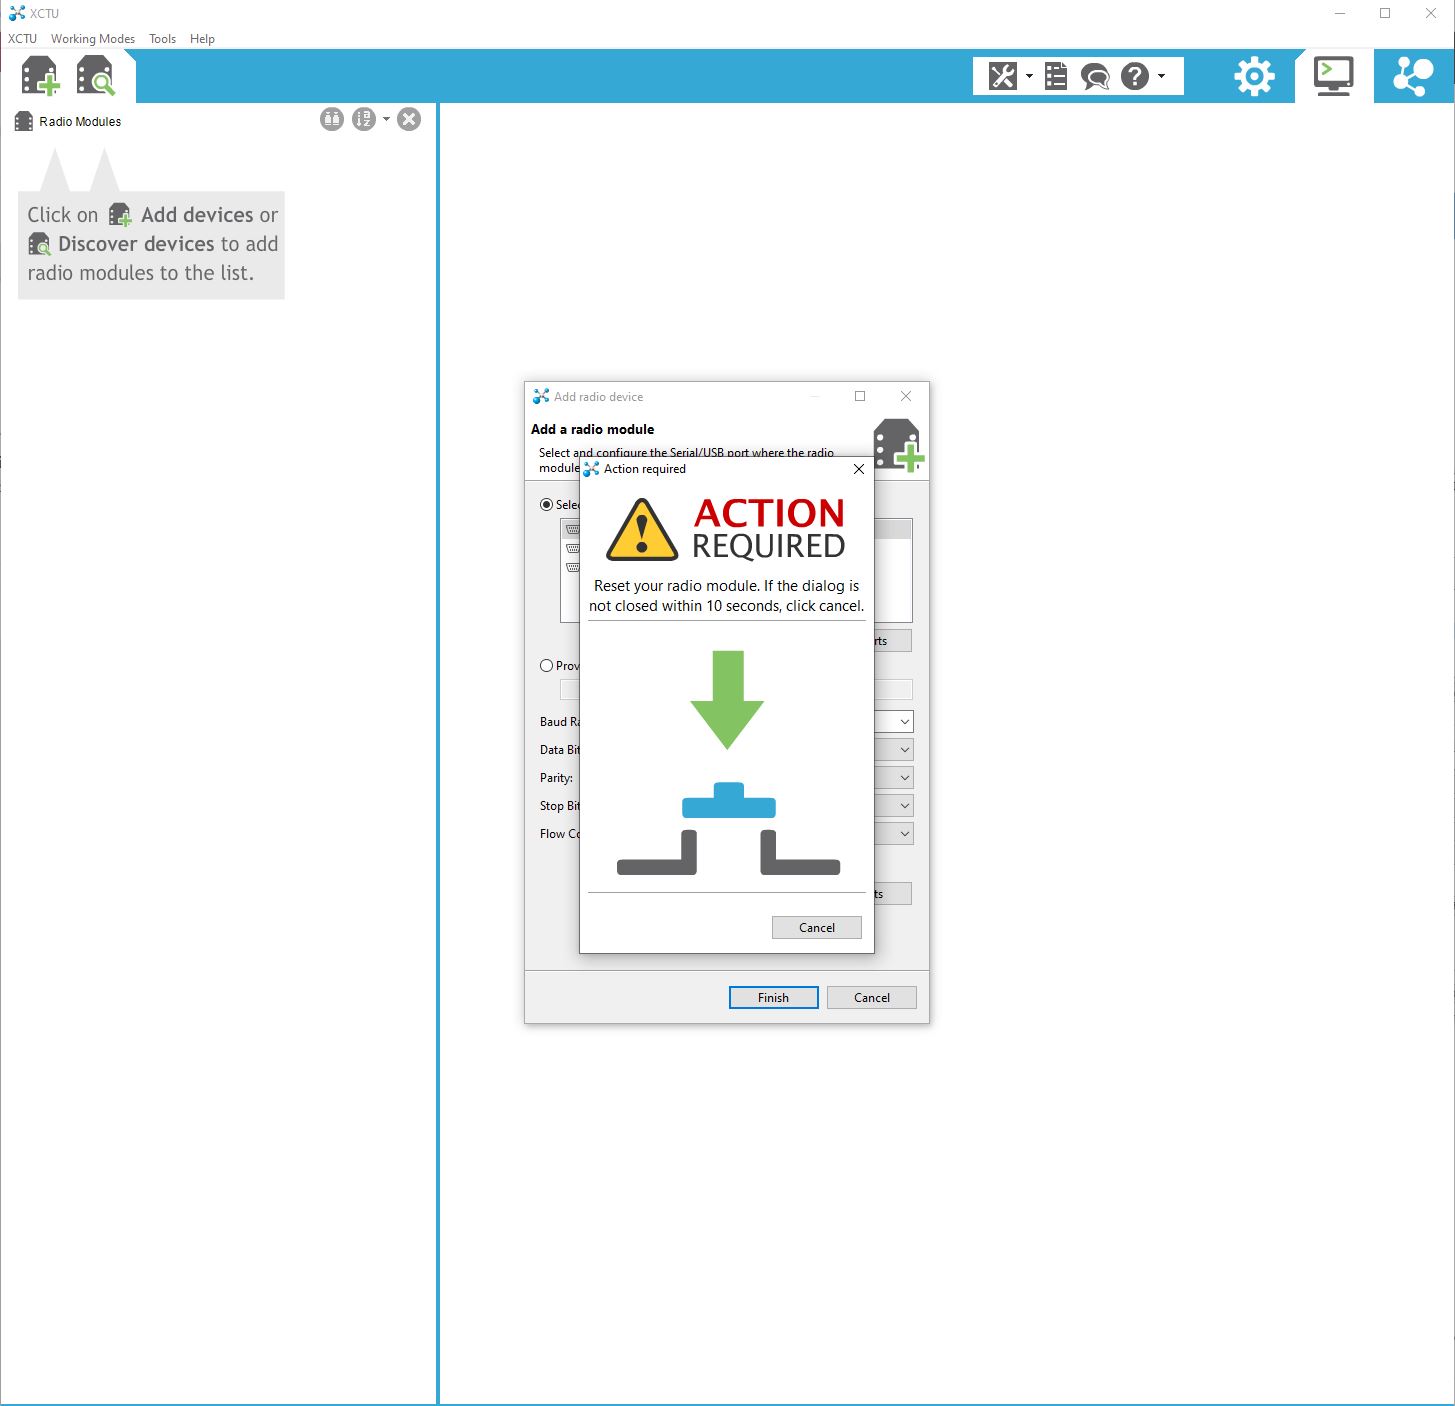
After selecting correct port click finish. The XCTU will start talking to the wireless module. It might ask for resting the module. if it does press the reset button on the Zigmo.
C. Select the radio on left side. Once radio is selected, XCTU will start reading the module current settings.

D. Download the wireless module profiles from here
https://github.com/ncdcommunity/ncd.io-IoT-Wireless-Sensor-Recovery-Files
E. Click Profile and Select Load Configuration Profile

If you are planning to use this module in a wireless sensor then select Sensor_Xbee_EY_Enable profile and if you are planning to use this with a Modem than select PC_Xbee_EY_Enable profile.
F. After selecting the correct profile click Write and XCTU will upload the new profile in the wireelss module

Once its done writing the settings you can remove the module and install it back into the sensor or the modem.
A. Click Update in the XCTU
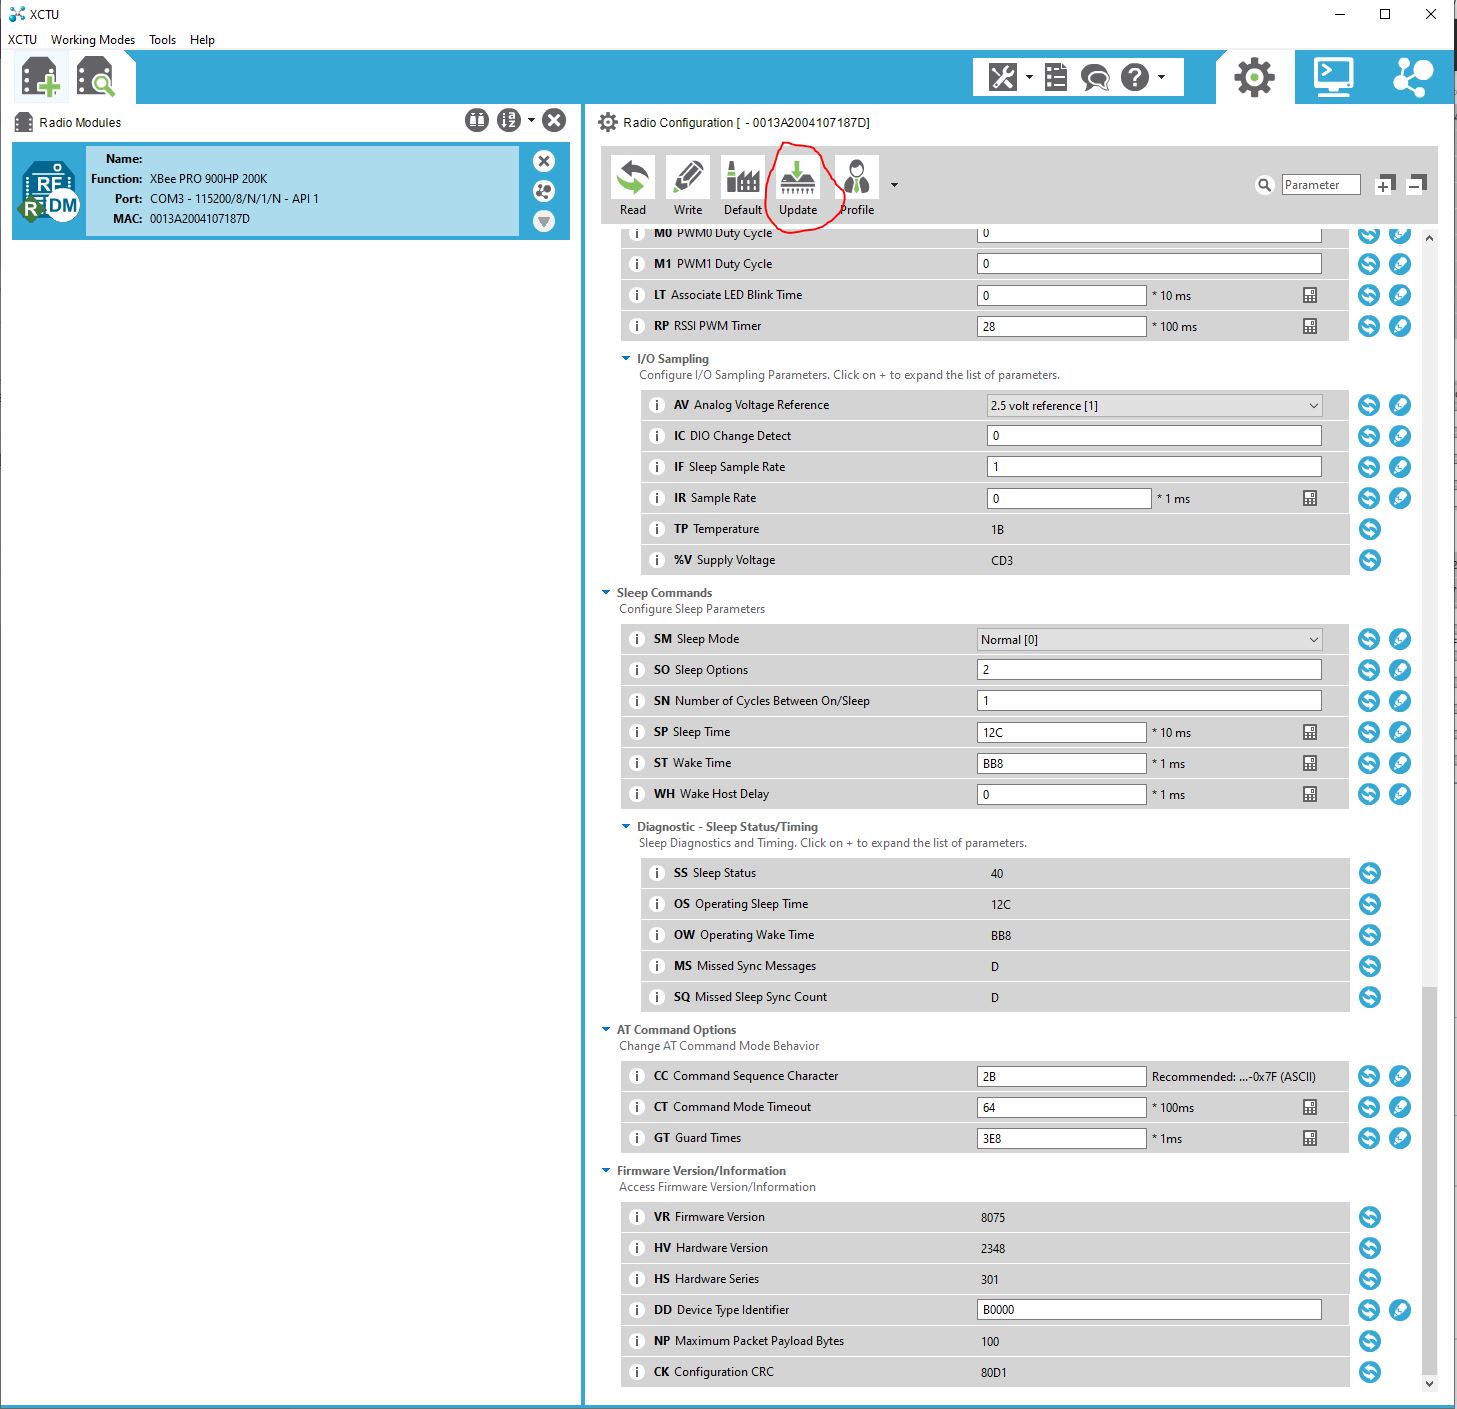
B. Select XBP9B-DP as prodcut family, Xbee PRO 900HP 10K as Function Set and 1075 as Frimware.
Make sure the Force Module checkbox is checked.

Click Update.
Sensor And Modem Should have
If there is a mismatch in settings the modem and sensor will not communicate with each other.
After connecting the wireless module to XCTU go to security setting and enter the new encryption key.
Follow Step 1,2,3A,3B,3C and skip 3D,3E,3F.
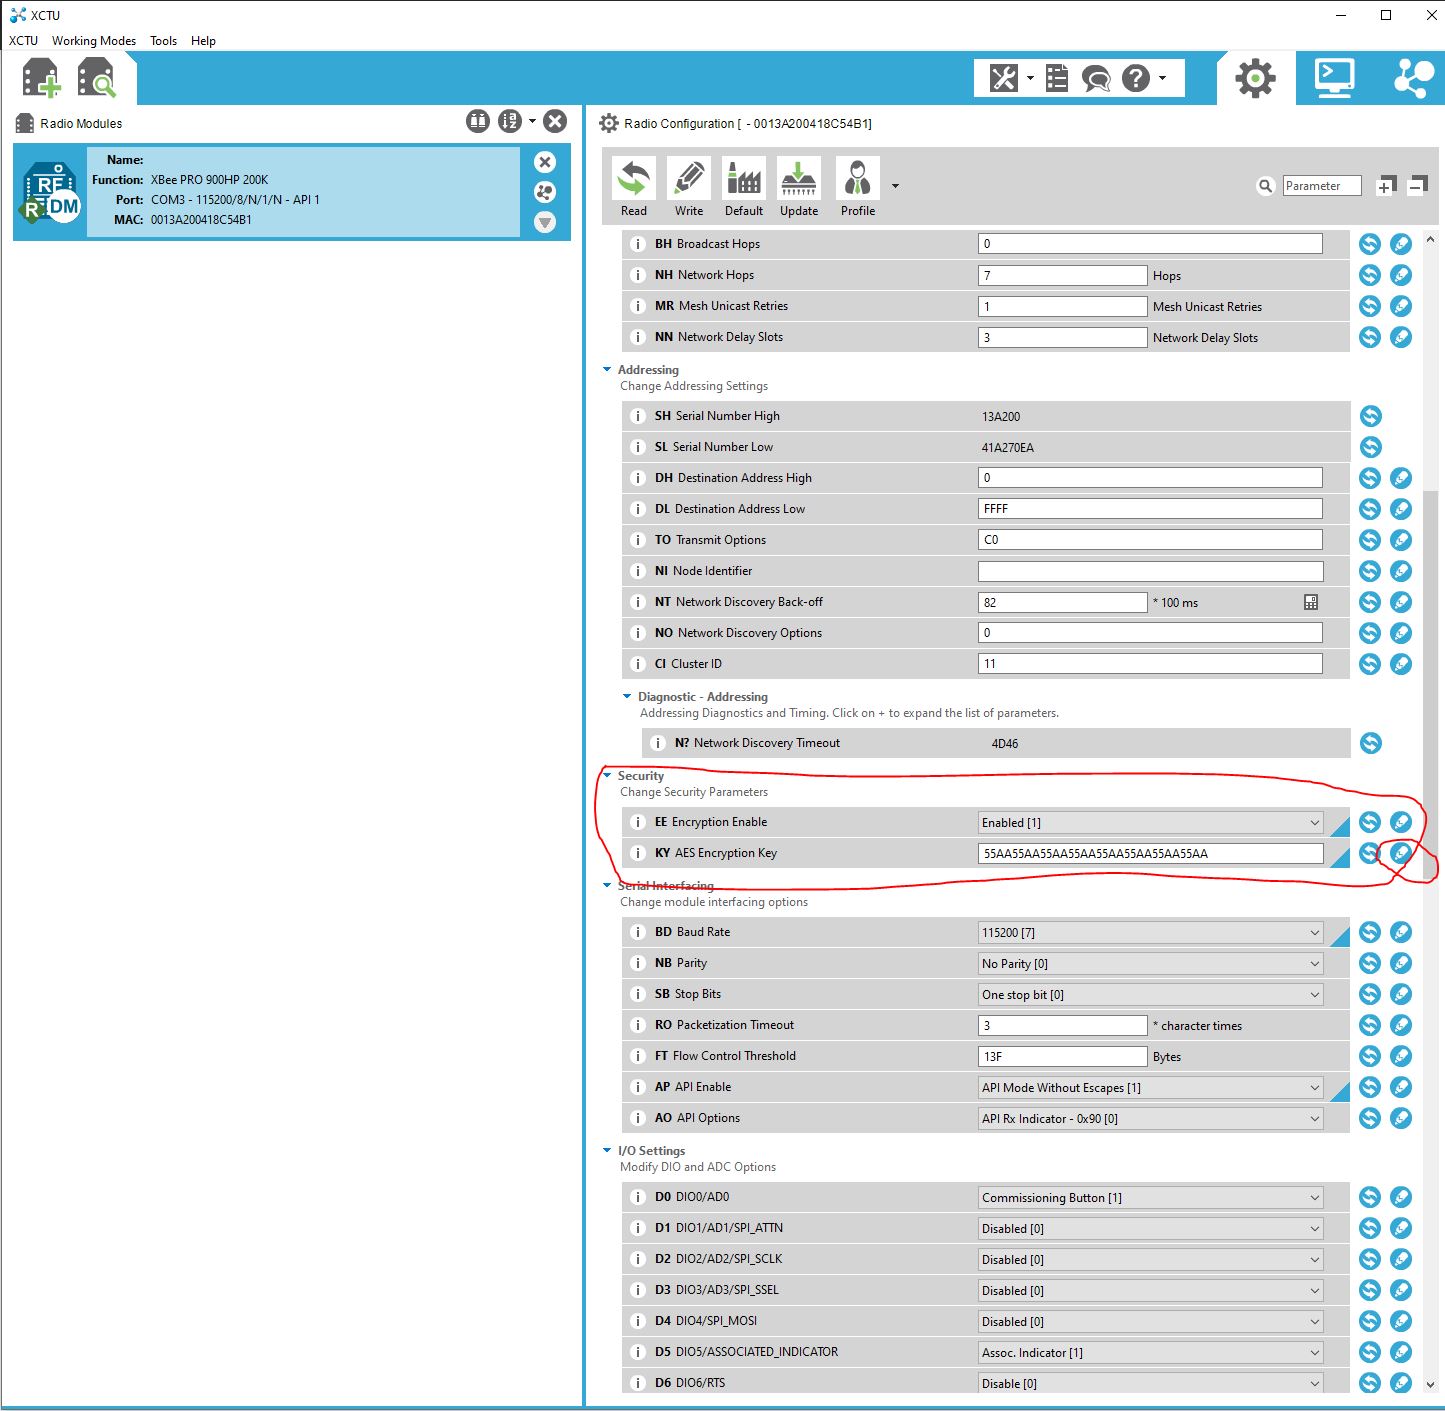
After entering the new key click on write button to store the new key. Once the key is store the module can be disconnected and put bank into its original board.
Serial Console can be used to view incoming RF data.

2. Click Console
3. Open Serial terminal Port


