With a few clicks in N-Button software, you can not only create a button to control relay channels, but also create Relay Status widgets to display the status of each relay channel.
Here are the steps for how to create Relay Status widget with N-Button Lite software.
1.Be sure you have connected the relay board to your computer with serial port, USB, or Ethernet interface.
2. Download, install and launch N-Button Lite software. N-Button Lite Manager will be shown on your desktop.
3. Click Devices Manager – New to add a device.

- Input the name for the device – Relay Board
- Select Manufacturer – National Control Devices
- Select Device Type – ProXR
- Select connection interface of the device
- Click OK on Device Setting and Devices Manager, you will see 1 Device is added on N-Button Lite Manager.
4. Click Relay Status to show Properties – Relay Status panel.
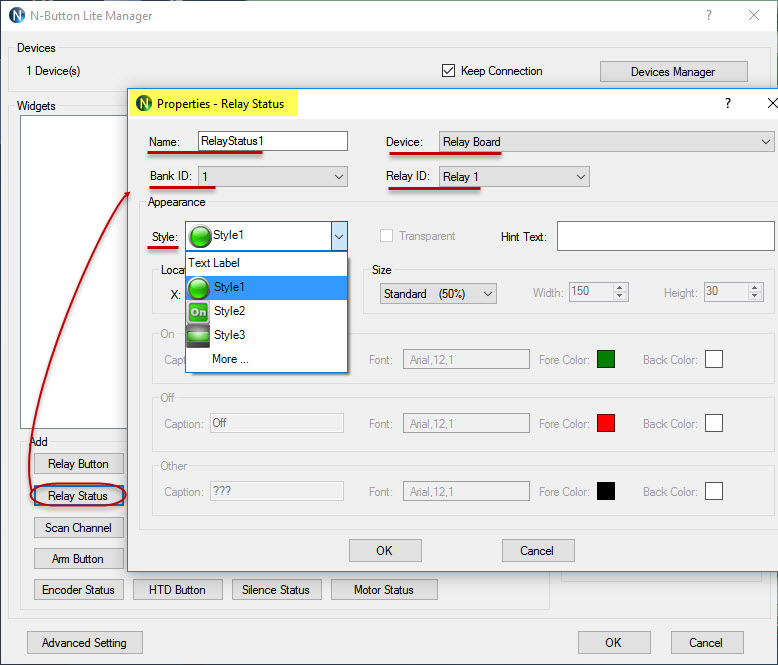
- Input the name or keep the default name
- Select the Device – Relay Board
- Select Bank ID and Relay ID
- Keep default Appearance or select your favorite Style, Location and Size
- Click OK back to N-Button Lite Manager, Relay Status is added to Widget panel
5. In the same way, click Relay Status to add more Relay Status widgets for different relay channels.

6. Click OK on N-Button Lite Manager, you will see the Relay Status widgets showing on your desktop. The color of Relay Status shows the current status of the related relay channel. Green means the relay is on. Red means the relay is off. You can move the widget by clicking down and dragging.

7. Right-click the Relay Status widget to show the pop-up menu. You can choose to open Properties panel or N-Button Lite Manger panel to edit the widget.

You can create up to 16 Relay Status widgets with N-Button Lite software.
If you need more widgets, please use N-Button Pro version, which supports up to 255 widgets.