For the most part, endNode devices need little to no configuration, as the default settings are typically optimal for most applications. However, there are times when you may need to alter a few settings for specific applications. endNode configuration is very easy using our Alpha Station software. Simply click on (A) shown below and the endNode Device Configuration control panel will populate with the current endNode settings.
Please note that endNode configuration changes are limited to the USB Port for the purposes of device security. endNode settings may be viewed and will appear to be altered from the secondary communications port (Ethernet, RS-485, Wireless, etc.), but changes will not actually be stored. The USB Port and secondary communications port may be used simultaneously. You could run Alpha Station on two different computers and talk to the same device should you choose.

B) Identifier – The identifier displays the part number of the endNode controller.
C) Port 1 – The USB communications rate is defaulted to 115.2K Baud, though much higher baud rates may be selected using this drop down box. Please note that important settings may only be changed using this physical port.
D) Port 2 – The secondary communications port is listed here. Please note that in some circumstances, these settings should never be changed, and are ghosted out. Also note that if you are using a RS-232 or RS-485 communications technology, lower baud rates may benefit longer cables. Ethernet and Wireless devices will be ghosted as shown in the screen shot.

When working with RS-485 communications, endNode devices can share up 256 Logical devices on a single RS-485 bus, each may be accessed individually using the E3C device number. The option shown above will appear, allowing you to set the E3C device number. While 256 logical devices are supported, 256 physical devices may not be electrically compatible with your wiring, bus speed, or other devices on the network.
Settings cannot be changed when connected to endNode devices using the secondary port. All settings will appear to change, but actual changes will not be stored using the secondary communications port of endNode controllers for security reasons.
E) Wireless Options – There are many wireless options available, but we typically advise not changing these settings unless you have a thorough understanding of these options.
F) AES Encryption Key – Do NOT Change this field when you are first learning endNode controllers. Your Modem and your endNode device are tied together with a default AES Encryption Key. If you change the endNode encryption key, you will loose access to your device unless you also change your modem AES Encryption Key to use the same key value.
G) Region – Set your Region here. This helps your endNode stay compliant with your local laws.
H) Destination of Data – Destination of wireless data is a very important setting. By default, endNode controllers reflect data back to the caller. This allows multiple modems to have private conversations with a endNode device. This is the preferred method of communications, as data is not broadcast or directed to a particular device. If however, you would like to broadcast responses or send result data to a different destination, these options are available, but not advised unless you have a thorough understanding of mesh communications.

I) Alarm – Select endNode devices include a integrated alarm which may be activated or deactivated by software. This control panel allows you to control the alarm manually or map the alarm to a relay, allowing the alarm to be controlled using ProXR Enterprise commands. This allows the alarm to flash on and off, activate for a duration of time, or other use cases.
J) ProXR Enterprise Driver – The Enterprise Driver simplifies relay control by providing you with a driver that makes relay control and timing very easy. These settings affect the driver, and are pretty easy to understand. Please note that Digital Inputs to Trigger Macros and Analog Inputs to Trigger Macros are future features. If you experience any strange behavior, you may want to turn these routines off. We are not ready to roll out these features, and may even discontinue the development of these features. So for now, these features are a work in progress.
K) Mode – The Mode of your endNode will change to lock and unlock setting changes. Run mode is for daily use, Configuration mode is for device configuration only. You don’t need to do anything with this button except watch it change colors when you save settings.
L) Device Settings – These Options will Store, Read, and Recover default factory settings when clicked.
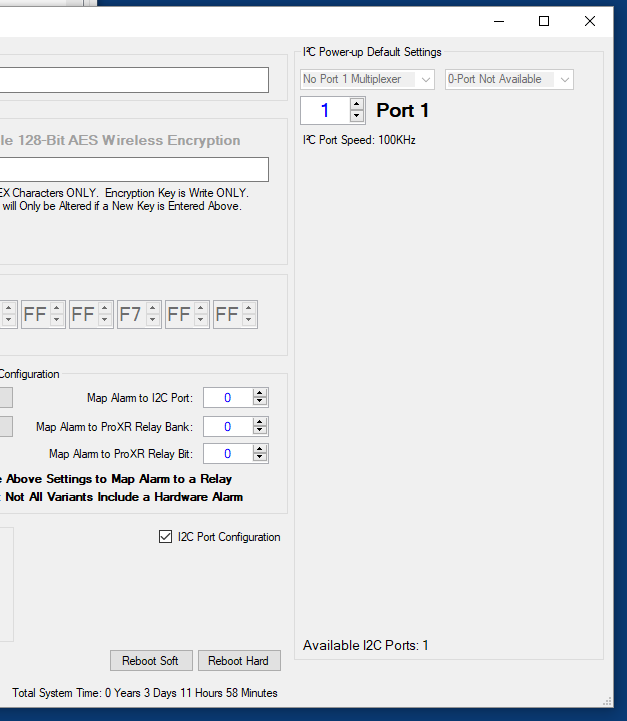
M) I2C Port Configuration – Allows changes of the I2C Bus Speed for each I2C Port of your Controller – a screenshot of these options are shown below.
N) Reboot Options