WiFi Sensor Setup Guide for use with Microsoft ® Azure®
Introduction
NCD’s WiFi Sensor for Microsoft® Azure® allows the complete line of NCD WiFi Sensors to transmit data wirelessly over the internet via Azure. This provides remote access to sensor data from various devices using a WiFi connection.
Only requiring network connection credentials and an Azure Connection String, this line of various WiFi Sensors is very convenient. All sensors are fully encrypted using 128-bit AES encryption. WiFi communications are also fully encrypted for security.
This guide is applicable to all of the NCD WiFi Sensors for use with Azure®. Some information such as displayed data towards the end of this guide may differ depending on the type of sensor in use. To get started using a WiFi Sensor for use with Azure®, follow the steps outlined below.
Setup Instuctions
Getting Started
This guide is broke up into 3 sections:
Create an Azure® account
Sensor Configuration
Initial Testing
Each section contains step-by-step instructions on how to setup a WiFi Sensor for use with Azure®. Follow the sections in order for a stress free, easy setup.
Step 1. Azure Account Setup
First, create an Azure account. During this account creation process enter payment information and create a subscription. Note the name of that subscription as it will be required further into the setup. In this case the subscription is named “Pay as you Go”. Once the account is created, go to: https://portal.azure.com
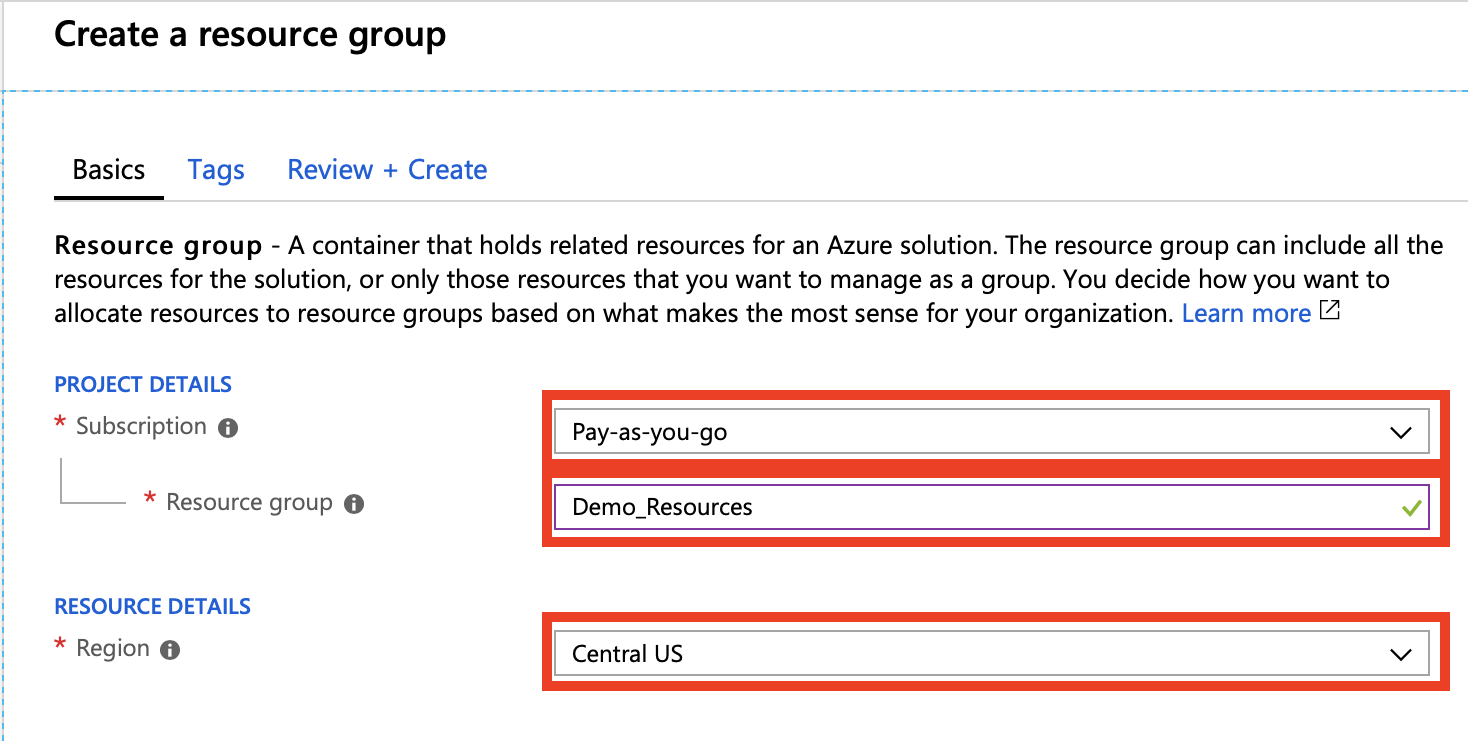
First create a Resource Group. Resources can be added to a resource group. In the left menu on the Azure portal, click Resource Groups, then click Add.
The Create a resourcegroup wizard will ask for some information to be filled out about this group. Select the Subscription that was established during account creation and give the resource group an appropriate name.
Now select the closest region from the region drop-down.
Click Review + Create then click Create.
It is possible to add Tags to the resource group but that will not be covered in this documentation. Please consult Microsoft Azure documentation to learn more about adding tags to the resource group.
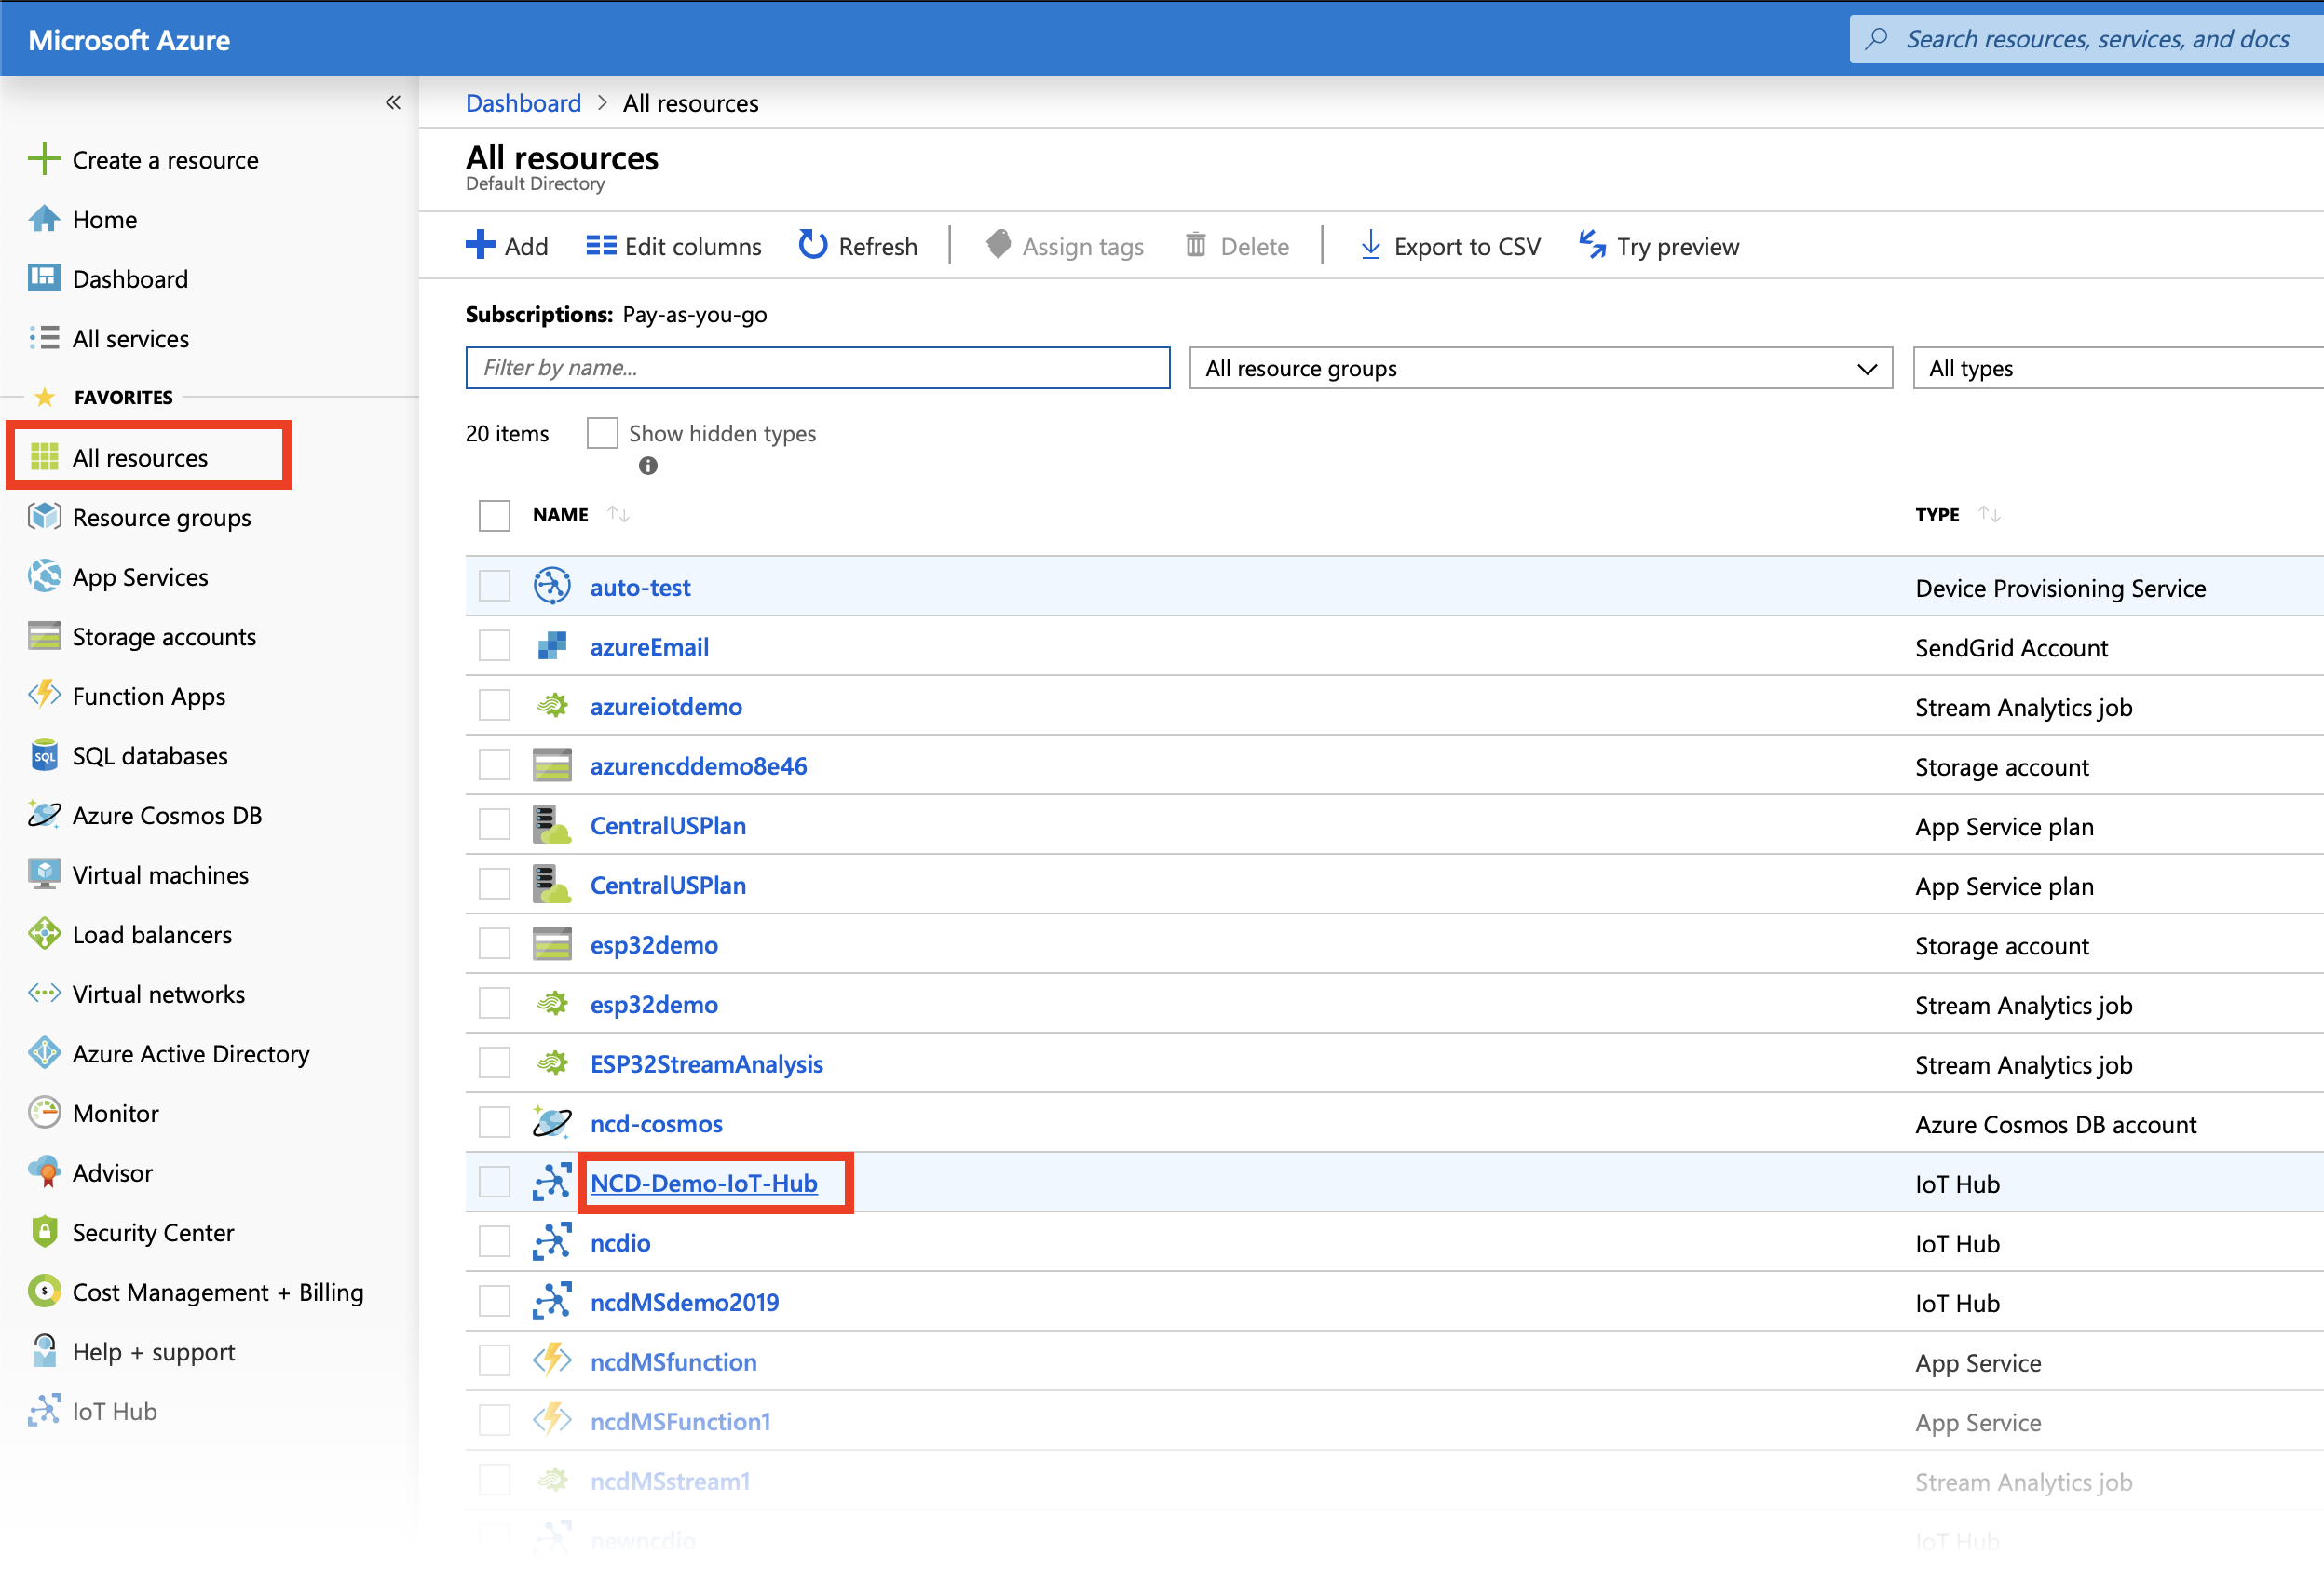
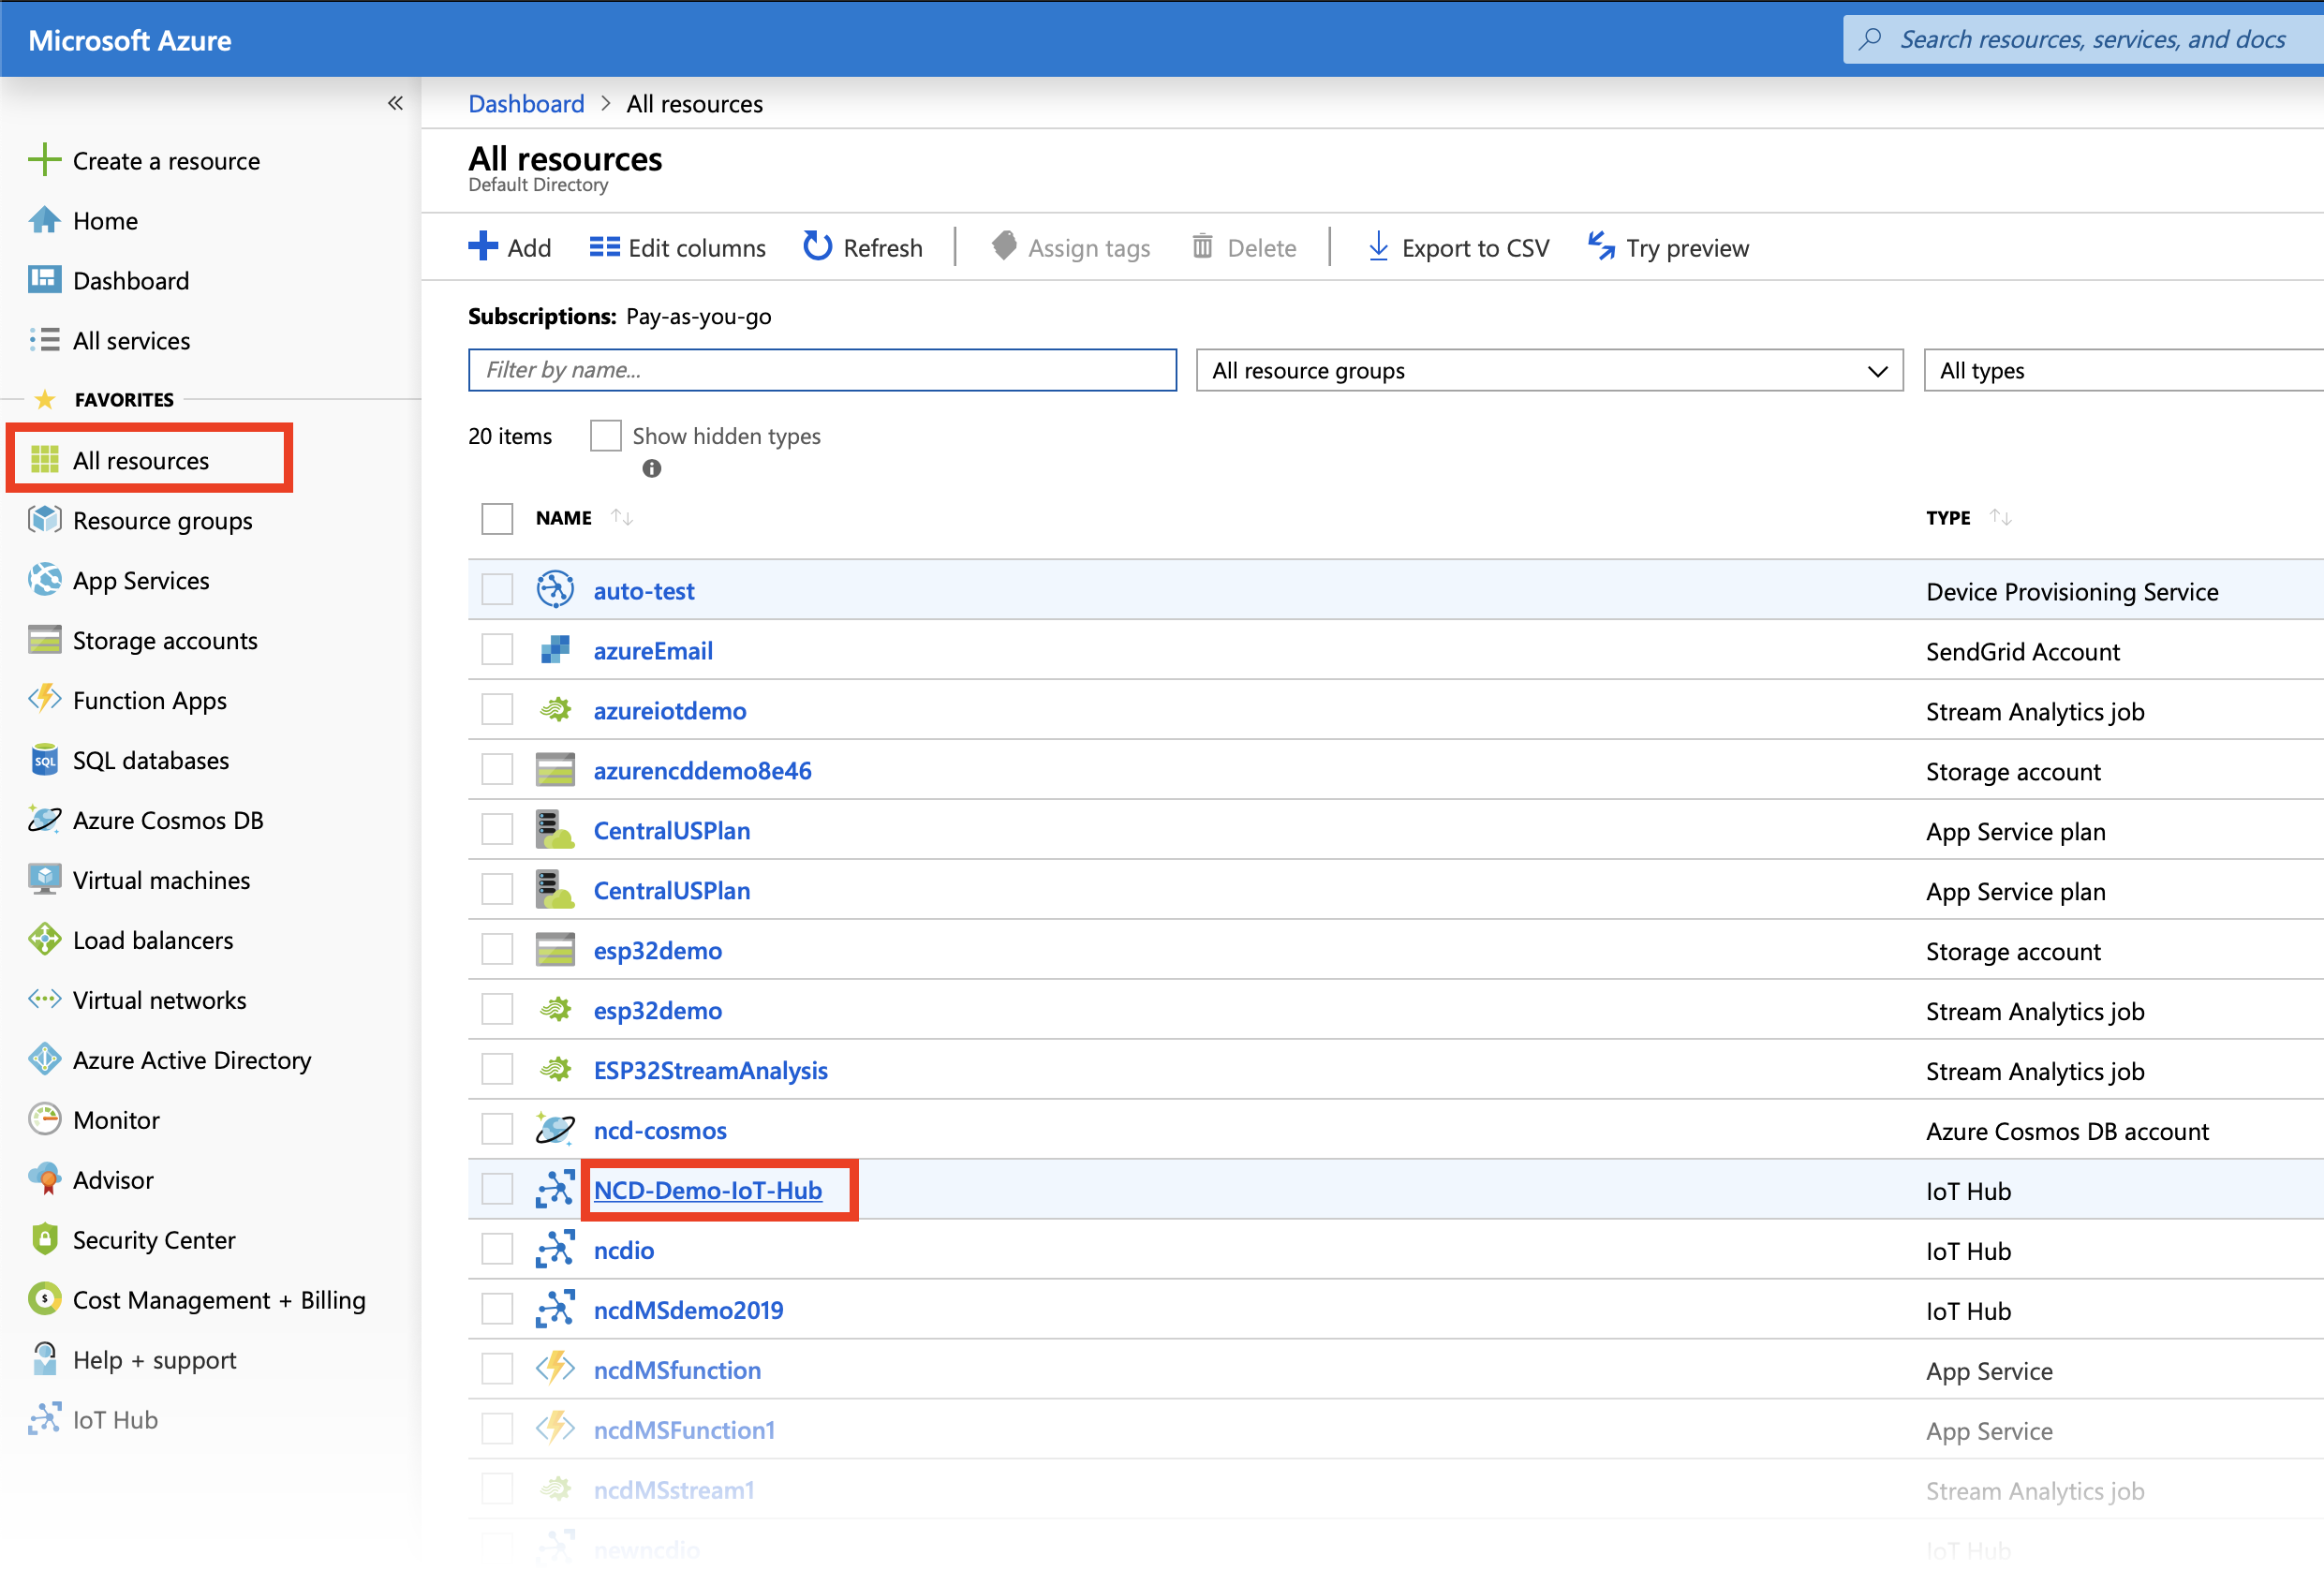
In the IoT Hub creation wizard some information will be requested. Select the Subscription, select the Resource group created in the previous step, select the closest Region, and finally enter a name for the IoT Hub.
(Note: The name must be something no other user is currently using.)
Now click the Review + create button at the bottom, then click the Create button on the pages which follow.
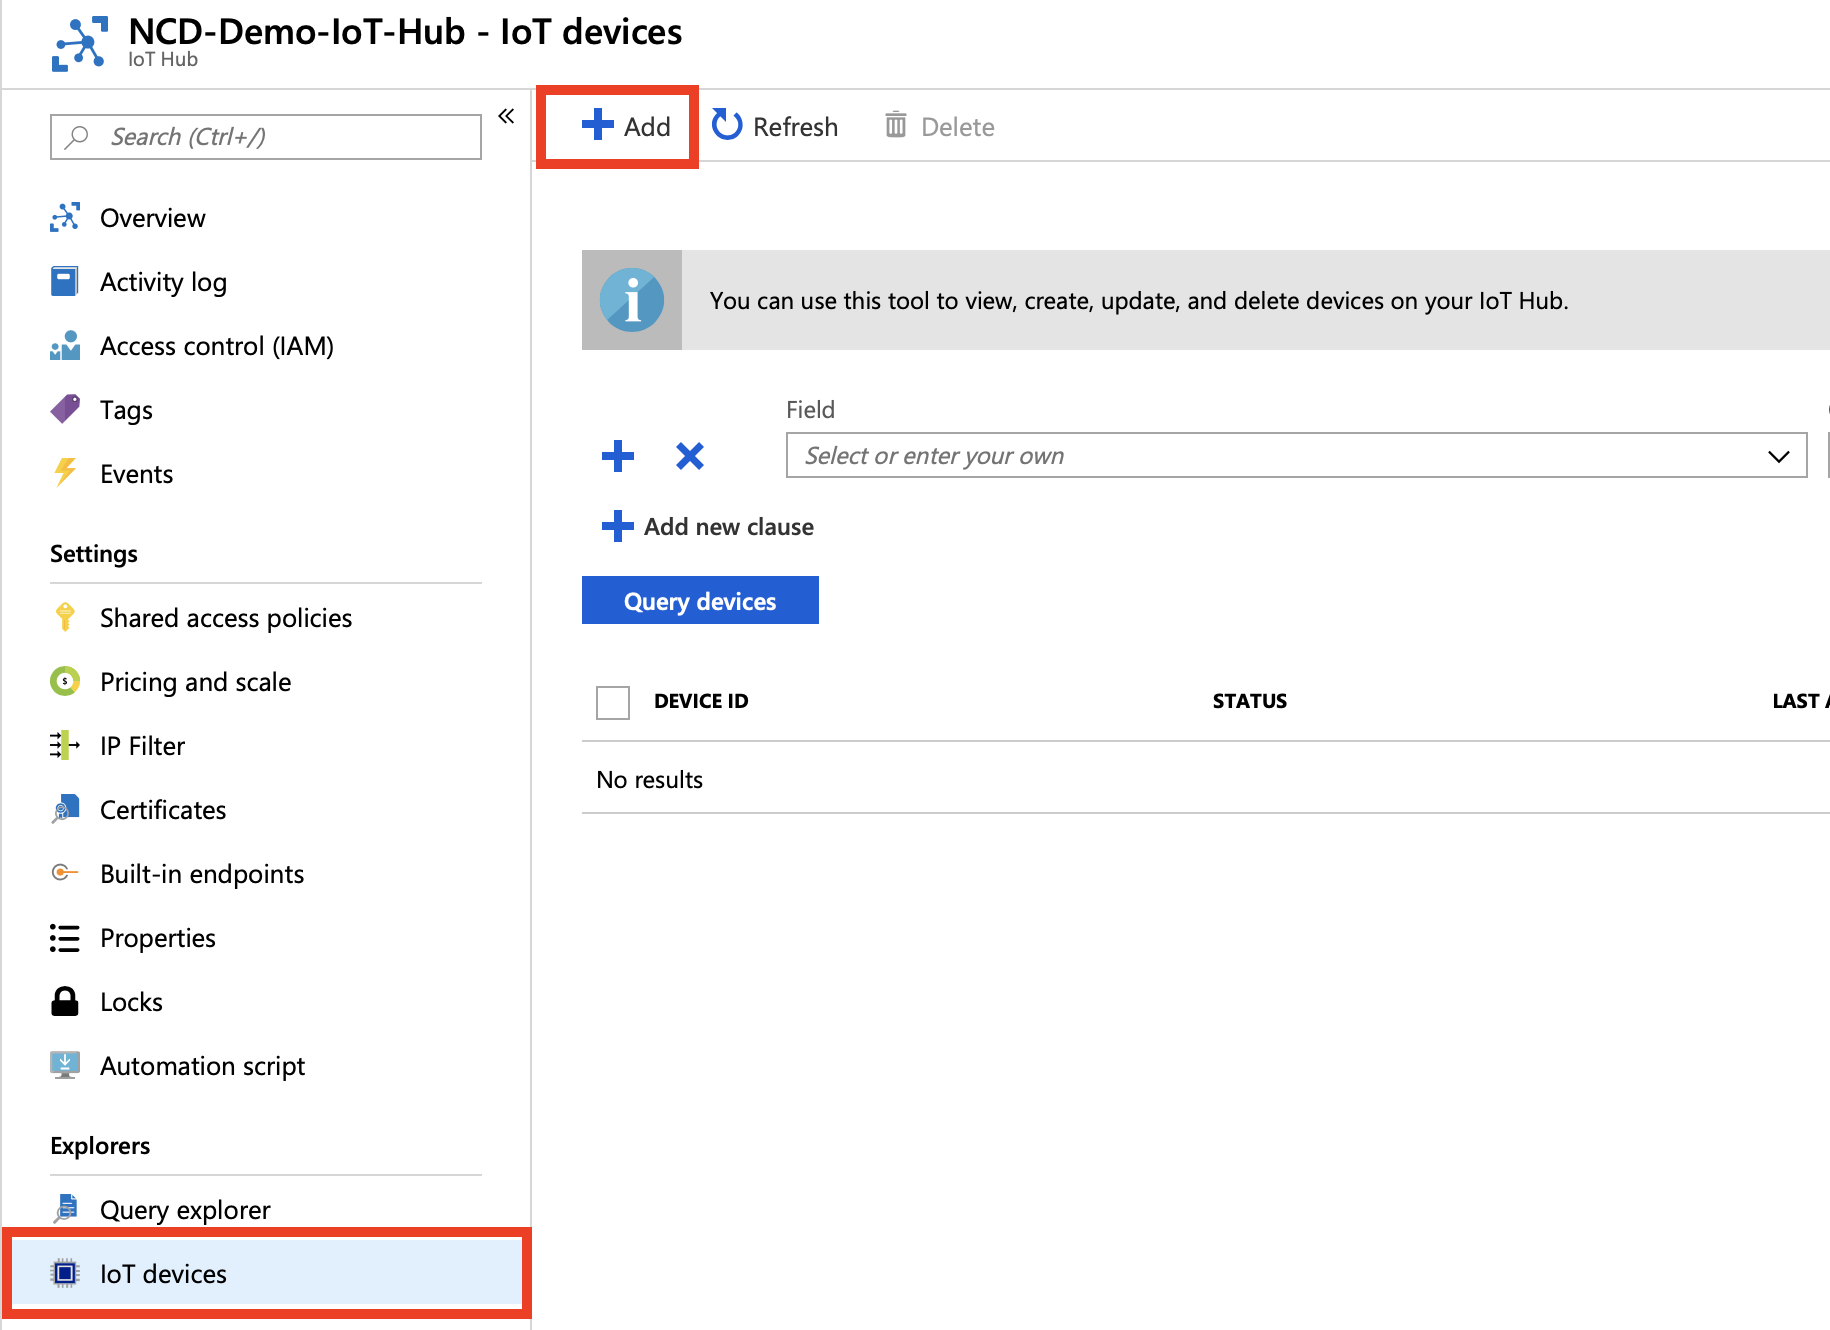
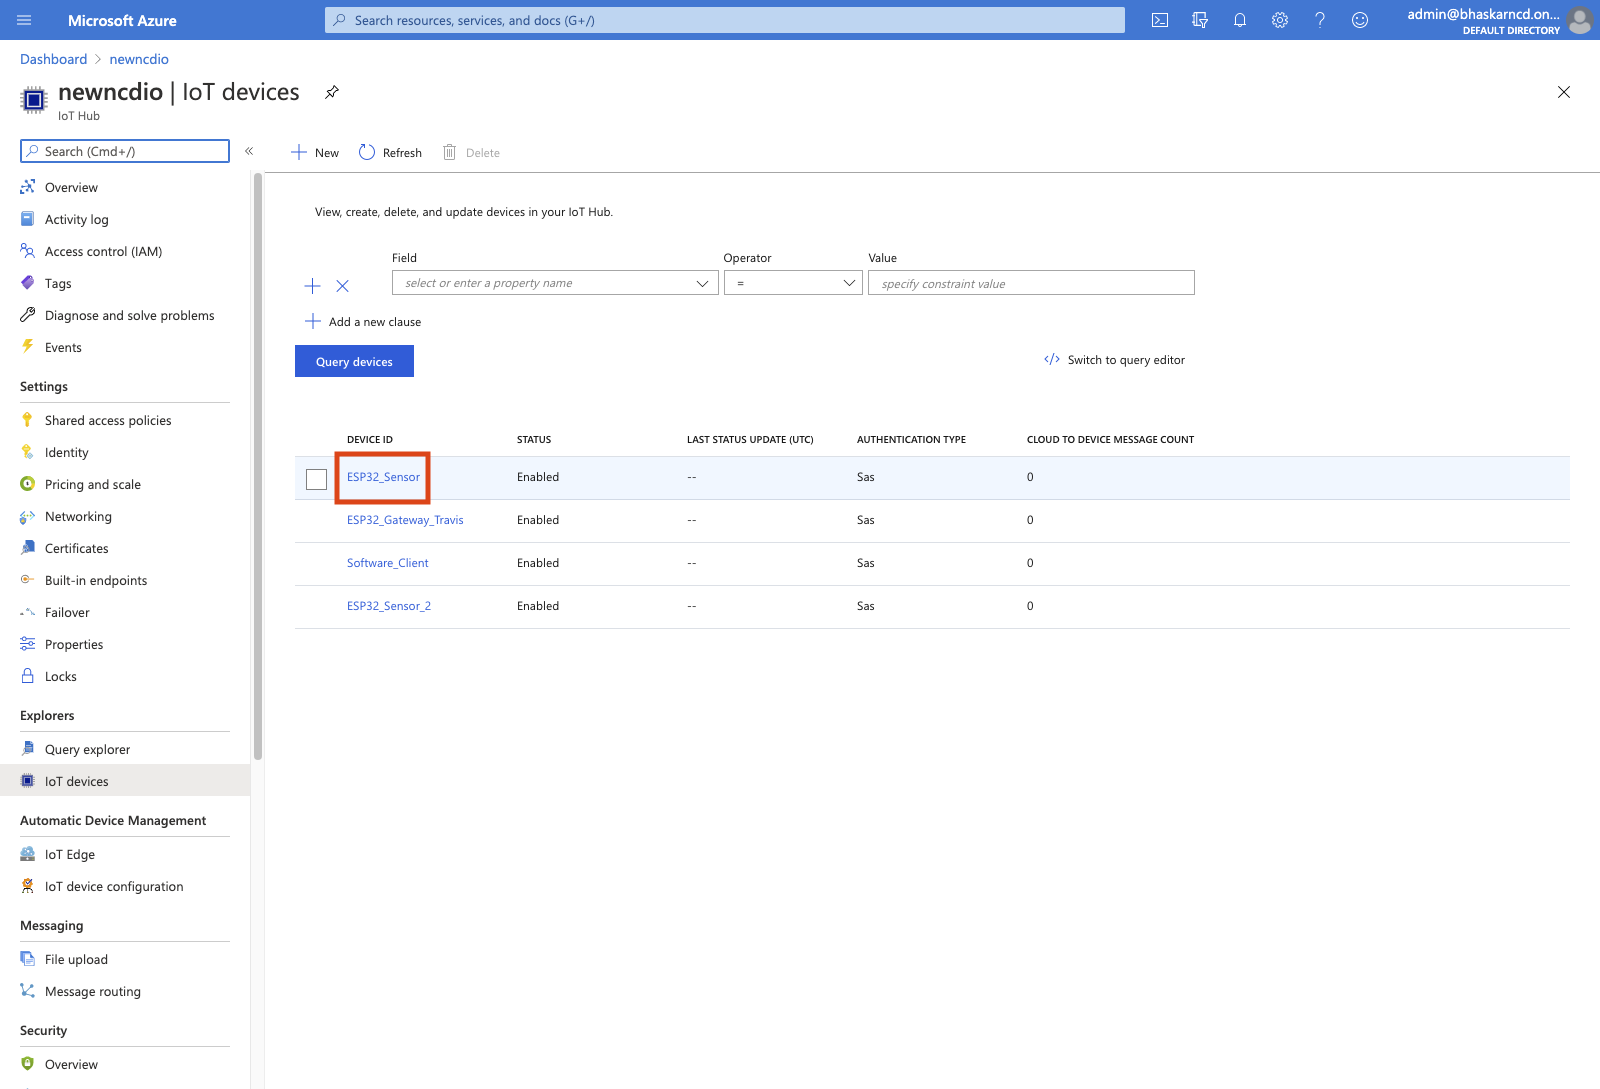
Enter a Device ID for the new device (Something easy to remember and recognize). Make sure Enable is selected and Auto-generate keys is checked, then click Save.
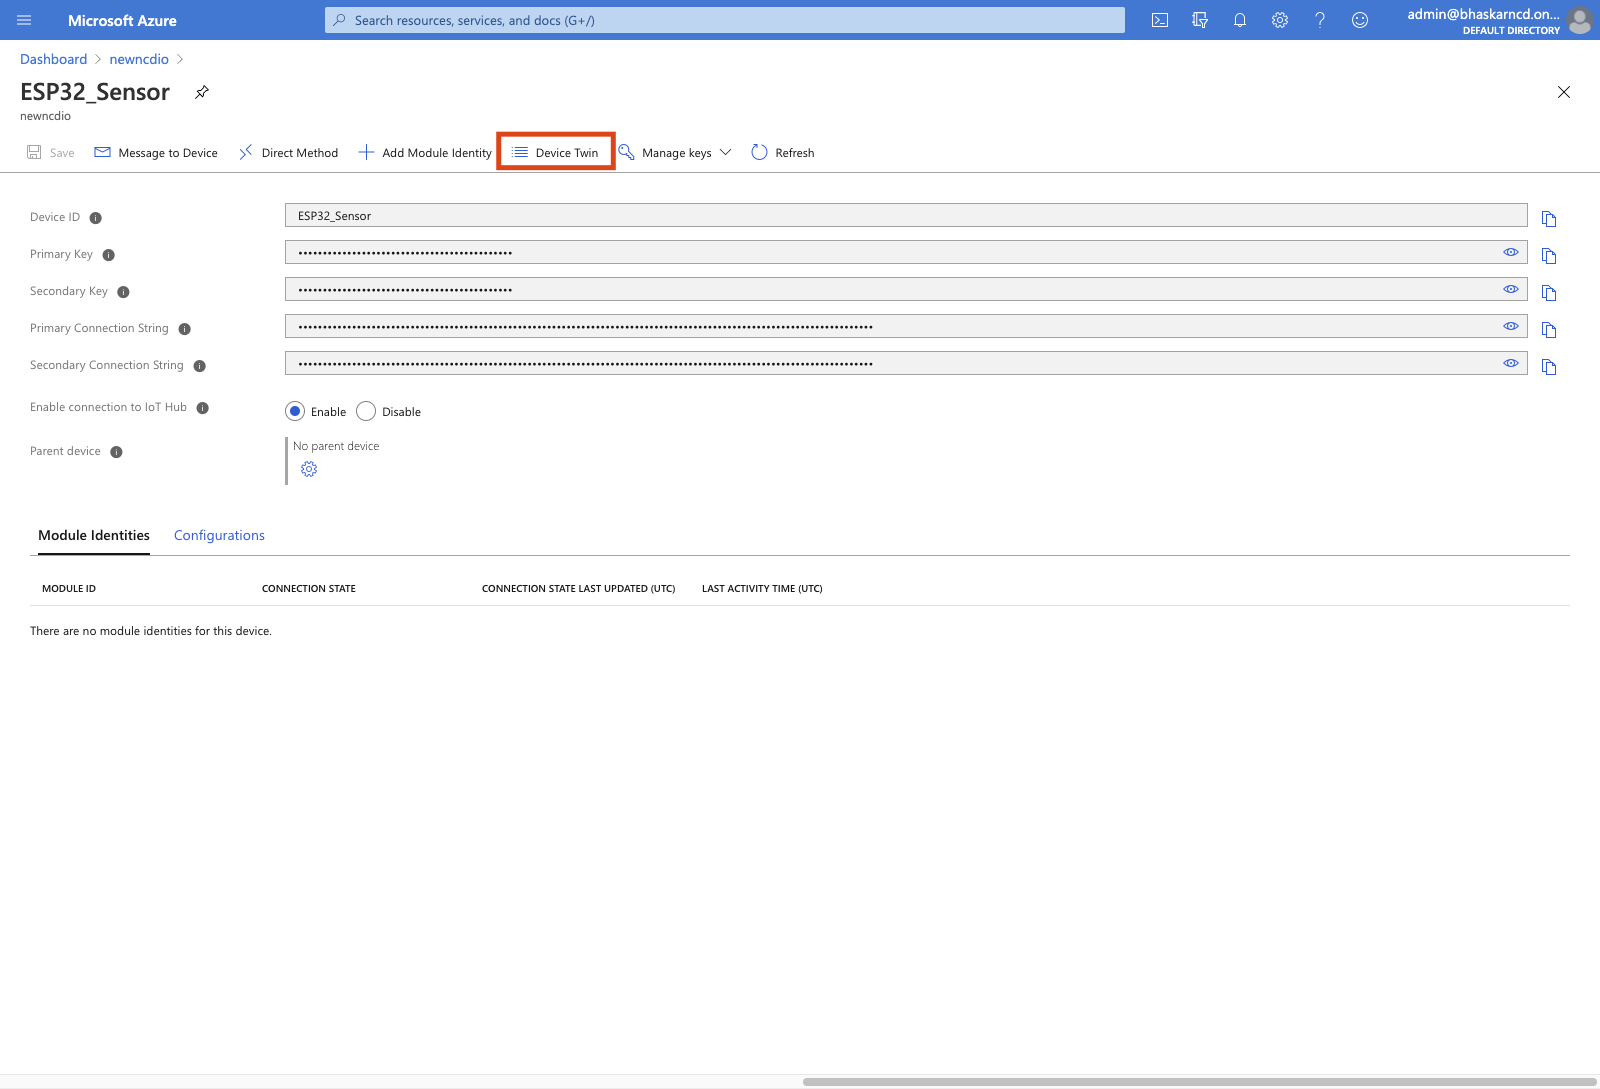
On the new device’s information page copy the text from the Primary Connection String field either by selecting all of it and copying, or by clicking the Copy icon to the right.
It is also recommended that the user creates a notepad or other text document and store this key there for easy access.
This concludes the setup on Azure, so now it’s time to setup the NCD Sensor.
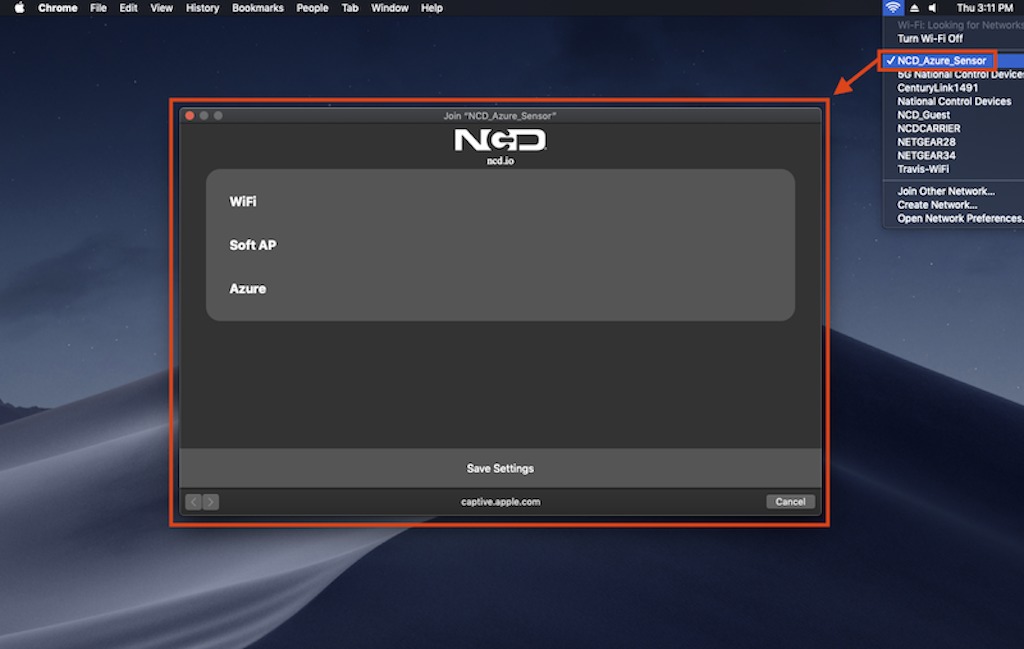
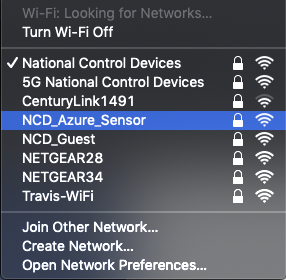
Once connected to the WiFi Sensor, a NCD browser window will appear on screen. If for some reason this browser window does not appear, open up a new window and enter the IP address 172.217.28.1 into the URL search box.
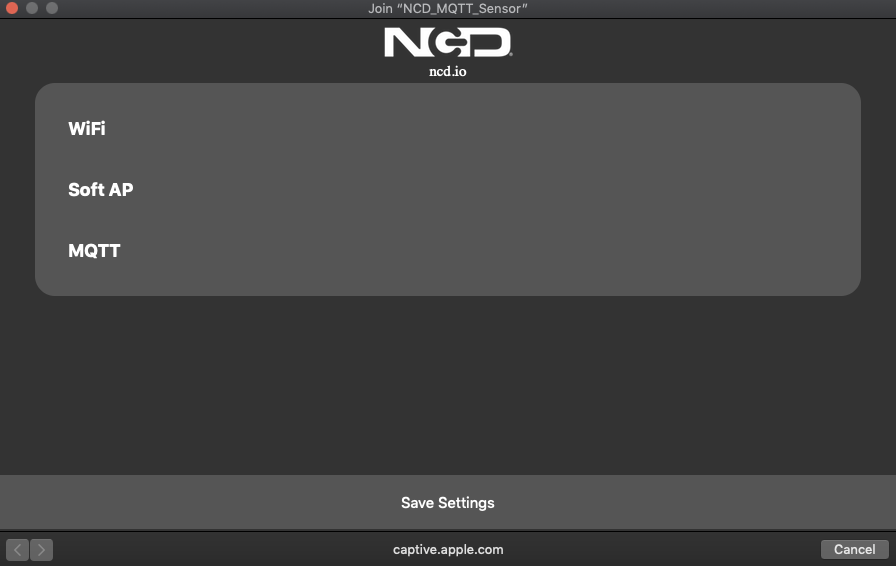
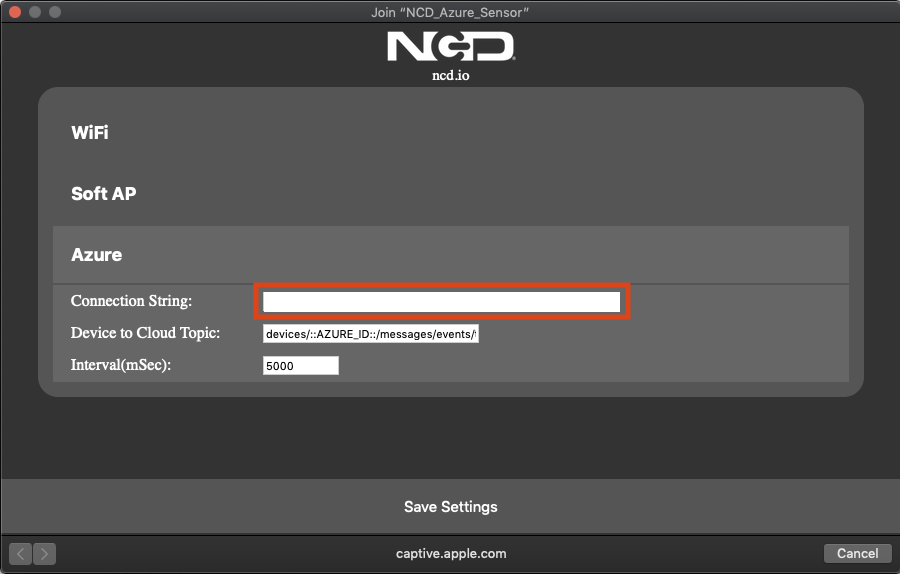
This browser interface tells the sensor which WiFi network to connect to for internet access, the network’s password, and all connection information for Azure.
Reference the information below to configure the settings on this browser interface and click the Save Settings button. Once saved, wait for the light on the sensor’s WiFi module to turn green and it will close the browser interface automatically.
Sensor Configuration:
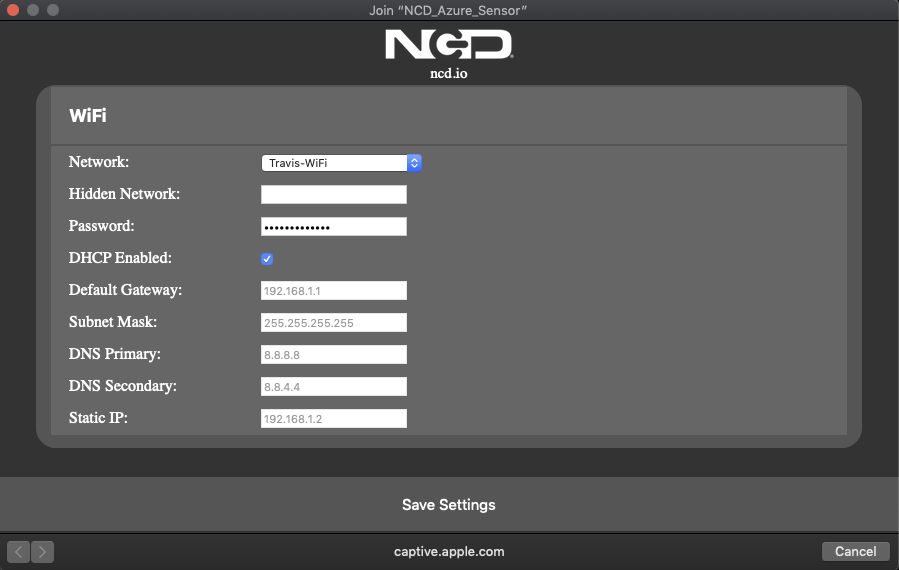
WiFi Settings -
Network:Select the SSID that this device should connect to upon being powered on.
Hidden Network:If applicable, choose a hidden SSID instead of a visible SSID.
Password:Enter the password for the Network or Hidden Network this device will be connecting to.
DHCP Enabled:Uncheck this to manually configure the settings below. Otherwise, move onto Soft AP.
Default Gateway:If applicable, enter Default Gateway address.
Subnet Mask: If applicable, enter Subnet Mask address.
DNS Primary: If applicable, enter DNS Primary address.
DNS Secondary:If applicable, enter DNS Secondary address.
Static IP:If applicable, enter Static IP address.
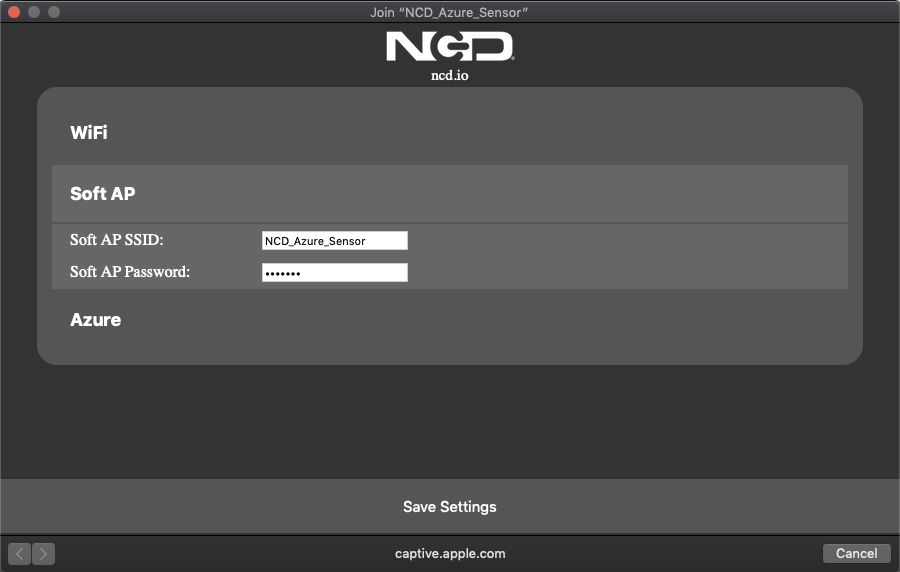
Soft AP Settings -
Soft AP SSID:This is where the SSID that the sensor will broadcast can be customized. Remember to use underscores or dashes instead of spaces if the intended ID contains multiple words.
Soft AP Password:This is the password that will need to be entered when trying to access this device’s network.
Azure Settings -
Connection String:The connection string is an important piece of sensitive information that the sensor uses to connect to an account on Azure. Paste the Primary Connection String here.
Device to Cloud Topic:For these sensors, it is recommended to leave everything in the Device to Cloud Topic alone up to events/. In other words, the user should NOT change devices/::AZURE_ID::/messages/events/. Enter a custom topic name after the forward slash following “events” in this field.
Interval(mSec): Customize the interval of transmission here. 8000 mSec in this setting means that data from this sensor will be published to the cloud topic every 8 seconds.
Step 3. Initial Testing
The Device Twin makes testing with sensors easy. Just open a web browser and go to https://portal.azure.com.
Here information about the device can be viewed. If the Sensor is powered up and the Green LED is illuminated, the connection state in the Device twin should indicate that it is “Connected”.
Once this information is displayed in the Device Twin, rest assured the Sensor is setup and working properly.
The interval of transmission can be changed from this Device twin screen. This means that whatever value is entered in for the interval (as shown to the right) will be the amount of time in mSec that will pass in between each data transmission. Do not change any code before or after the green value as displayed to the right. Just simply alter the green number prior to the comma, and located after “interval”:
After clicking the Cloud Shell icon, Azure will open a terminal window at the bottom of the screen.
Using the up and down arrow keys on the keyboard, select the command:
az iot hub monitor-events –output table –hub-name newncdio
First, try pressing the up arrow once. This should bring up the command needed. If not located on the first try, continue using the arrow keys to maneuver the list of commands.
Otherwise, copy & paste or type out the command then press enter. It is also listed below for convenience.
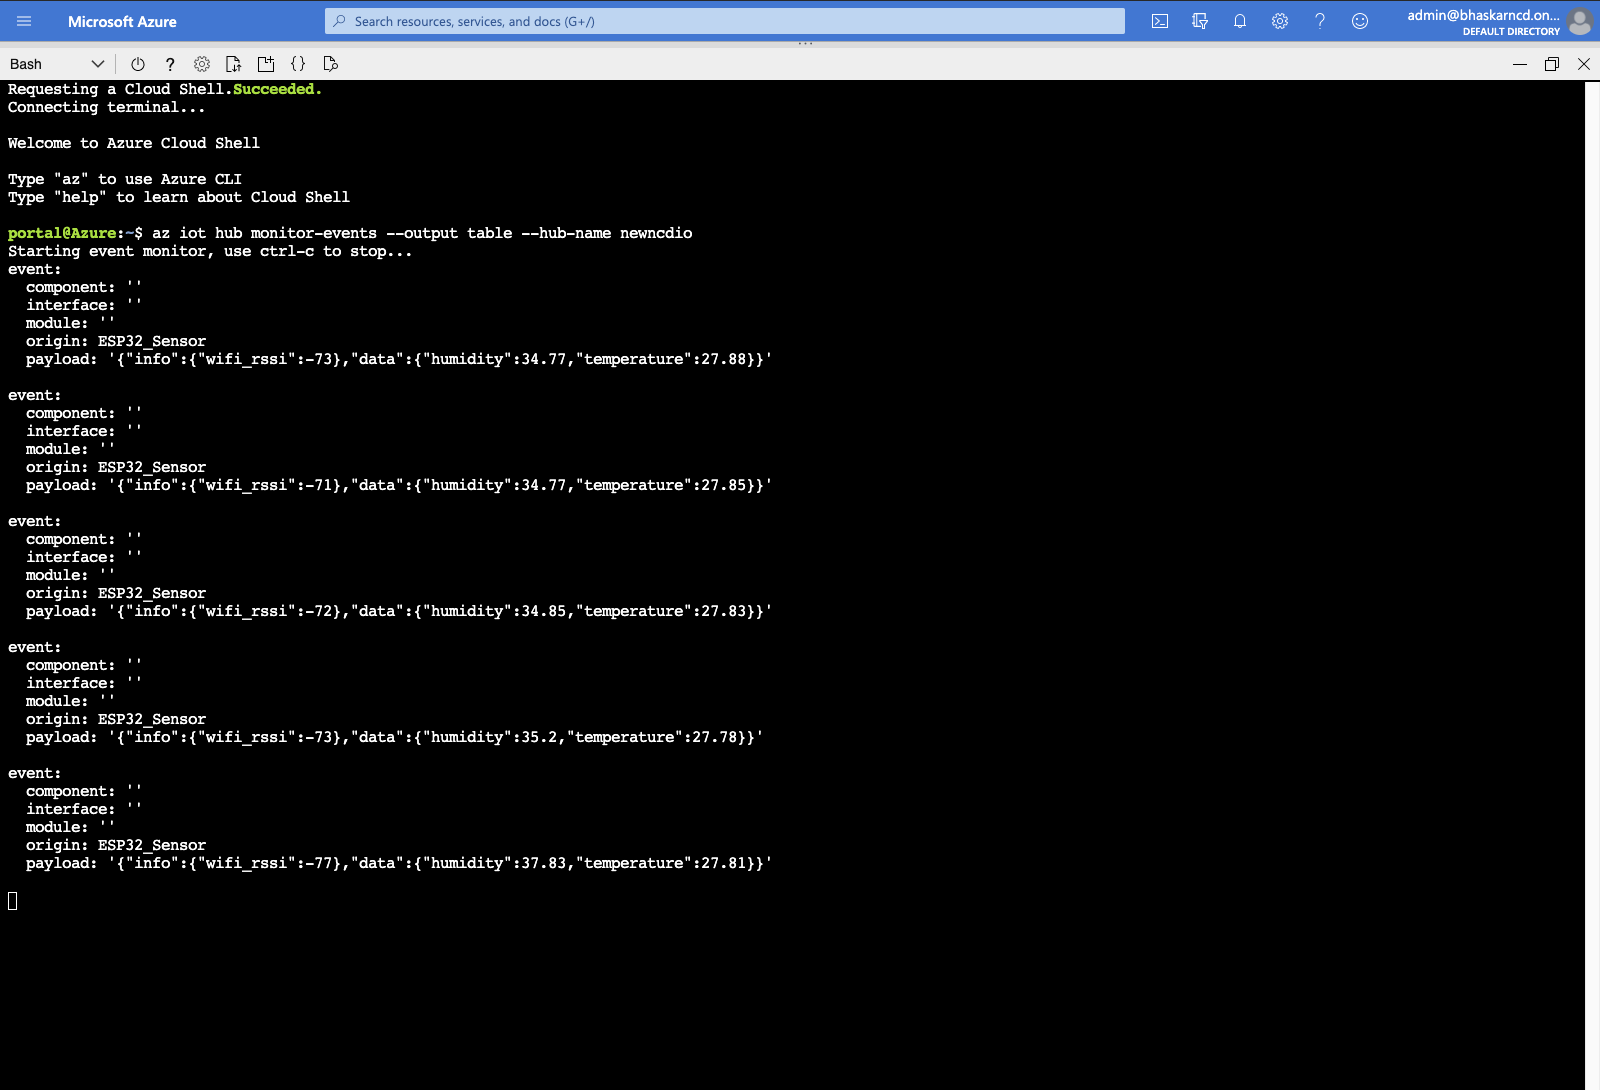
Start streaming data from the sensor by entering the following command after portal@Azure:-$:
az iot hub monitor-events –output table –hub-name newncdio
Instead of “newcndio” in this command, replace it with the name of the hub created earlier on Azure. If using the arrow keys, this step should already be done when it pulls up this command.
After pressing enter, this will tell the terminal to run the command just typed or selected.
Data will periodically be streamed onto the screen as seen on the right. As mentioned in the beginning of this guide, the type of sensor and it’s values will be different depending on the sensor being used.
In the case to the right, Temperature and Humidity data is being streamed onto the terminal screen. This is how to perform initial testing as well as view sensor data. This concludes the WiFi Sensor User Guide for Microsoft®Azure®.
NOTES
NOTE: These sensors are secured using the default NCD 128-Bit AES encryption key. This is the same Key used by ALL NCD Wireless Sensors at the time of shipping. Please contact us if you would like a custom Key Assigned to your company. We have also made provisions for customers to change the Encryption Key using additional hardware.