Unable to Mount Virtual COM Port in Windows 10
If you are using Windows 10 (or any other operating system) and having problems getting a Virtual COM Port to be assigned to your system, follow these steps. We recently discovered after a Windows 10 Update, that Virtual COM Port drivers may not load any-longer by default for some devices. If you are unable to use Base Station or AnyI2C software because the COM port is not showing up, here’s an easy fix:
Prerequisite: VCP Driver Installation
Recent operating system updates, hardware (VCP Chip) revisions, and VCP drivers may prevent a Virtual COM Port from registering properly with your operating system. We have seen ALL THREE factors prevent proper operation. We STRONGLY ADVISE installation of the latest drivers for your particular operating system before going any further. NCD hardware uses FTDI drivers for most devices, you should download and install the latest FTDI drivers from here.
In most cases, this should resolve your virtual COM port registration problem and a new COM port should appear in “Device Manager”. If this does not mount the virtual COM port to your system, please follow the steps outlined below.
Step 1: Open Device Manager
Move your Mouse pointer to the lower left corner of the screen and type “Device Manager”. Click on the “Device Manager” as shown in Blue in the screenshot below.

Step 2: Examine the USB to Serial Converter Settings
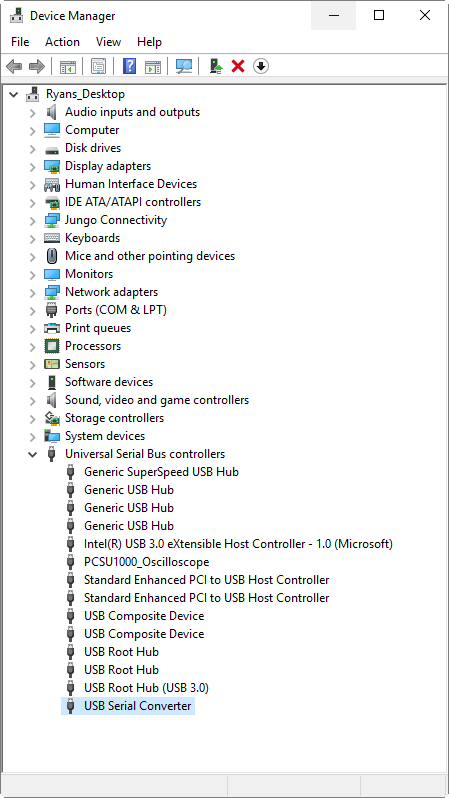
With your USB device plugged in, Expand the “Universal Serial Bus controllers” list to reveal “USB Serial Converter”. Right click on “USB Serial Converter” and select “Properties”.

Step 3: Load the VCP Driver
After opening the Properties for the device, click on the “Advanced” tab and MAKE SURE the “Load VCP” option is checked. Once checked, click OK.

Step 4: Reconnect your USB Device
Disconnect the USB device and reconnect. The device should now be visible to your operating system.
If all goes well, your Virtual COM Port Driver will be loaded and ready to run. Now re-run Base Station Software (https://ncd.io/start) and your Virtual Serial Device should appear. This should also allow COM devices to list properly in AnyI2C software.
Alternative Solution
If the above steps did not work, and your computer has had unusually large number of COM ports assigned (more then 256), then it will not be possible to mount additional COM ports to your computer without cleaning up all unused ports. The process for cleaning up unused ports is as follows:
Automatic COM Port Removal Method
The following tool may be used to remove all hidden COM ports at once. This tools is published by FTDI, which is vetted and trusted by NCD:
https://www.ftdichip.com/Support/Utilities/ CDMUninstaller_v1.4.zip
From the command line, execute the following command:
CDMUninstaller.exe 0403 6001 -l
Complete Documentation can be found here.
Manual COM Port Removal Method
From the command line, enter the following two commands:
> set DEVMGR_SHOW_NONPRESENT_DEVICES=1
> devmgmt.msc
This will open the device manager. Next you will need to review all COM ports that are hidden from view, but assigned to other devices that are not in use. To do this from device manager, click View>Hidden Devices.
Next, it will be necessary to delete all GRAY (not black) USB Serial Port devices that are not in use. This will take some time. To delete unused COM ports, right click on Grayed USB Serial Port Items and select “Uninstall Device”. Do not select the option for deleting the driver.
Now it will be possible to assign additional COM ports to your computer and devices will no-longer appear as unrecognized COM ports.

