Introduction
This is a web-based Thingspeak weather app. This web Application uses SHT31 sensor for getting the real-time temperature and humidity data. We have deployed our project on ESP8266 WiFi module. For cloud operations, we are using ThingSpeak API.
SHT31 is a Temperature and Humidity Sensors made by Sensirion. The SHT31 provides a high level of accuracy around ±2% RH. Its Humidity range is between 0 to 100% and Temperature range is between -40 to 125 °C. It is much more reliable and fast with 8 sec of Sensor response time.
Some features of this tutorials are as follows-
Features
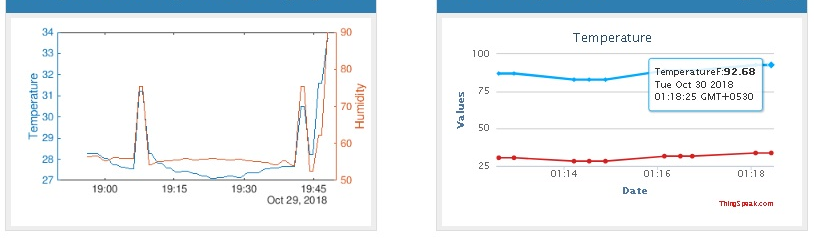
- Provides you real-time analytics and stats using ThingSpeak API.
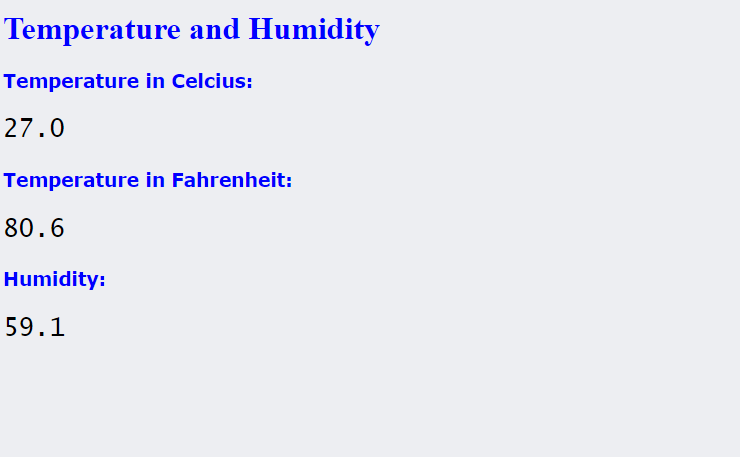
- The sensor data can also be seen in a web server hosted by the device.
- TaskScheduler is used to schedule the task like fetching data from sensors, hosting a web server, posting the readings to the cloud.
- It uses I2C protocol to fetch the sensor reading which is more accurate, expandable and scalable.
- ESP8266 Huzzah I2C adapter is used, which provide us with better hardware connections to I2C
- Sleep mode when the device is idle or no task callback is called.
- Effective task scheduling provides hassle-free usage.
Hardware Specification
Hardware used to complete this task:
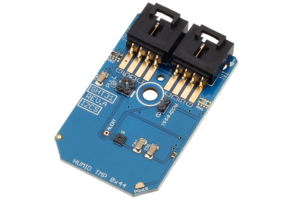
- SHT31 Temperature and Humidity Sensor
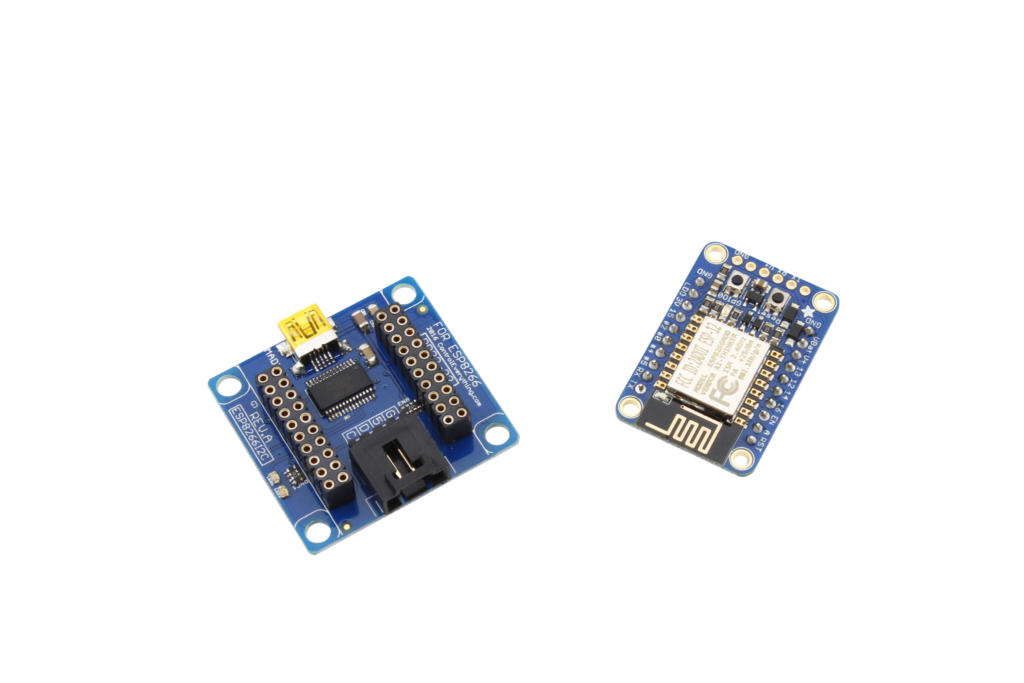
- Adafruit Huzzah ESP8266
- ESP8266 I2C Adapter
- I2C Cable
Software Apps and Online Sevices
- Arduino IDE
- Thing Speak API
Hardware Connections
This step includes the hardware hookup guide. This section basically explains the wiring connections required between the sensor and the ESP8266. The connections are as follows.
- The SHT31 works over I2C. The above image demonstrates the connection between ESP8266 and SHT31 module. We are using I2C cable for it either we can use 4 F to F jumper wires.
- one wire is used for Vcc, the second wire for GND and other two to SDA and SCL respectively
- According to the I2C adapter pin2 and pin 14 of an ESP8266 board are used as SDA and SCL respectively
Here we are performing three different operations in one go. We are retrieving the values form I2C compatible SHT 31 temperature and Humidity sensor. Then, A webpage has been hosted by the device to show these values real time on a web server. Simultaneously we are posting these values to the cloud using ThingSpeak API. So the next instruction will elaborate the procedure we have followed to complete these tasks.
Task Scheduling
In this tutorial, we are performing three operations:
- Read the data from SHT31 using I2C protocol
- host the web server and post the sensor reading to the webpage
- post the sensor readings to ThingSpeak API
To achieve this we are using TaskScheduler library. We have scheduled three different tasks referring to three different control operations. this is done as follows
- Task 1 is for reading the SHT 31 sensor value this task runs for 1 second till it reaches timeout of 10 secs.
- When the Task1 reaches its timeout Task 2 is enabled and Task1 is disabled.
- We connect to AP in this callback, Two boolean variables are taken to take care of the switching between STA and AP
- In Task 2 we are hosting a web server at 192.168.1.4. This task runs for every 5 sec till it reaches its timeout which is 50 sec
- When Task 2 reaches timeout Task 3 is enabled and Task2 is disabled.
- We connect to STA(local IP) in this callback. In Task 3 we are posting the sensor reading to cloud ThingSpeak API
- Task 3 runs for every five seconds till it reached its timeout i.e 50 sec
- When the Task3 reaches its timeout Task 1 is enabled again and Task3 is disabled.
- When no callback is called or the device is idle it goes to Light Sleep thus saving power.

This piece of code explains the task scheduling:
void taskI2CCallback();
void taskI2CDisable();
void taskWiFiCallback();
void taskWiFiDisable();

//---------Tasks------------//
Task tI2C(2 * TASK_SECOND, TASK_FOREVER, &taskI2CCallback, &ts, false, NULL, &taskI2CDisable);
Task tWiFi(20* TASK_SECOND, TASK_FOREVER, &taskWiFiCallback, &ts, false, NULL, &taskWiFiDisable);

//---------Task Timeout------------//
tI2C.setTimeout(10 * TASK_SECOND);
tWiFi.setTimeout(20 * TASK_SECOND);

//enable I2C
tI2C.enable();
Reading Temperature and Humidity Values from SHT31
I2C is a two-wire interface which only uses two wires to communicate with the master device. The one is SCL(Serial Clock) and the other is SDA(Serial Data). Each slave device has a unique address. SHT 31 also has an 8-bit address and can be accessed by 0x44 address. it has a 8bits of the address where 7 bits are actual address and while rightmost LSB bit 0 is used to signal reading from or writing to the device. If bit 0 is set to 1 then the master device will read from the slave I2C device. I2C is much more reliable, scalable and fast and even it has many modes of operation which makes it much more energy efficient
We are using Wire.h library to read the temperature and humidity values. This library facilitates i2c communication between the sensor and the master device. 0x44 is the I2C address for SHT31.
SHT31 operates in a different mode of operations. You can refer to datasheet for that. We are using 0x2C and 0x06 as MSB and LSB respectively for single shot operation.
In this piece of code we are reading Temperature and Humidity values from SHT31
//I2C task callback void taskI2CCallback(){
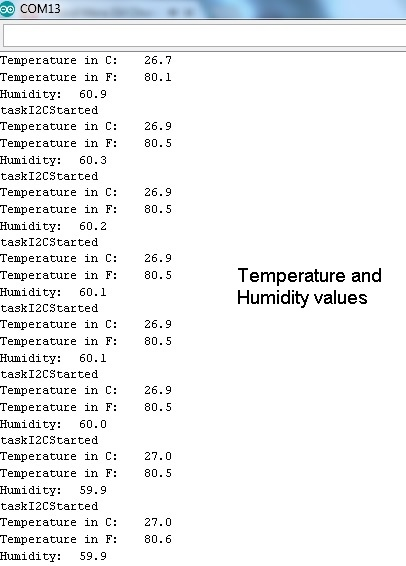
Serial.println("taskI2CStarted");
unsigned int root[6];
//begin transmission from 0x44;
Wire.beginTransmission(Addr);
//for one shot transmisstion with high repeatability we use 0x2C(MSB) and 0x06(LSB)
Wire.write(0x2C);
Wire.write(0x06);
//end transmission
Wire.endTransmission();
//request bytes from 0x44
Wire.beginTransmission(Addr);
Wire.endTransmission();
Wire.requestFrom(Addr,6);
if(Wire.available() == 6){
//data[0] and data[1] contains 16 bit of temperature.
root[0] = Wire.read();
root[1] =Wire.read();
//data[2] contains 8 bit of CRC
root[2] = Wire.read();
//data[3] and data[4] contains 16 bit of humidity
root[3] = Wire.read();
root[4] = Wire.read();
//data[5] consists of 8 bit CRC
root[5] = Wire.read(); }
int temp = (root[0] * 256) + root[1];
//shift MSB by 8 bits add LSB
float cTemp = -45.0 + (175.0 * temp / 65535.0);
float fTemp = (cTemp * 1.8) + 32.0;
//shift the MSB by 8 bits add LSB to it devide by full resolution and *100 for percentage
float humidity = (100.0 * ((root[3] * 256.0) + root[4])) / 65535.0;
tempC = cTemp;
tempF = fTemp;
humid = humidity;
Serial.print("Temperature in C:t");
Serial.println(String(cTemp,1));
Serial.print("Temperature in F:t");
Serial.println(String(fTemp,1));
Serial.print("Humidity:t ");
Serial.println(String(humidity,1)); }
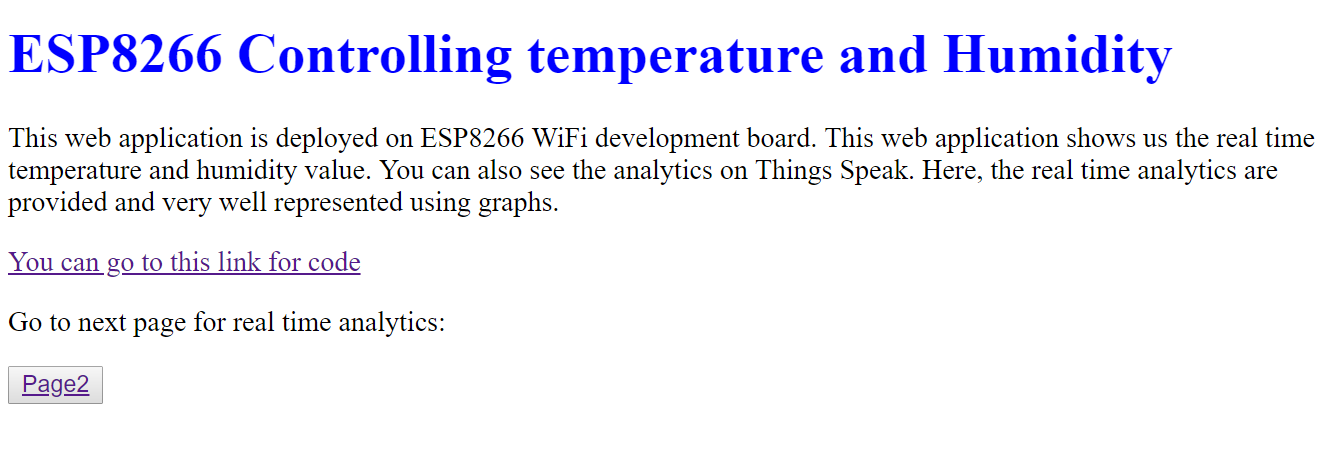
Hosting an ESP8266 Web server
We have hosted a web server from our device on a static IP.
- ESP8266WebServer library is used to host the web server
- First, we need to declare IP address, Gateway and subnet mask to create our static IP
- Now declare SSID and password for your Access point.connect to the Access point from any STA device
- Host the server on port 80 which is a default port for internet communication protocol, Hypertext Transfer Protocol (HTTP)enter 192.168.1.4 on your web browser for intro webpage and 192.168.1.4/Value for sensor reading webpage
The following piece of code shows the procedure to host a web server from your device
//--------- AP config------------//
IPAddress ap_local_IP(192,168,1,4);
IPAddress ap_gateway(192,168,1,254);
IPAddress ap_subnet(255,255,255,0);
Serial.print("Configuring access point...");
WiFi.softAPConfig(ap_local_IP,ap_gateway,ap_subnet);
Serial.print("Setting up User Credentials");
WiFi.softAP(ssidAP,passAP);
server.on("/", handleRoot);
server.onNotFound(onHandleNotFound);
server.begin();
APTimer = millis();
while(millis()-APTimer<APInterval){
server.handleClient();
}
//****************************HANDLE ROOT***************************//
void handleRoot() {
if (server.hasArg("ssid")&& server.hasArg("password") ) {//If all form fields contain data call handelSubmit()
handleSubmit();
}
else {
//Redisplay the form
//read the file contained in spiffs
File file =SPIFFS.open("/webform.html", "r");
server.streamFile(file,"text/html");
//don't forget to close the file
file.close();
}
}
//**************************SUBMIT RESPONSE**************************//
void handleSubmit(){//dispaly values and write to memmory
String response="<p>The ssid is ";
response += server.arg("ssid");
response +="<br>";
response +="And the password is ";
response +=server.arg("password");
response +="</P><BR>";
response +="<H2><a href="/">go home</a></H2><br>";
server.send(200, "text/html", response);
//calling function that writes data to memory
ROMwrite(String(server.arg("ssid")),String(server.arg("password")));
}
void write_EEPROM(String x,int pos){
for(int n=pos;n<x.length()+pos;n++){
//write the ssid and password fetched from webpage to EEPROM
EEPROM.write(n,x[n-pos]);
}
}
Thingspeak weather app Setup
ThingSpeak is an IoT platform. ThingSpeak is a free web service that lets you collect and store sensor data in the cloud.
In this Step, I will be giving you a brief procedure to set up your Thing Speak account
- Sign up for new User Account in ThingSpeak
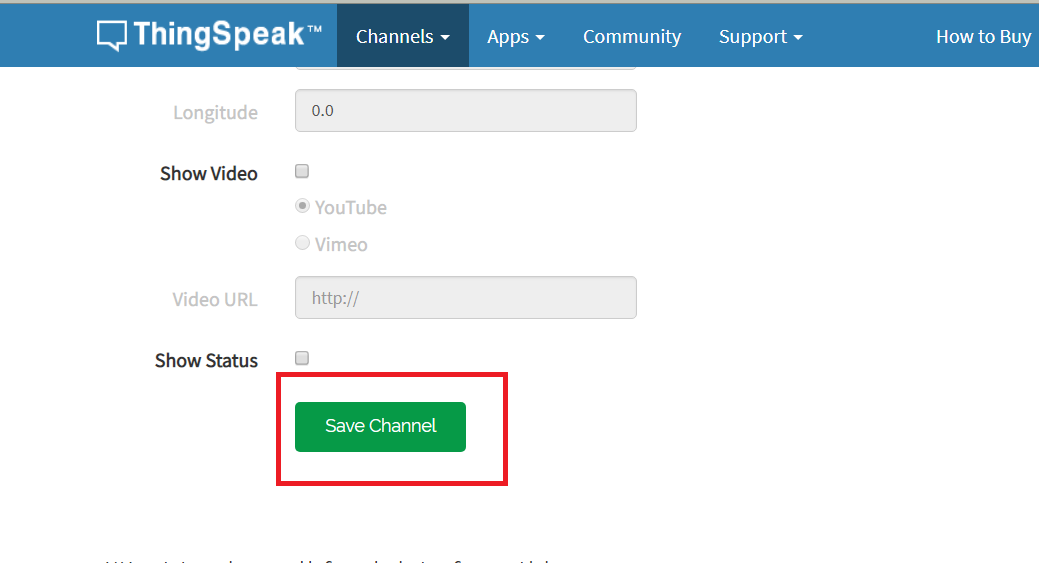
- Create a new Channel by selecting Channels, My Channels, and then New Channel
- Edit your fields
- These fields contain your sensor data
- Note the Write API Key and Channel ID
- On your Arduino sketch, you can use ThingSpeak library for Arduino or you can directly POST the data to ThingSpeak API
- the next step elaborates about posting the content to Thing Speak API


Posting Data to ThingSpeak
Here we are posting the sensor readings to Thing Speak. the following steps are needed to complete this task-
- Create your account in thing speakCreate channels and fields to store your sensor data
- we can get and post the data from ESP to thingSpeak and vice-versa using GET and POST requests to the API.
- we can post our data to ThingSpeak as follows
The following piece of code explain the procedure :
id taskWiFiCallback(){

 WiFiClient wifiClient;

if(wifiClient.connect(hostId,80)){

String postStr = apiKey;

postStr +="&field1=";

postStr += String(humid);

postStr +="&field2=";

postStr += String(tempC);

postStr +="&field3=";

postStr += String(tempF);

postStr += "rnrn";

wifiClient.print("POST /update HTTP/1.1n");

wifiClient.print("Host: api.thingspeak.comn");

wifiClient.print("Connection: closen");

wifiClient.print("X-THINGSPEAKAPIKEY: "+apiKey+"n");

wifiClient.print("Content-Type: application/x-www-form-urlencodedn");

 wifiClient.print("Content-Length: ");

 wifiClient.print(postStr.length());

wifiClient.print("nn");

wifiClient.print(postStr);

   }          wifiClient.stop();

}


Overall Code
The overall code is available in my GitHub repository