Getting Started with Kosmos and NCD Wireless Sensors

Getting Started with

and

Wireless Sensors

Control with the Power of Kosmos

Kosmos is an Industrial IoT cloud platform developed by Temboo and it’s the ONLY cloud service which does not require a single line of the code to build a complete, end-to-end IoT solution. Kosmos generates the optimized code for your specific application automatically and also makes it possible to build a full-featured IoT solution in just a few minutes using an intuitive guided setup.  With the power to scale into predictive maintenance applications and machine learning, Kosmos has become a widely adopted industrial IoT solutions provider.  Learn more athttps://temboo.com/platform

Temboo is an official partner of NCD

See how Kosmos is connected to NCD Sensors

As an official Temboo partner, NCD has worked directly with Kosmos developers to support a large number of ncd.io wireless sensors. Connecting wireless sensors to Kosmos is easy and the entire setup takes less than 30 minutes.

*Thanks to Temboo for sharing this video.

Getting Started

In this tutorial, we will demonstrate the power of Kosmos using a long-range wireless IoT temperature and humidity sensor.  We will show how to log temperature data throughout the day and send a daily report via email.

Temp/Humidity Sensor

USB Modem

Raspbery Pi 3

Kosmos Cloud

Hardware You Will Need

Connect Kosmos to NCD Wireless sensors using the following hardware:

  1. Raspberry Pi 3 Model B+ and Power Supply
  2. 8GB SD Card (to Run the Pi Operating System)
  3. Wireless Temperature Humidity Sensor
  4. USB Modem (Includes Power Supply)
  5. USB Flash Drive (to Copy Kosmos Configuration)

First, on the software side, we will need to create an account on Kosmos and generate an application file. This application file will contain the OS and all the necessary code to build our gateway. 

Step 1: Create a Kosmos Account

Please visit Temboo’s Web Site and enter your work email address.  Click the “Get Started” button to create an account. 
Be sure to fill in all of the account details by following the guided account configuration menus.

Step 2: Get Started - Select Application Type

In our case we will select “Build a New Connected Product” and “Edges Connect via Gateway”.

Step 3: Gateway - Select Gateway Type

Select the “Raspberry Pi 3 Model B+” gateway type and enter the location info and gateway name. 

Step 4: Sensors & Actuators - Select Sensor Manufacturer

Select “NCD” as the sensor manufacturer.

Step 5: Sensors & Actuators - Select the IoT Sensor Type

Select the “NCD Ambient Temperature & Humidity” sensor type.

Step 6: Enter Sensor Information

Enter the name of your sensor and the MAC address of the sensor.  The sensor mac address is printed on a sticker attached to the outside of the sensor enclosure. 

Step 7: Sensors & Actuators - Confirm Sensor Settings

Click the “Confirm” button to complete the association of the NCD Ambient Temperature & Humidity Sensor to Kosmos.

Step 8: Data & Predictions - Sensor Data Frequency

Data & Predictions allows you to configure the graphing, notification, and batch sensor uploads.  The default settings are shown above and are recommended for initial testing.

please note the Notification section is configured to “Every 10 Minutes”.  These settings will be pushed to the sensor, which will affect battery life.  Longer time periods will increase battery life.

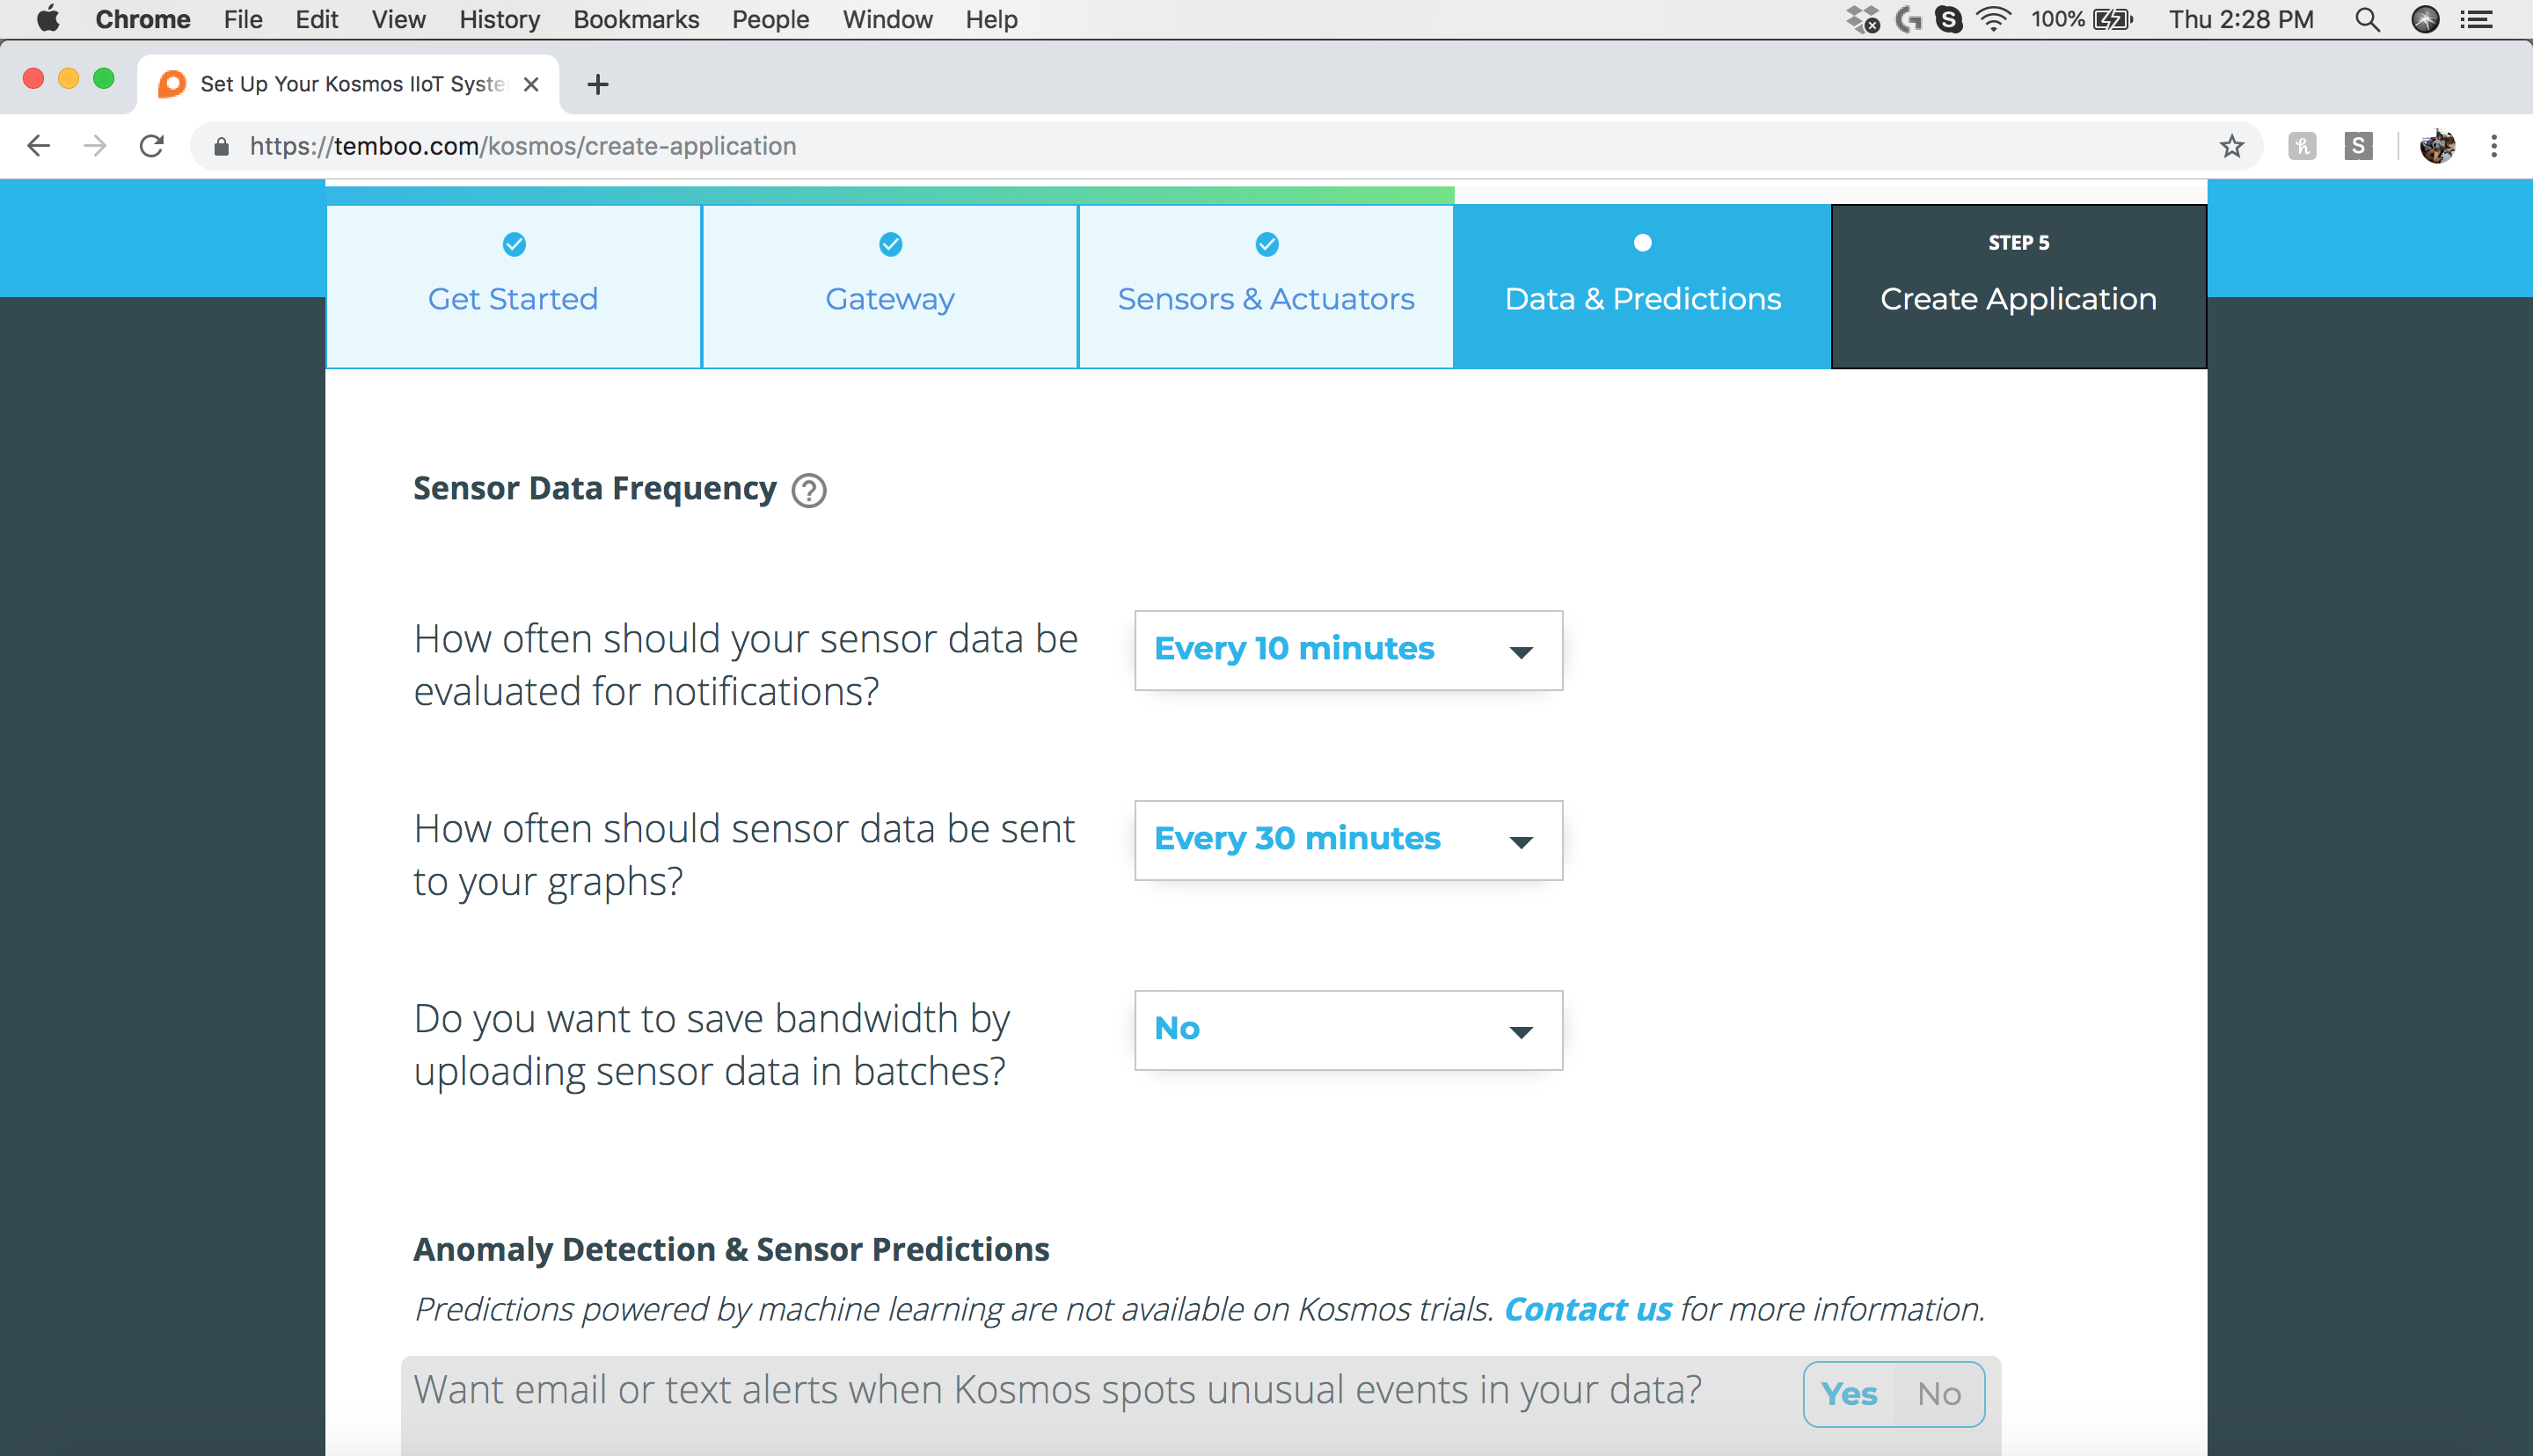
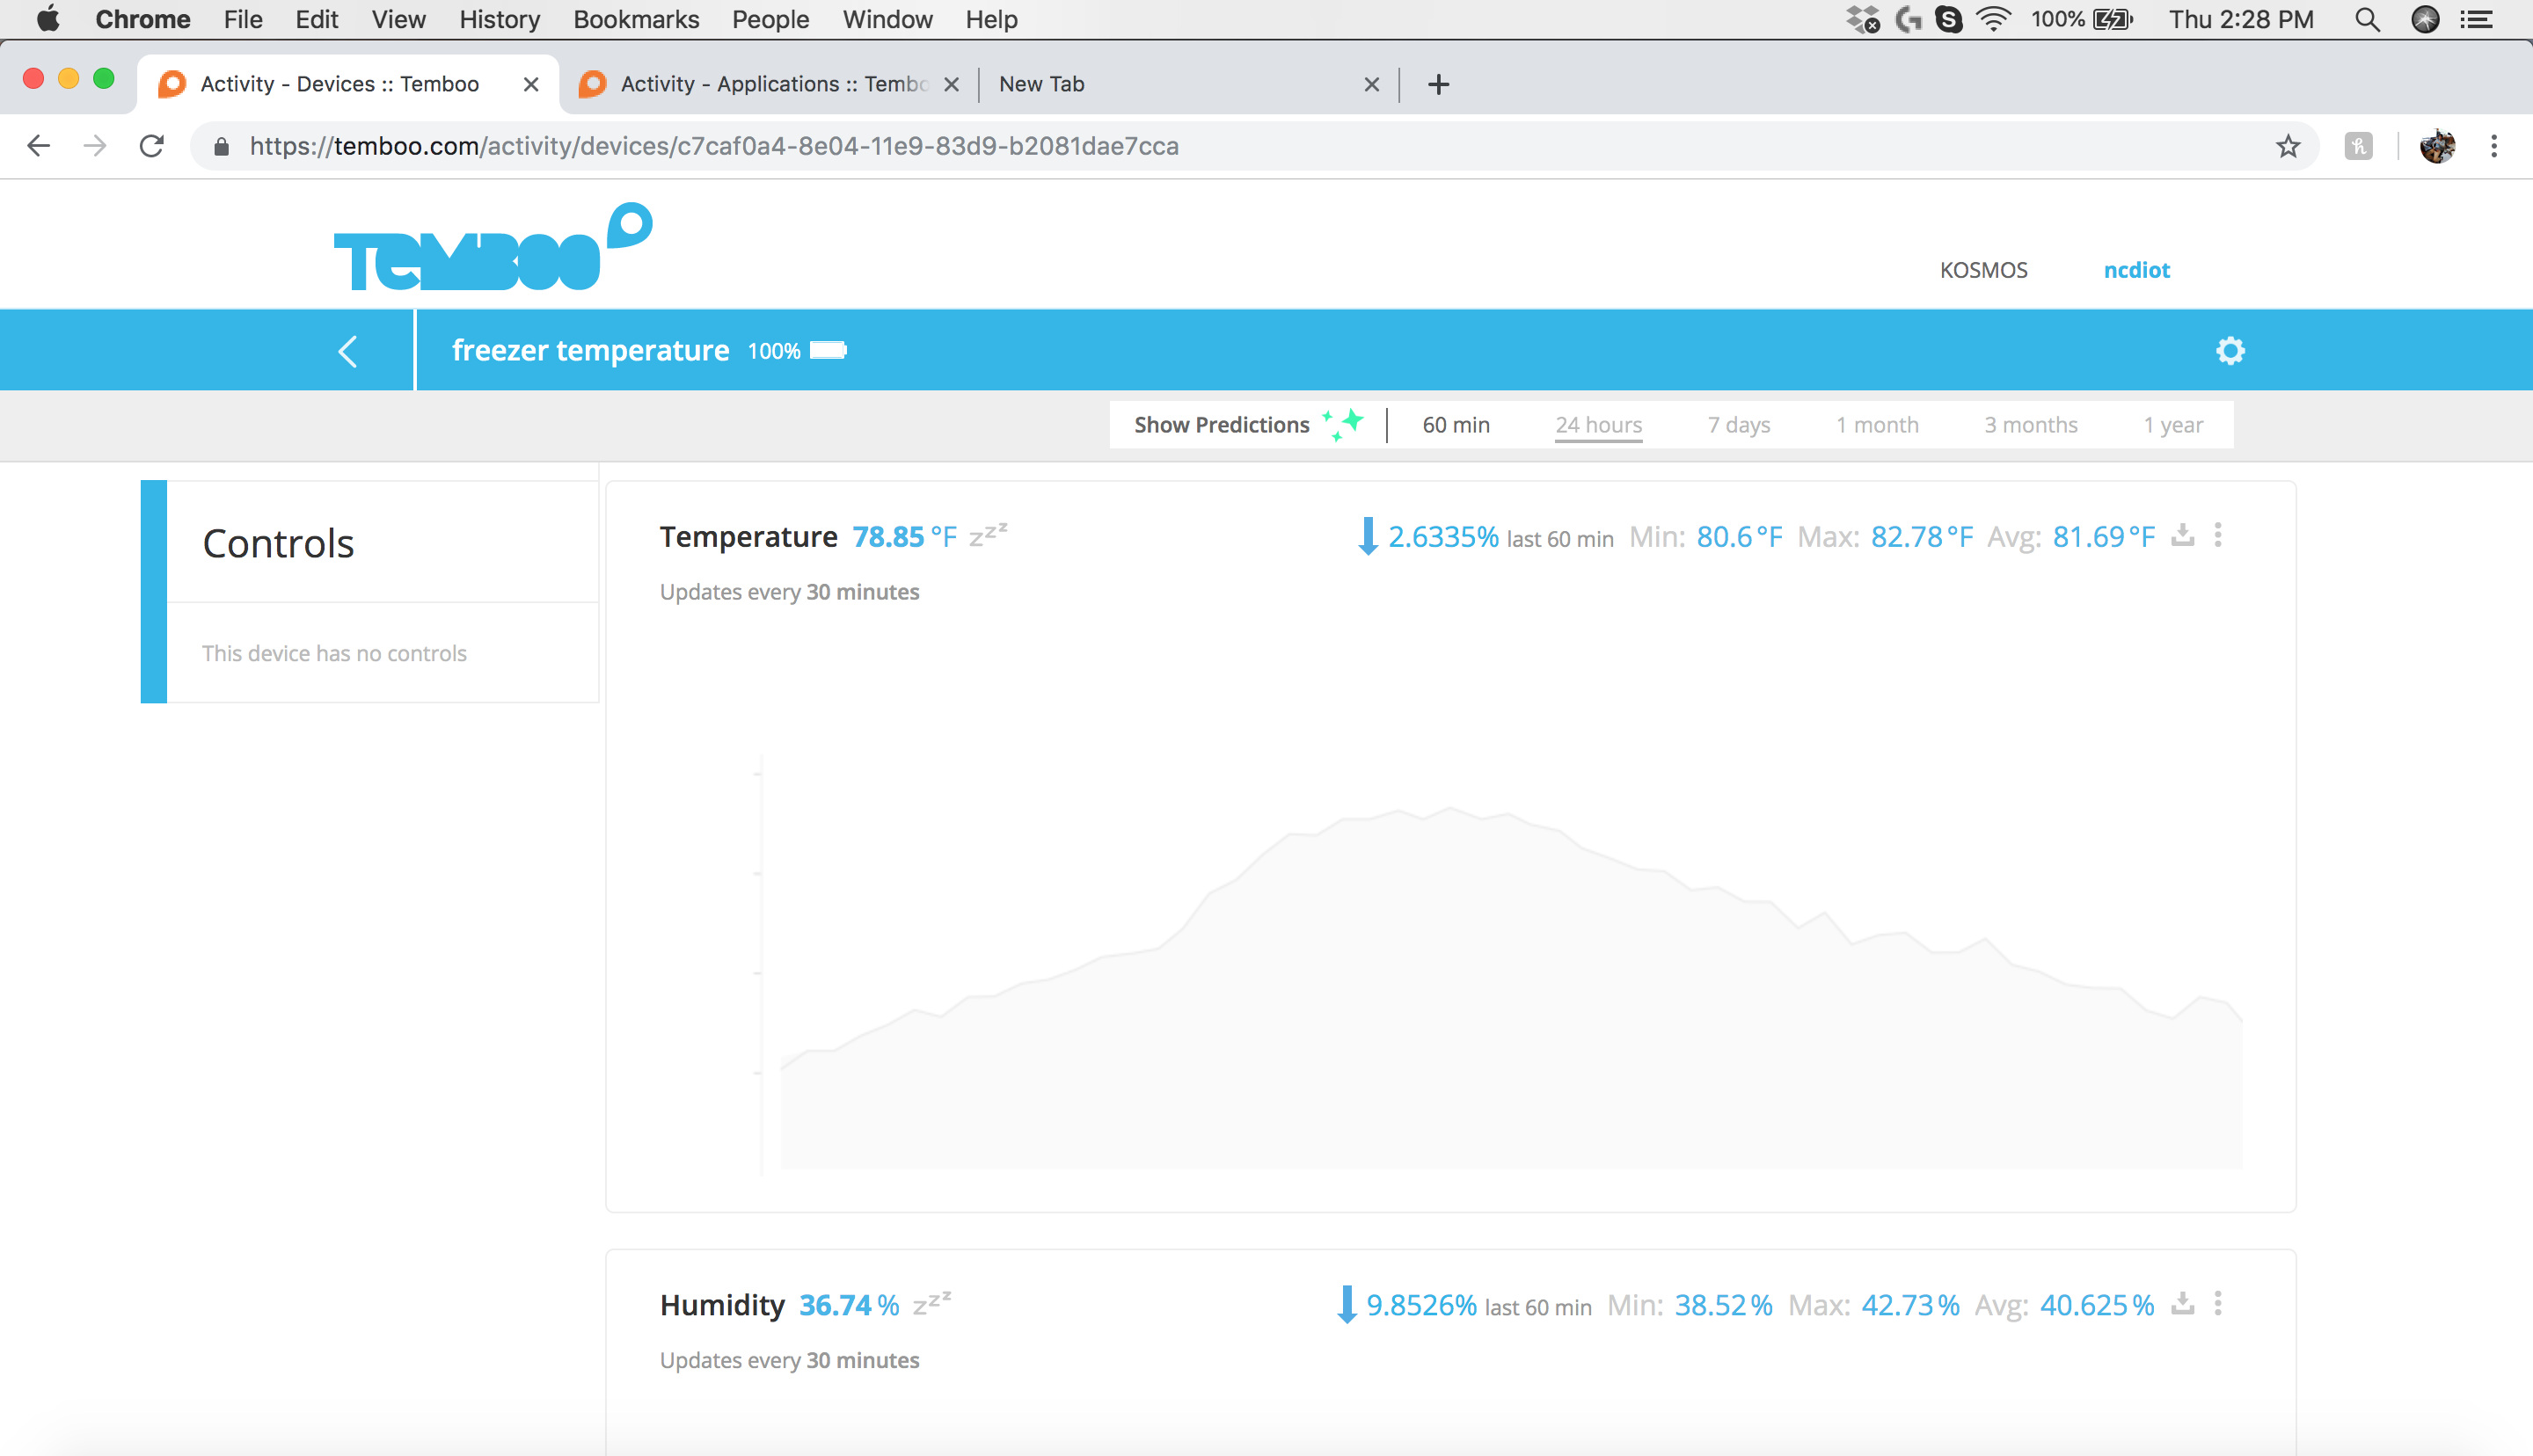
Sensor Data Notifications Frequency — By default sensor sends data after every 10 minutes. If you want data more frequently, you will need to change this value.  This value will affect battery life, longer intervals are typically preferred for best battery life.
Sensor Graphing — The Gateway is Capable of Storing Sensor Data and Pushing to the Cloud at Regular Intervals defined by this parameter.
Upload Sensor Data in Batches – Upload data in batches to save bandwidth.  This could be useful if you are using cellular communications.

Step 9: Download Your Kosmos Application Files

Once you complete all of the above steps, Kosmos will present two files that should be downloaded. The first file is the “Kosmos Gateway Image”. This file needs to be copied to the SD card as the Pre-Configured operating system for your Gateway. The Second file is the “Gateway Configuration Files“, which needs to be copied to your USB drive.

Step 10: Copy the Firmware to the SD Card

We prefer using balenaEtcher to flash the Kosmost Gateway Image firmware to the SD Card.  This software is very easy to use, please see the link for details if you are unfamiliar with the firmware image flashing process.  Once the operating system has been flashed to the SD Card, insert the SD Card into your Raspberry Pi.

Step 11: Copy the Configuration File

Copy the Gateway Configuration File to your USB Flash Drive and insert the Flash Drive into any open USB port on your Raspberry Pi.

Step 12: Get Connected

Plug the USB Modem into an open USB Port on the Raspberry Pi.  Make sure the Modem is powered up by plugging in the included power supply cable.  With the SD Card and USB Flash Drive Inserted, Connect the Ethernet cable to your Raspberry Pi and connect the Power Supply.  Your gateway should boot with internet connectivity available.  As soon as the Gateway connects to the internet, a connection will be established to the Kosmos cloud.

Step 13: Your Kosmos Account

Once the Gateway boots, return to your Kosmos Account and wait for the message shown above, which indicates “Your Gateway is Connected!“.

Step 14: Device Provisioning

Once the Gateway is ready, Kosmos will wait for your sensor to enter configuration mode. Follow the steps below to place the sensor into configuration mode. 

Step 15: Sensor Configuration Mode

Press and Release the sensor “Reset” button.  Next, hold the CFG (Configuration) button for 5-6 seconds.  As soon as sensor enters config mode, the gateway will register the sensor.  The “Device Provisioning” window will show all sensors currently connected to the gateway.  Click the “Finish Setup” button to add the sensor to your Kosmos account.

Step 16: Kosmos Dashboard

Click on the “freezer temperature” sensor to open the sensor dashboard. Here you can see all the historical values as shown in the screenshot below.

Kosmos is capable of doing much more than just displaying the data. You can use Kosmos API to push data to other cloud services as well. You can also send alerts when sensor values go outside safe limits.  Use Kosmos to trigger relays, actuators, sound alarms, and much more.

*Be Sure to Learn More about Temboo Kosmos and watch for more tutorials as we work to build an ecosystem of sensors that support the Kosmos platform.