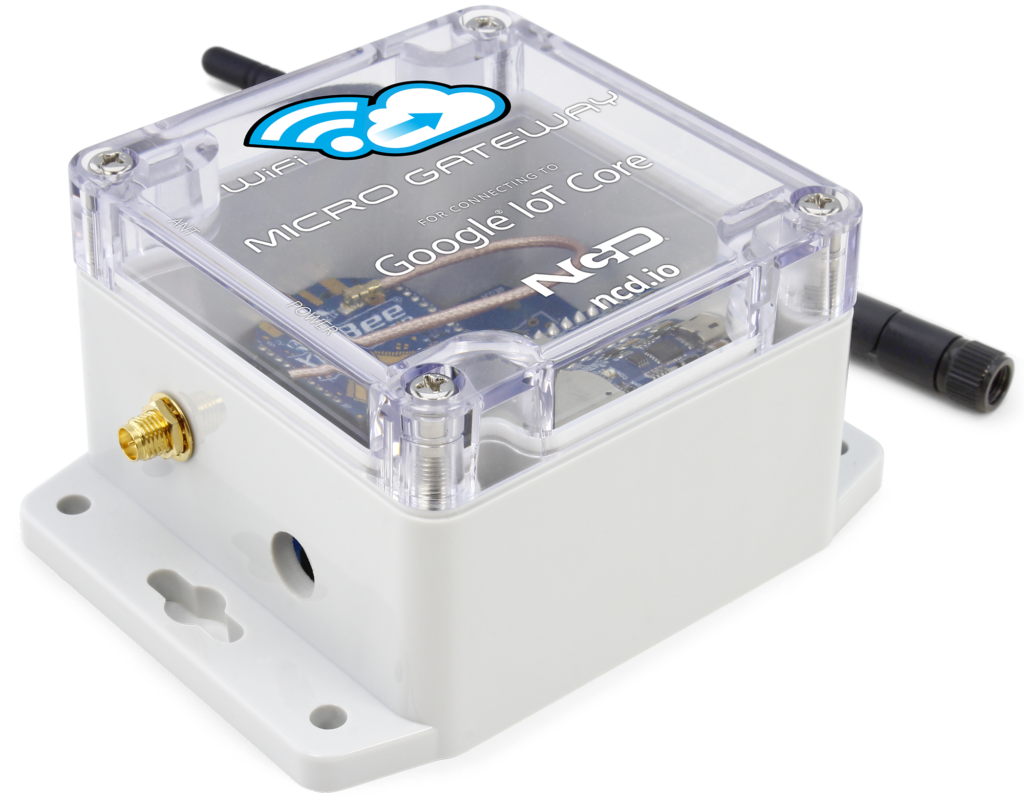
The Google IoT Core Gateway was designed to make setup as simple as possible. In this guide we will walk through
setting up a new Google IoT Core gateway. It is not the intent of this guide to explain how to consume device data
on Google cloud, but rather to simply get the data there so you can consume it as needed.
This guide will walk you through creating:
• A Google Cloud Project
• Enabling the required APIs
• A service account for the Gateway
• Creating a Google IoT Core device registry
• Visualizing data coming from connected child
sensor devices
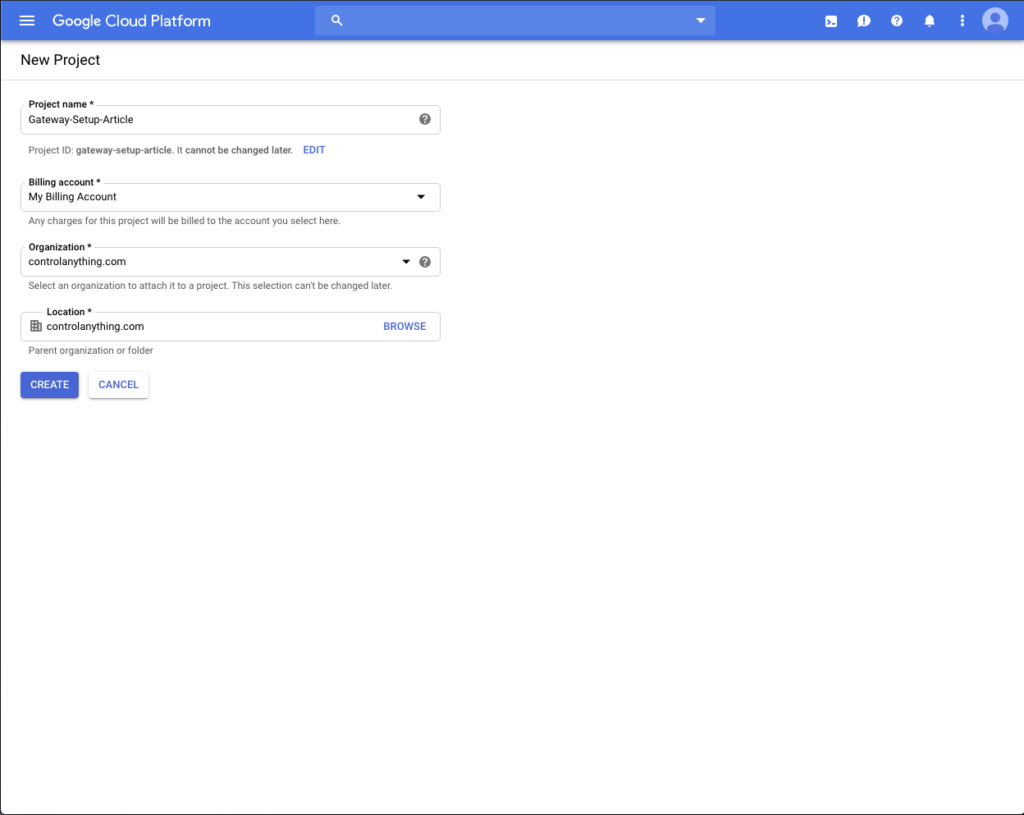
1. Create a Google Cloud Project
Go to https://console.cloud.google.com and log in with your Google account.
From the console home page click Create to create a new Project. If you do not see a create button you may need to click the Home button on the left. If you don’t see a home button you may need to click the menu icon in the upper left corner.
Enter a name for the Project. All Projects must have a unique global unique ID.
Select other options (Billing, Organization, Location) accordingly. If “Billing” is not yet enabled on your account you will not see a Billing option and will be required to enter billing information in a later step.
Click Create.
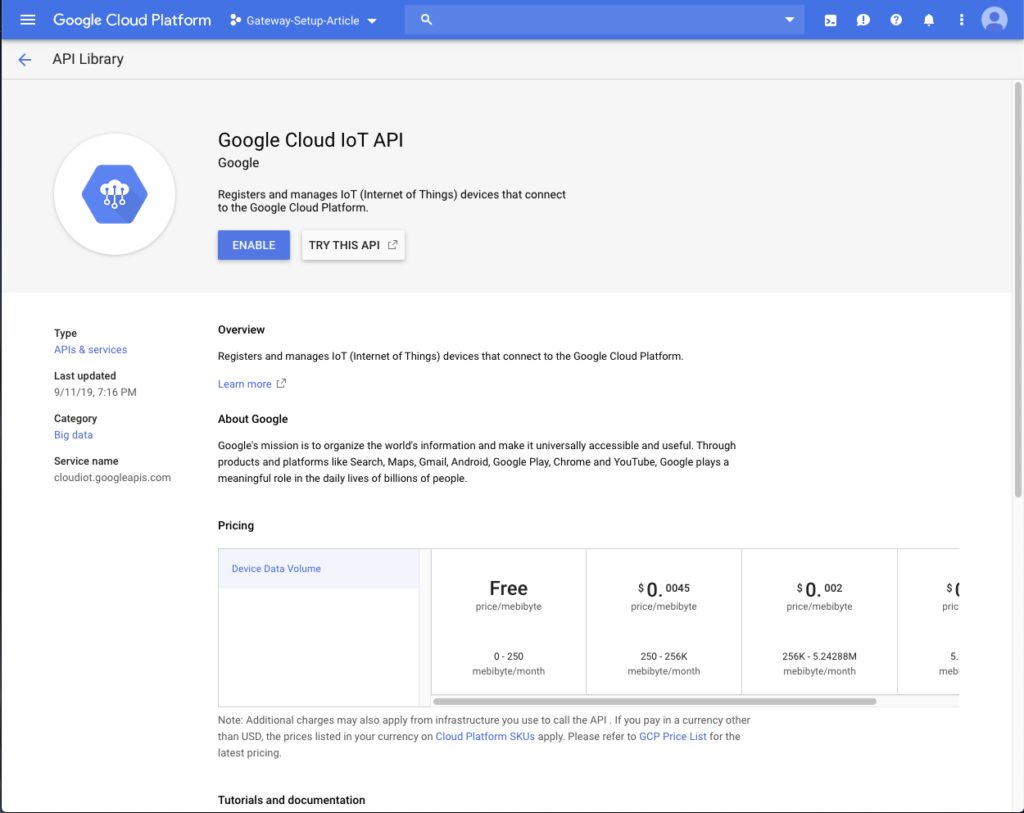
Enable required Google Cloud APIs
Cloud IoT API
Click the menu icon in the upper left corner, Scroll over APIs & Services, then click Library.
Enter “IoT” in the search box.
Click on Google Cloud IoT API.
Click the ENABLE button.
If “Billing” is not already enabled on your Google Cloud account you may be prompted to setup a billing account at this time. If so follow prompts to enable billing.
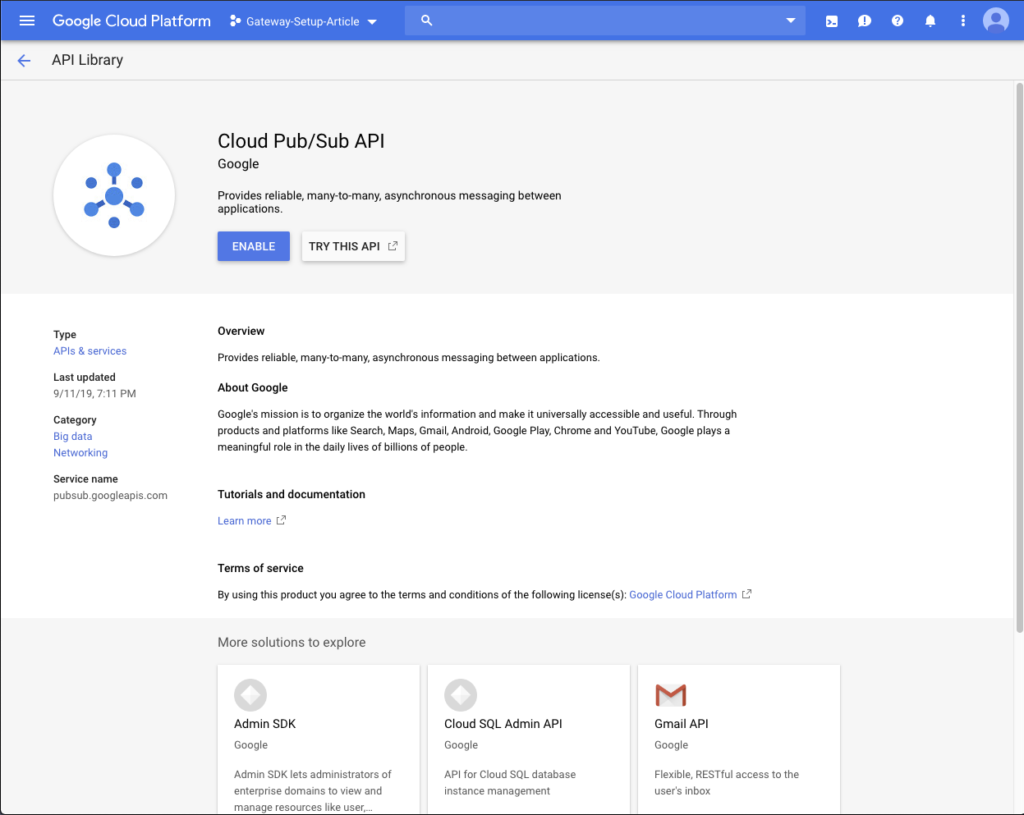
Cloud Pub/Sub API
Click the menu icon in the upper left corner, Scroll over APIs & Services, then click Library.
Enter Pub/Sub in the search box.
Click on Cloud Pub/Sub API.
Click the ENABLE button.
Create the Service Account
The Gateway requires the ability to provision itself and discovered sensors as children devices on Cloud IoT. Google has a methodology of granting software applications scoped permissions called service accounts. This is essentially an “IAM permission” which grants applications specific access. We will create a service account which gives permission to provision devices and we will give those credentials to the Gateway device.
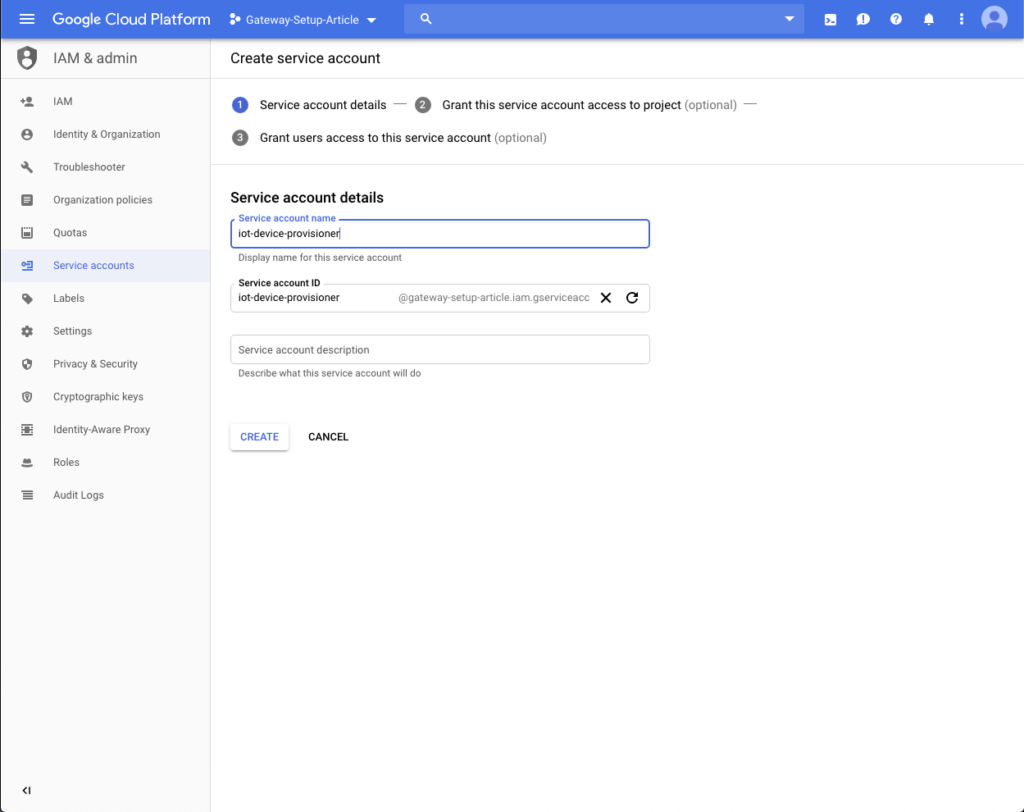
Click the menu icon in the upper left corner, Scroll over IAM & admin, then click Service accounts.
Click Create Service Account at the top of the page.
Enter a name for the service account.
Enter a Description for the service account if you like.
Click Create.
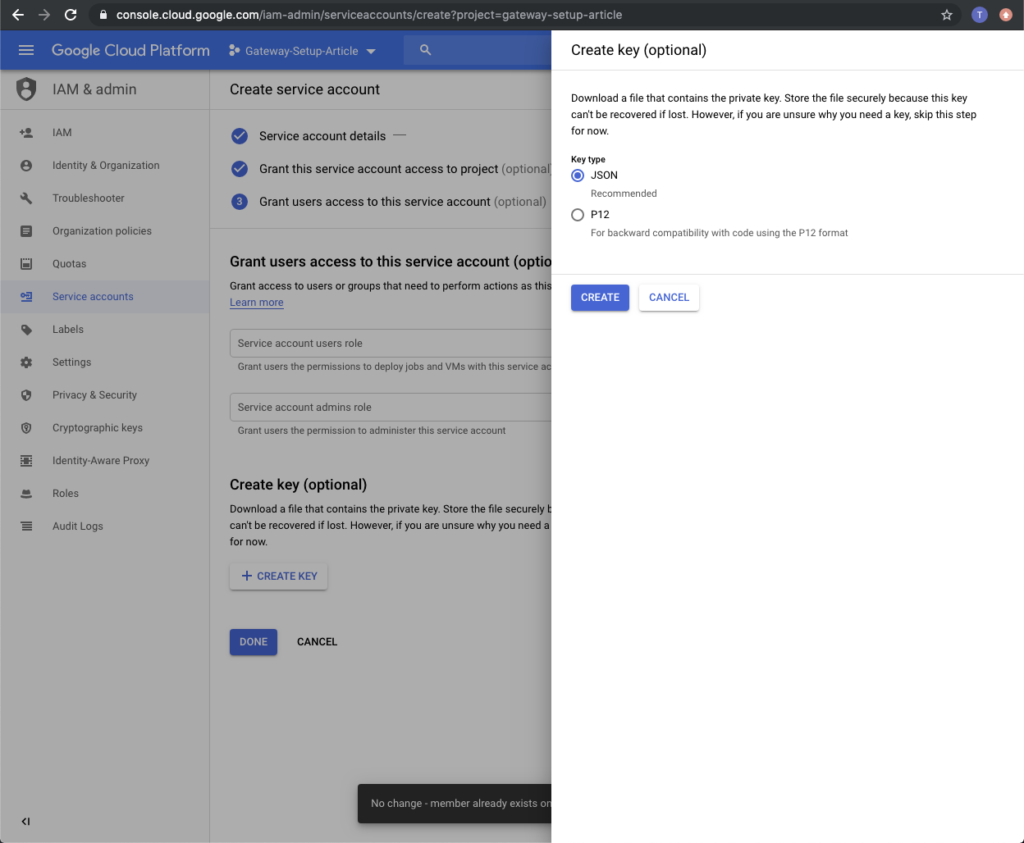
6. Under Select a role search for Cloud IoT Provisioner and select it.
7. Click Continue.
8. Click Create Key.
9. Select JSON as the Key Type.
10. Click Create. A .json file will be downloaded to your computer. Note where it is located as we will need to upload that to the Gateway at a later step.
11. Finally click Done.
Create an IoT Device Registry
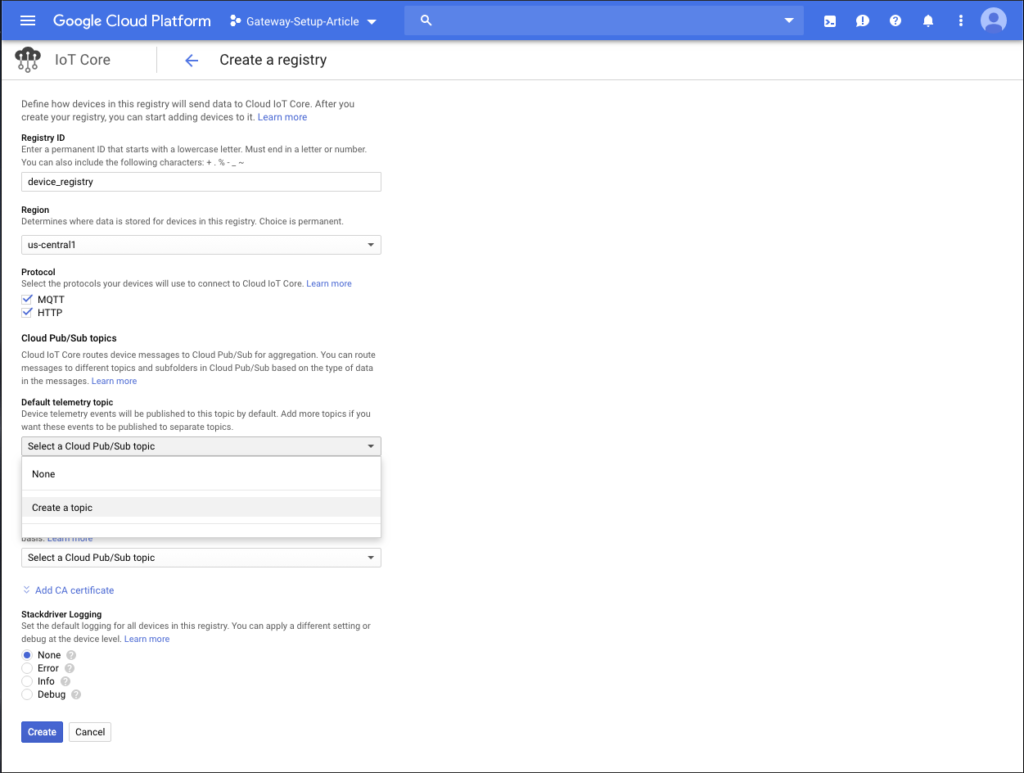
Click the menu icon in the upper left corner, scroll down and select IoT Core.
Click Create Registry.
Enter a name for the registry. Make note of the name you entered here, we will need to enter that in the Gateway.
Select a Region. Make note of the Region you select here, we will need to enter that in the Gateway.
Make sure MQTT is checked under protocol. You can also leave HTTP checked if you like.
Under default telemetry topic click the drop down and select Create a topic.
Enter a name for the topic (I entered “device_telemetry“). This will create a new Pub/Sub topic which we will monitor in a later step.
Click Create.
Click the Create button at the bottom to complete creation of the Device Registry.
Configure the Gateway
Make sure your gateway is in setup mode. This is indicated by a flashing Blue LED. If the LED is not flashing blue then open the cover, press and hold the CFGbutton until the LED turns blue, then release the CFG button. Once the LED is flashing Blue the Gateway is in setup mode.
On your computer, smartphone, or tablet search for WiFi networks. The gateway will appear as a wifi network called WiFi_Micro_Gateway. Connect to the Gateway’s wifi network, when prompted for a password enter NCDBeast.
Once connected to the gateway open your web browser and enter 172.217.28.1 in the URL bar. This will open the Gateway’s web interface.
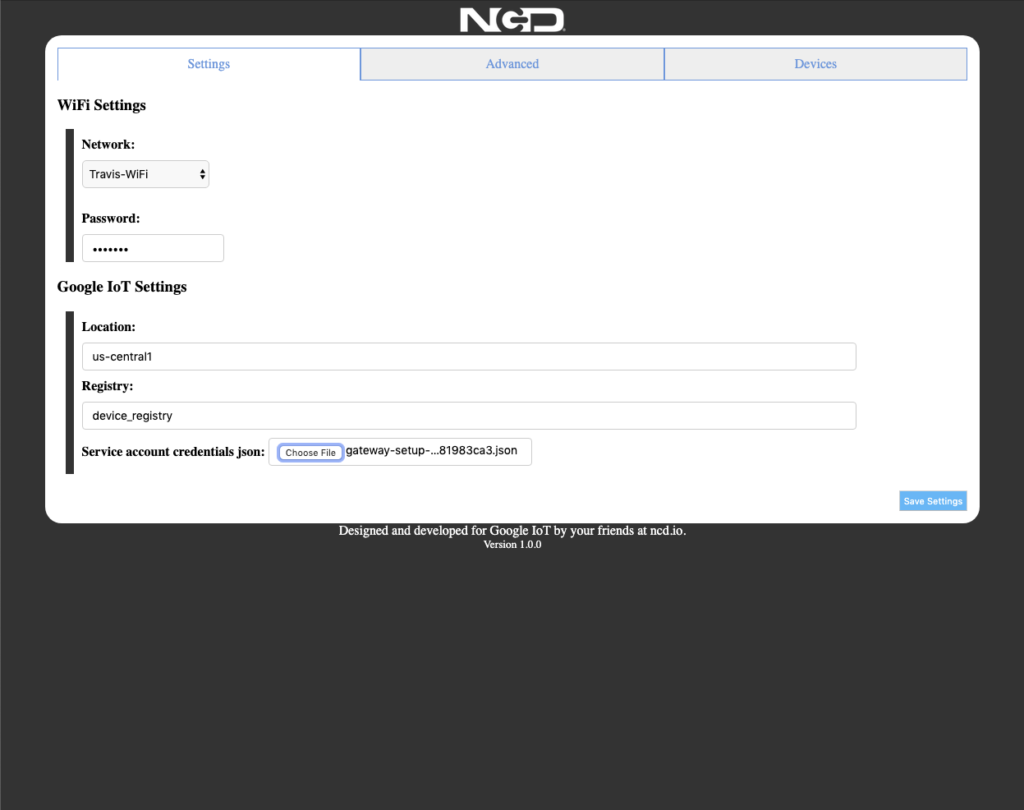
Select the WiFi network you would like the gateway to connect to from the Network Drop down menu.
Enter thepassword for the network, if it is an unsecure network leave this field blank.
In the Location field enter the Region you selected during setup of the Device Registry.
In the Registry field enter the name you entered for the Device Registry you created.
For Service account credentials json click the Choose File button, then browse to find the .json file you downloaded earlier.
Click the Save Settings button.
The Gateway will now reboot and attempt to authenticate with Google IoT using the supplied credentials. It will then provision itself to your IoT Device registry as a gateway device. Once this is complete the LED on the gateway should turn green. I recommend powering up your sensors now if they are not already.
Testing
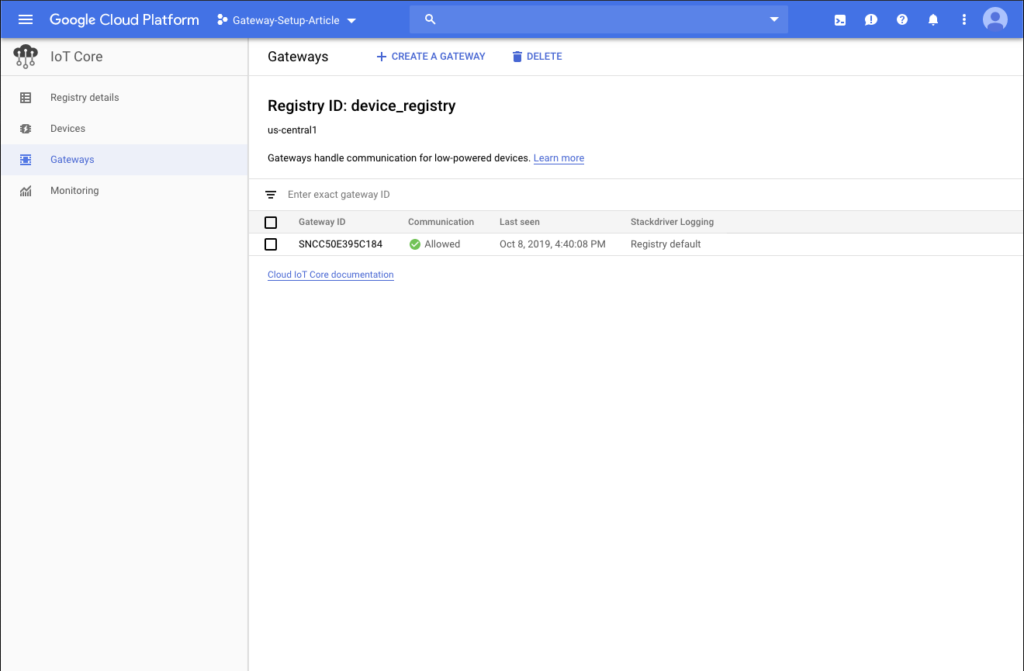
Ensure the Gateway has been provisioned to your Device Registry.
Click the Menu icon in the upper left corner, scroll down and select IoT Core.
Click on the registry you created earlier.
Click Gateways on the left.
You should see your gateway registered here with an ID beginning with SN. The rest of the ID is the Mac address of your gateway.
Ensure your wireless sensors are listed as devices on the Google IoT Device Registry.
First make sure your sensor is powered up and has sent at least one transmission since the gateway was initially configured. You can press the reset button on the sensor at this time to ensure that this happens.
On the Device Registry page click Devices on the left (above where you clicked Gateways).
Here you should see a list of the wireless sensor devices with IDs starting with SN (the rest of the ID is the module’s unique wireless serial number which should also be printed on the sensor enclosure).
Monitor published events
Click the menu icon in the upper left corner, Scroll down select Pub/Sub.
Click on Topics on the left. There you should see the topic which was created when the IoT Device registry was created.
Copy the Topic Name.
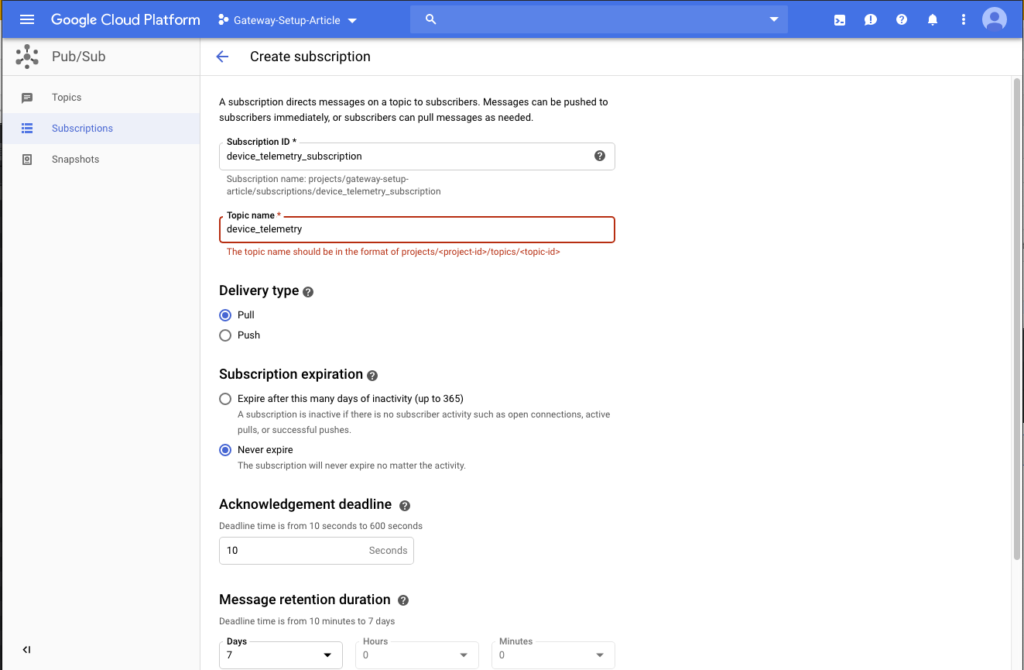
Click on Subscriptions on the left.
Click Create Subscription.
Enter a name for the subscription.
For Topic Name paste in the topic name you copied in step 3.
Leave delivery type Pull.
Change subscription to Never expire.
Scroll down and click Create.
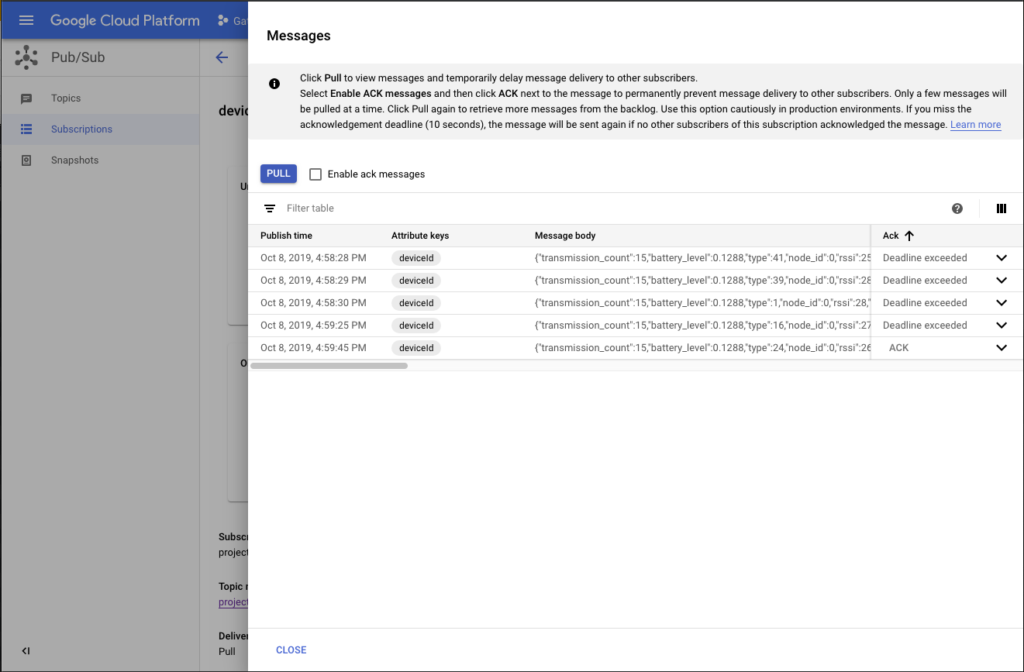
You should be taken to the new subscription’s dashboard.
Click View Messages. This should bring up a pane.
Click the Pull button to query the topic for recent messages. It should now populate with messages published by the sensor devices. If you do not see any messages try pressing the Reset button on your sensor, then continue to click Pull until messages appear (messages can take some time to appear here).
This completes the setup of the Google Cloud IoT Gateway